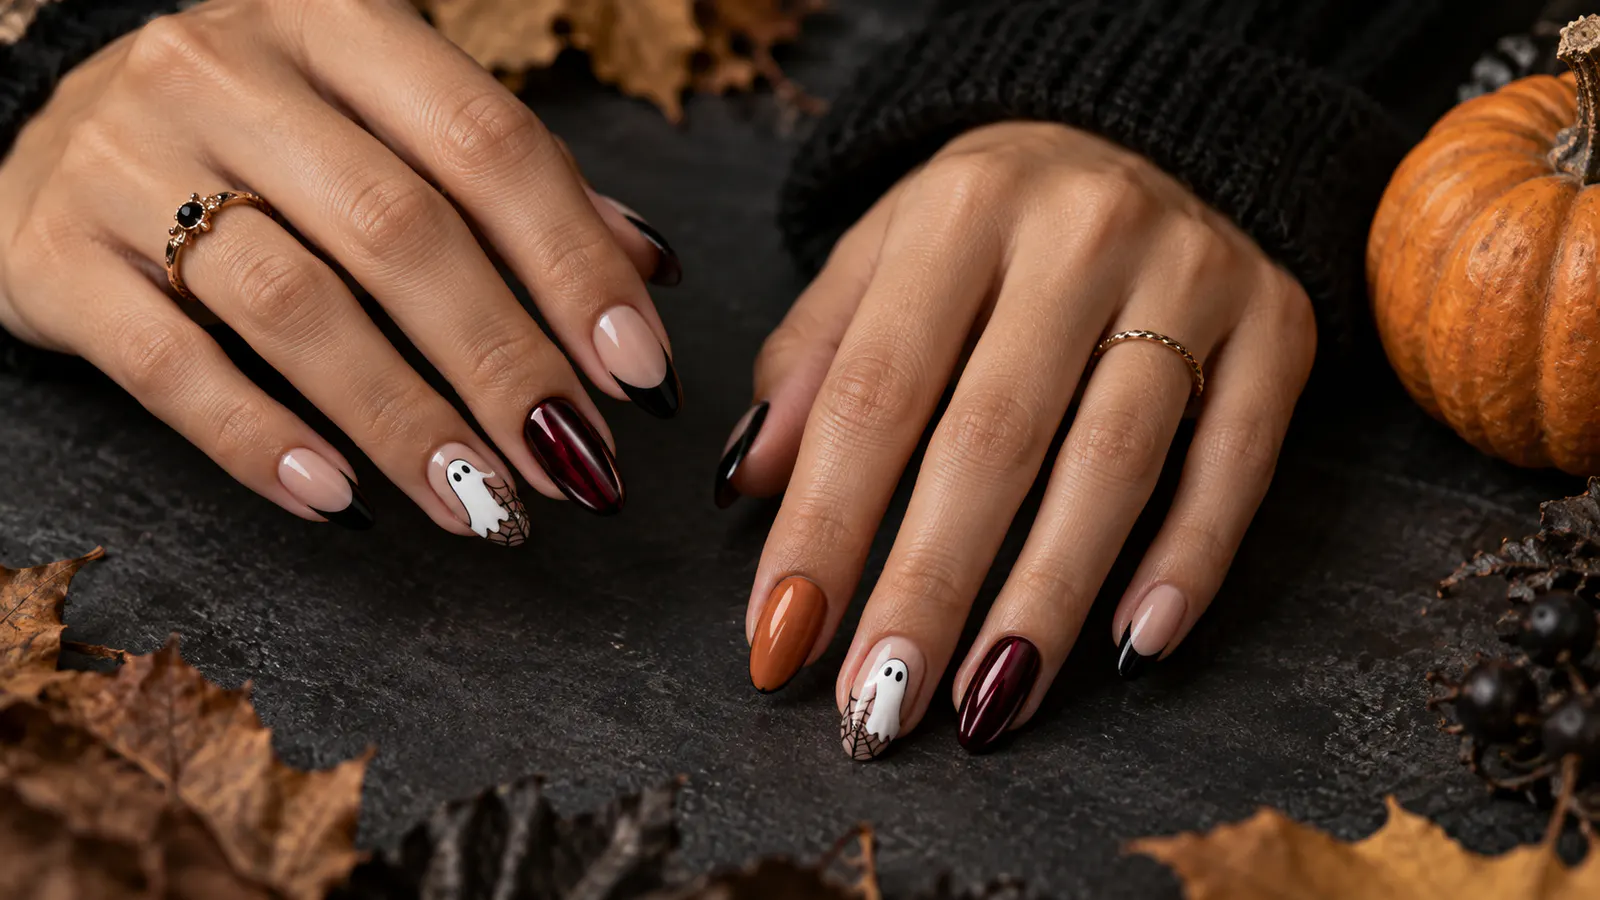
Halloween-themed nail designs are accelerating as October approaches, with readers searching for everything from simple ghost nails and short spooky manicures to detailed salon art. The most useful ideas borrow the season’s atmosphere—inky black, candlelit orange, midnight blue and deep wine—then add one clear detail that makes the manicure feel intentional.
This expanded 2026 edit includes 51 cute, simple and spooky Halloween nail ideas across short, almond, oval and squoval shapes. Every design can be adapted to your preferred length. When you save a photo for your nail artist, note the shape, finish, base color and number of accent nails you want; those decisions are often more useful than the motif alone.
The biggest Halloween nail directions for 2026 balance one recognizable spooky detail—ghosts, bats, webs, moons or pumpkins—with a clean shape and cohesive color palette. For an easy manicure, try black micro-French tips, tiny ghosts or orange dots on short nails. For a stronger statement, choose chrome, magnetic cat-eye, aura gradients or a single detailed accent nail.
1. Black micro-French tips
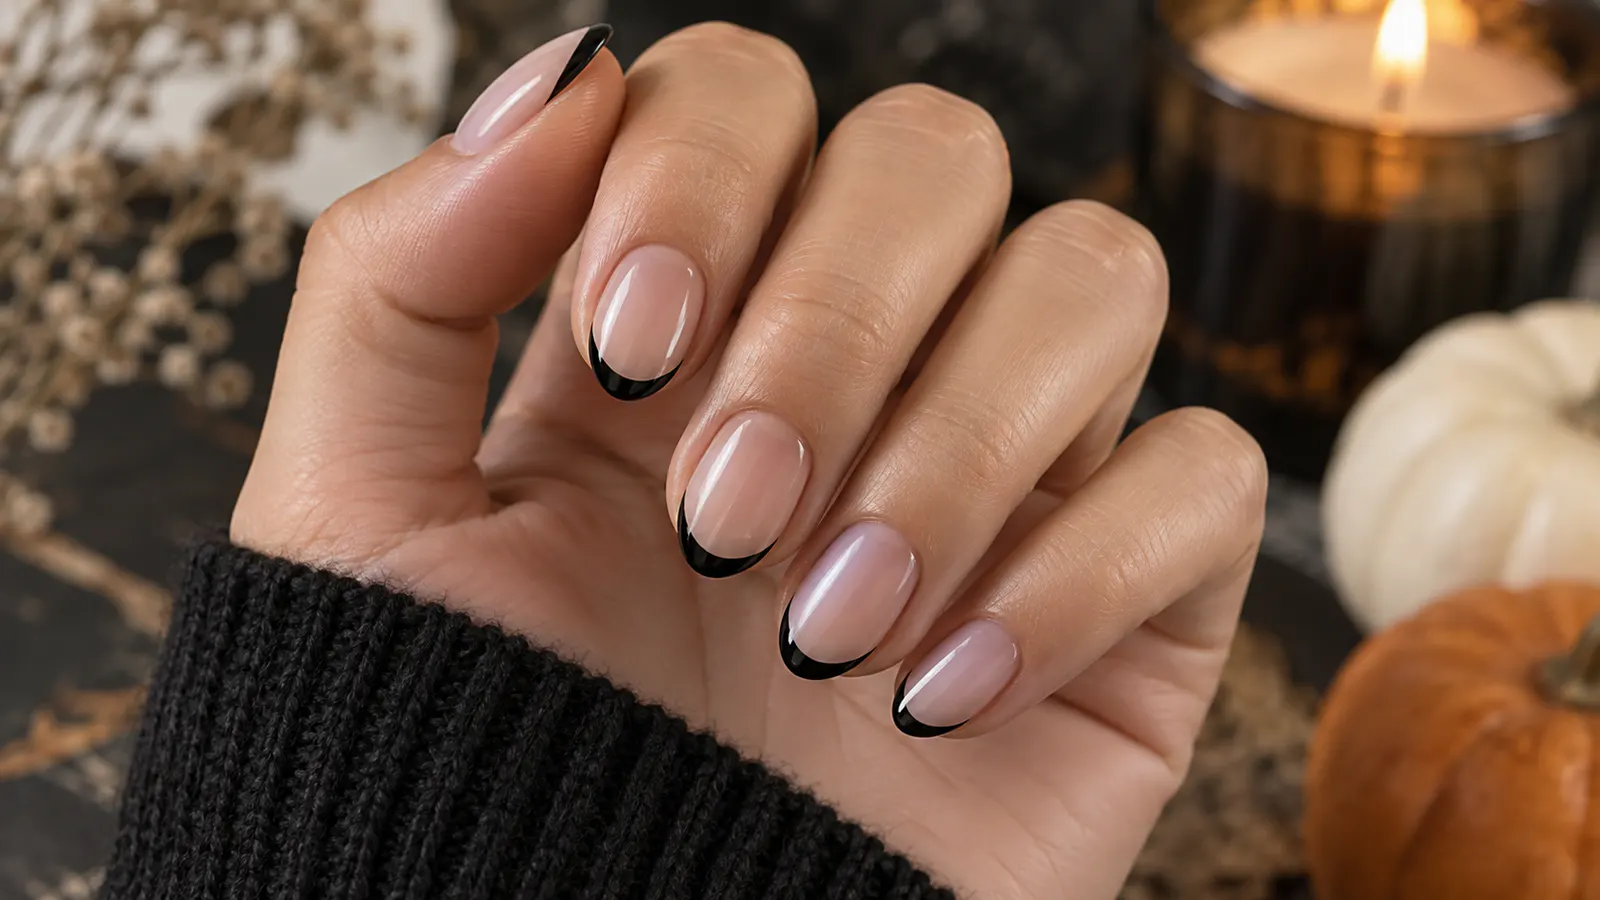
Black micro-French tips are the easiest entry point if you want simple Halloween nails that still look appropriate after the party. The narrow line creates contrast without visually shortening the nail, and the sheer nude base keeps the manicure clean and grown-up.
Ask for the black edge to follow the natural curve of each nail. On very short nails, an ultra-thin tip looks sharper than a deep smile line. High gloss gives the black maximum definition.
How to get the look
- Apply a smoothing sheer nude base.
- Paint a very fine curved black tip with a detail brush.
- Correct the line before sealing with a glossy top coat.
Best for: Short Halloween nails, minimalist manicures and work-friendly designs.
2. Tiny ghost accent nails
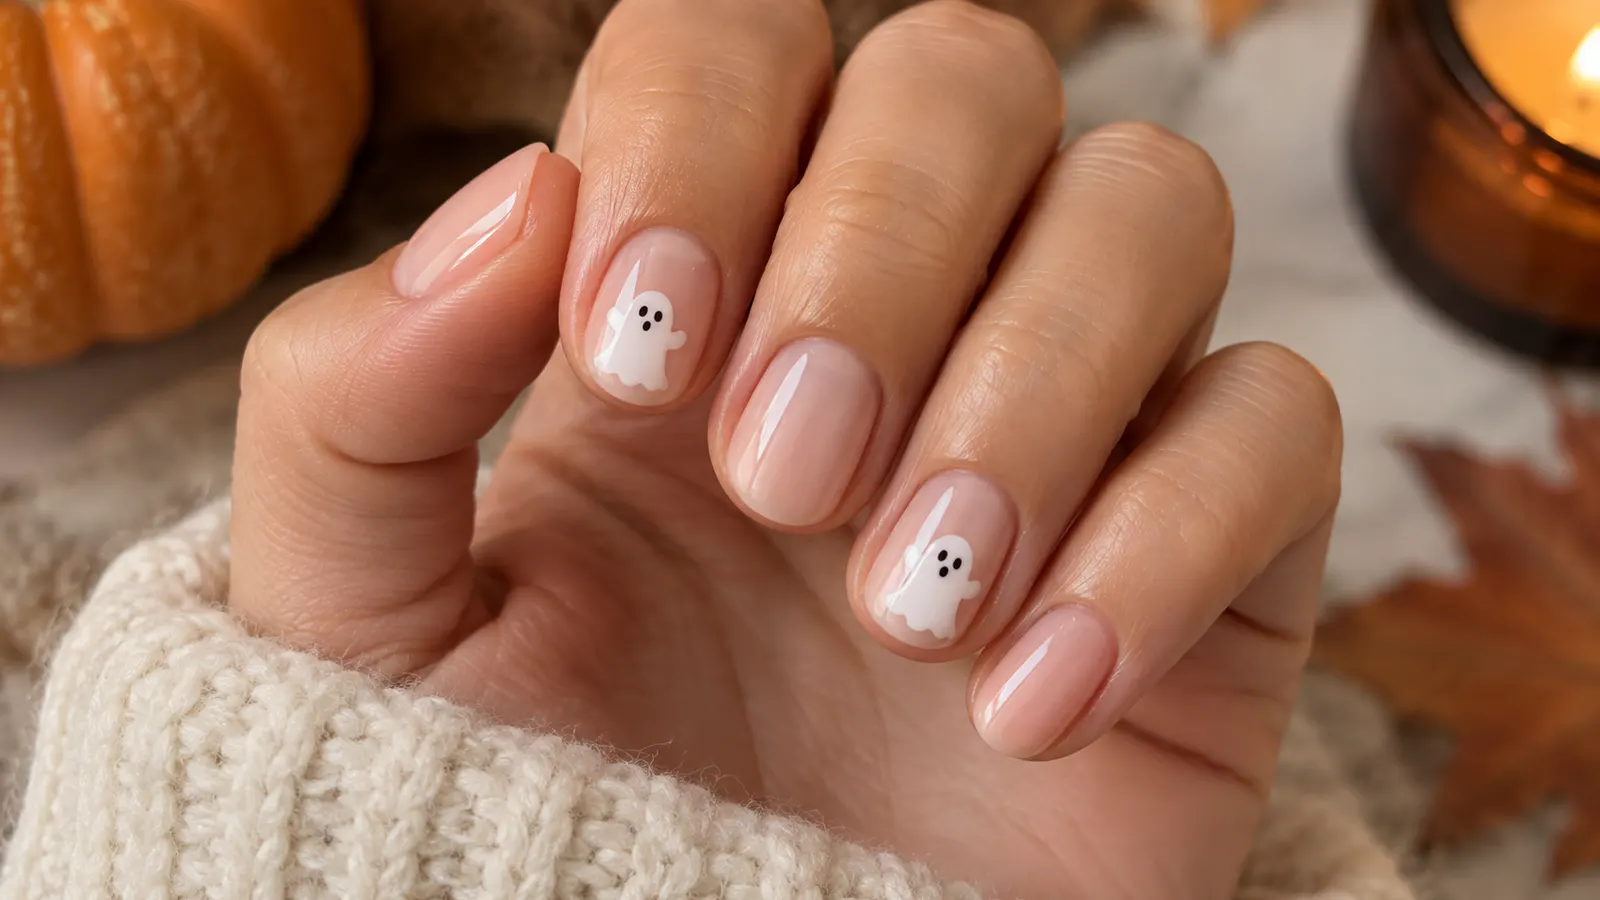
Tiny ghosts are cute Halloween nails in their most wearable form. Limiting the motif to one or two nails leaves enough negative space for the design to feel light, while a translucent milky base softens the contrast.
The best ghost shape is simple: a rounded head, softly uneven hem and two small eyes. Avoid packing in facial details, which can become unreadable on short nails.
How to get the look
- Build a translucent milky-nude base.
- Use white gel or polish to form a small rounded ghost.
- Add two tiny black dots only after the white layer is dry.
Best for: Short oval nails, beginners and playful but polished manicures.
3. Oxblood chrome nails
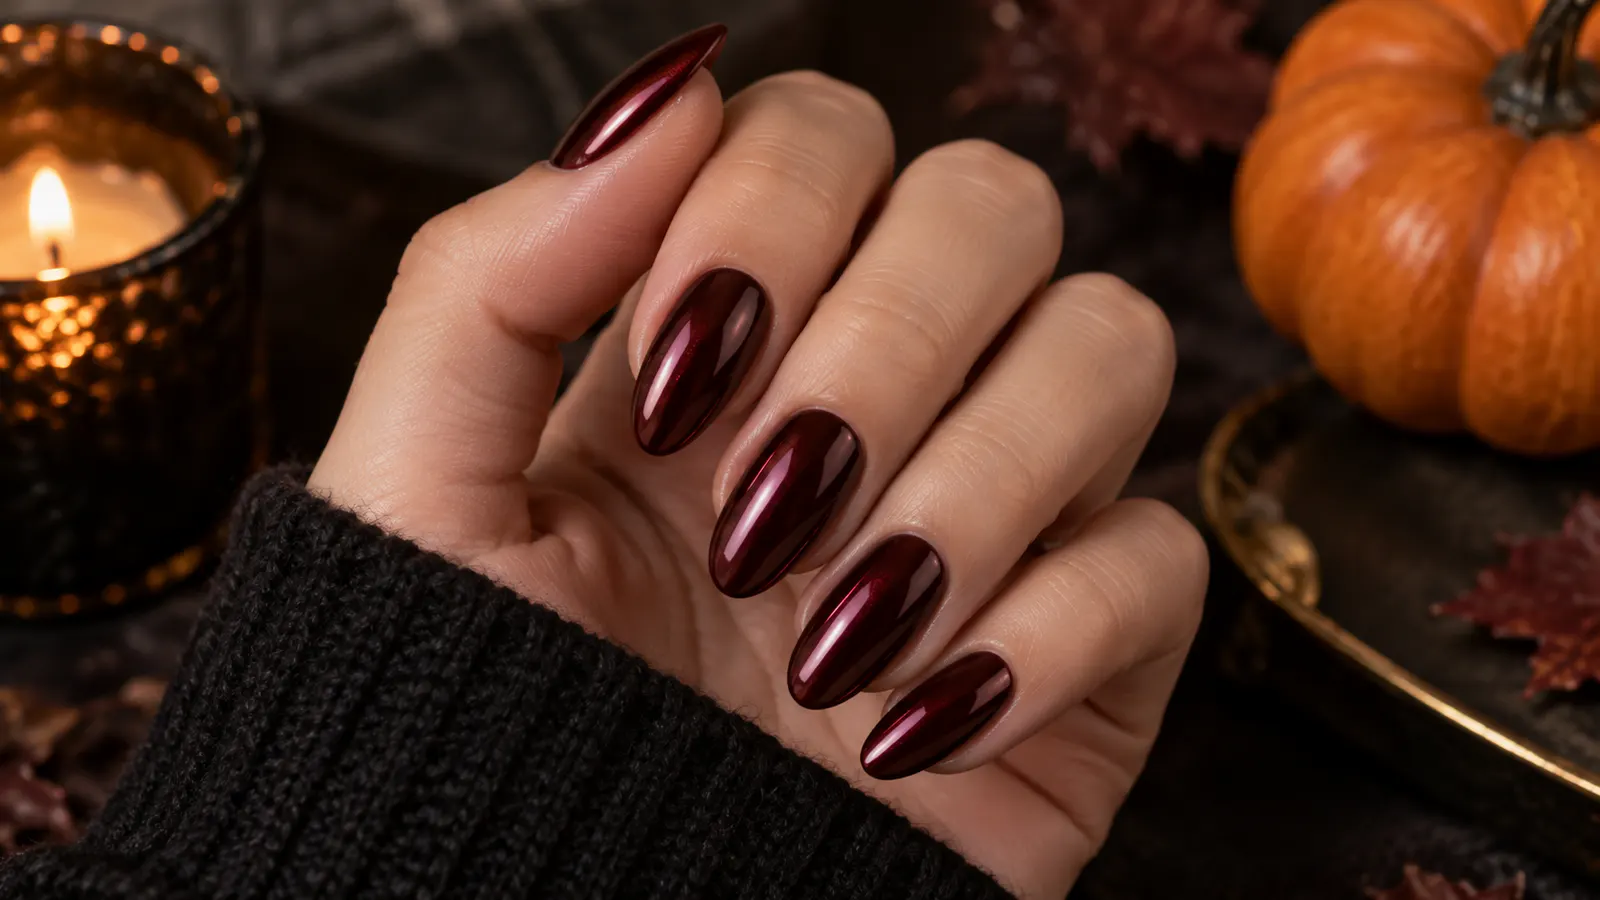
Oxblood chrome is a strong choice when you want Halloween color without literal nail art. The shade sits between dark cherry, burgundy and brown, while a restrained chrome layer gives it a polished, glassy dimension.
Begin with a deep wine base and use a translucent red or neutral chrome powder. The manicure looks elegant on almond nails, while a short squoval shape makes the color practical.
How to get the look
- Apply two thin coats of deep wine polish.
- Rub fine chrome powder over a compatible no-wipe layer.
- Cap the free edge carefully to protect the finish.
Best for: Evening plans, almond nails and anyone who prefers color to character art.
4. Silver spiderweb accents
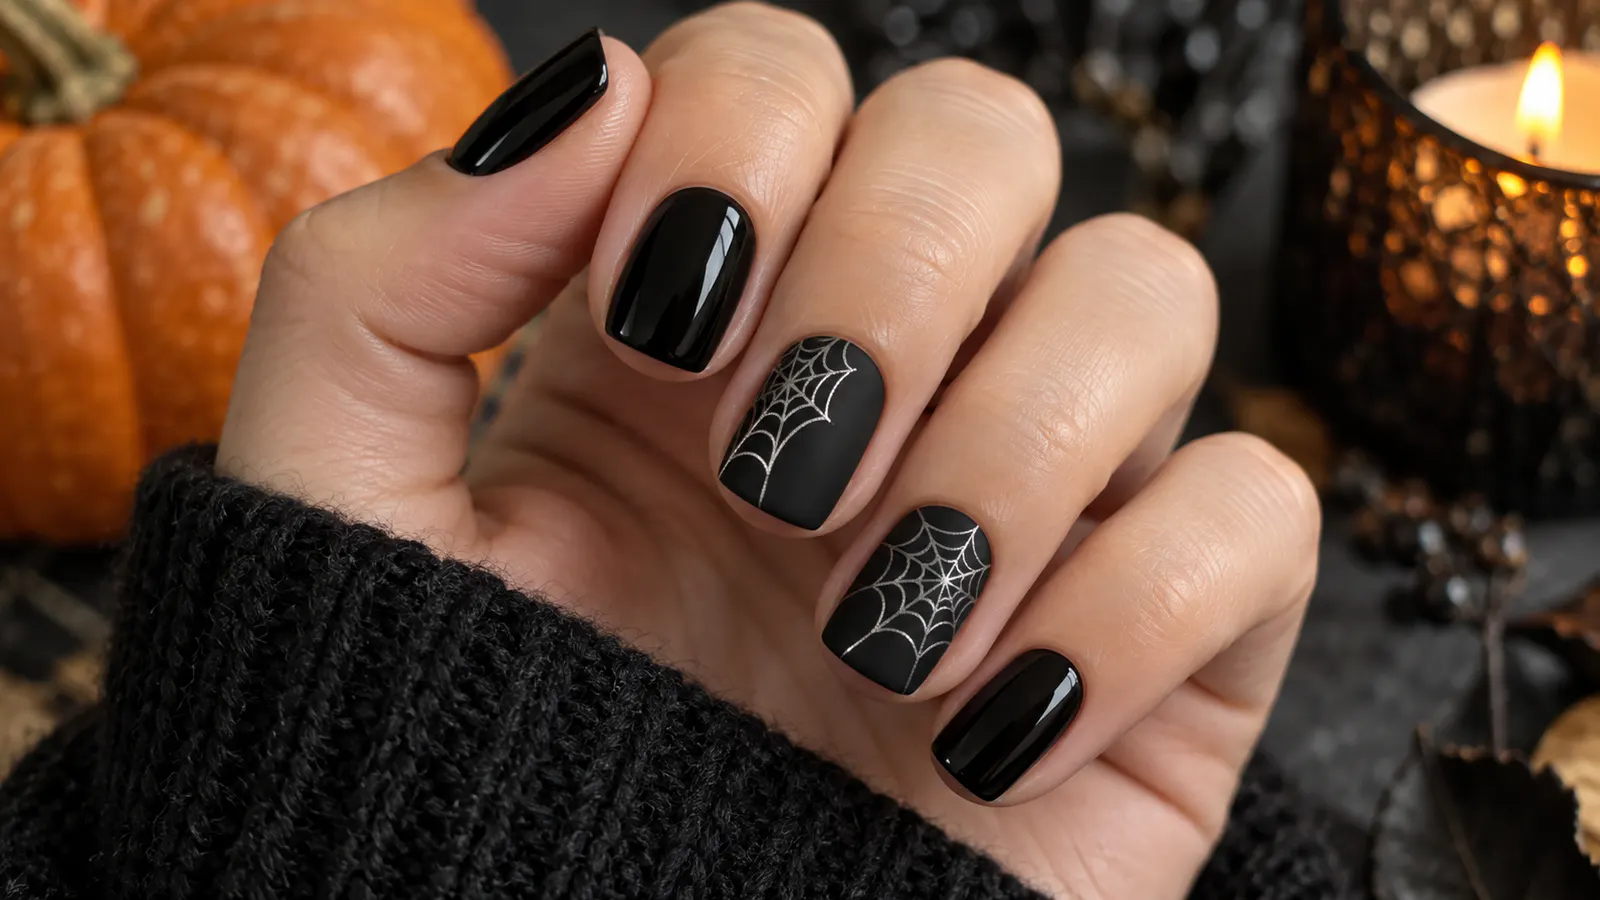
Spiderweb nails can look graphic rather than theatrical when the lines are delicate and the palette is limited. Silver over matte black has enough contrast to read immediately.
Two web nails are usually enough. Place the center near a side corner so the pattern appears to travel across the nail instead of sitting like a sticker in the middle.
How to get the look
- Paint the accent nails black and finish them matte.
- Draw three or four fine silver rays from one corner.
- Connect the rays with shallow curves and seal carefully.
Best for: Short square or squoval nails and high-contrast Halloween manicures.
5. Burnt-orange cat-eye nails
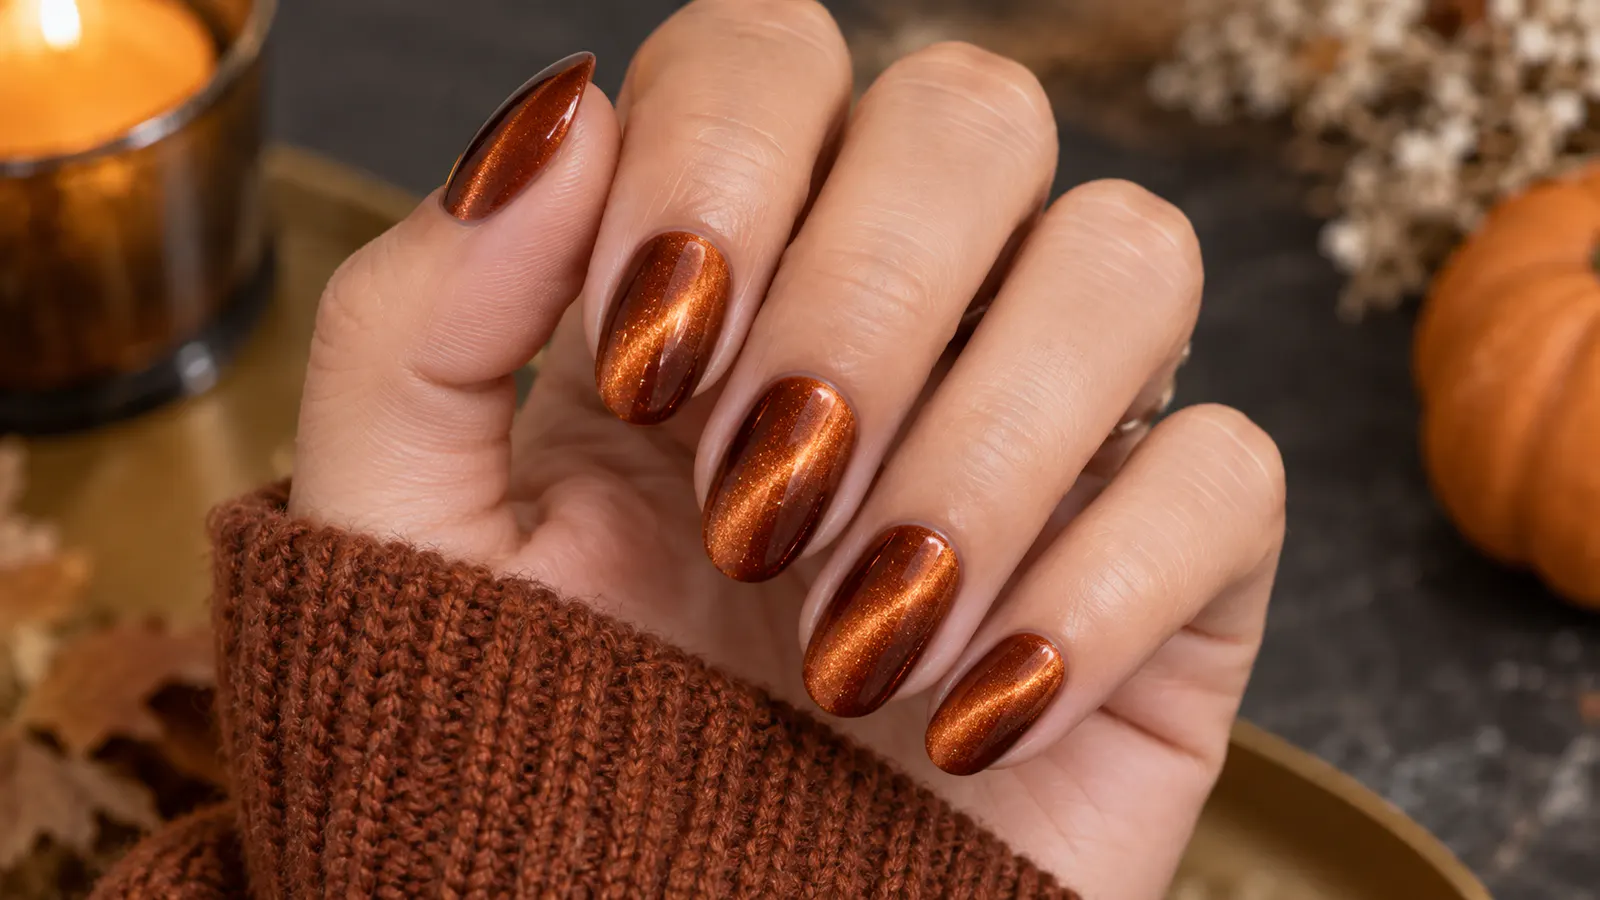
Burnt orange feels seasonal, but the cat-eye finish keeps it from becoming a predictable pumpkin manicure. Magnetic pigment creates a moving ribbon of light that changes as the hand turns.
Choose a coppery orange with brown depth rather than neon. A dark brown base intensifies the magnetic line, while translucent amber produces a lighter glow.
How to get the look
- Apply a dark warm base for extra depth.
- Float on magnetic orange polish without curing it.
- Hold the magnet consistently, then cure and top coat.
Best for: One-color manicures and a fall-to-Halloween crossover.
6. Minimalist bat details
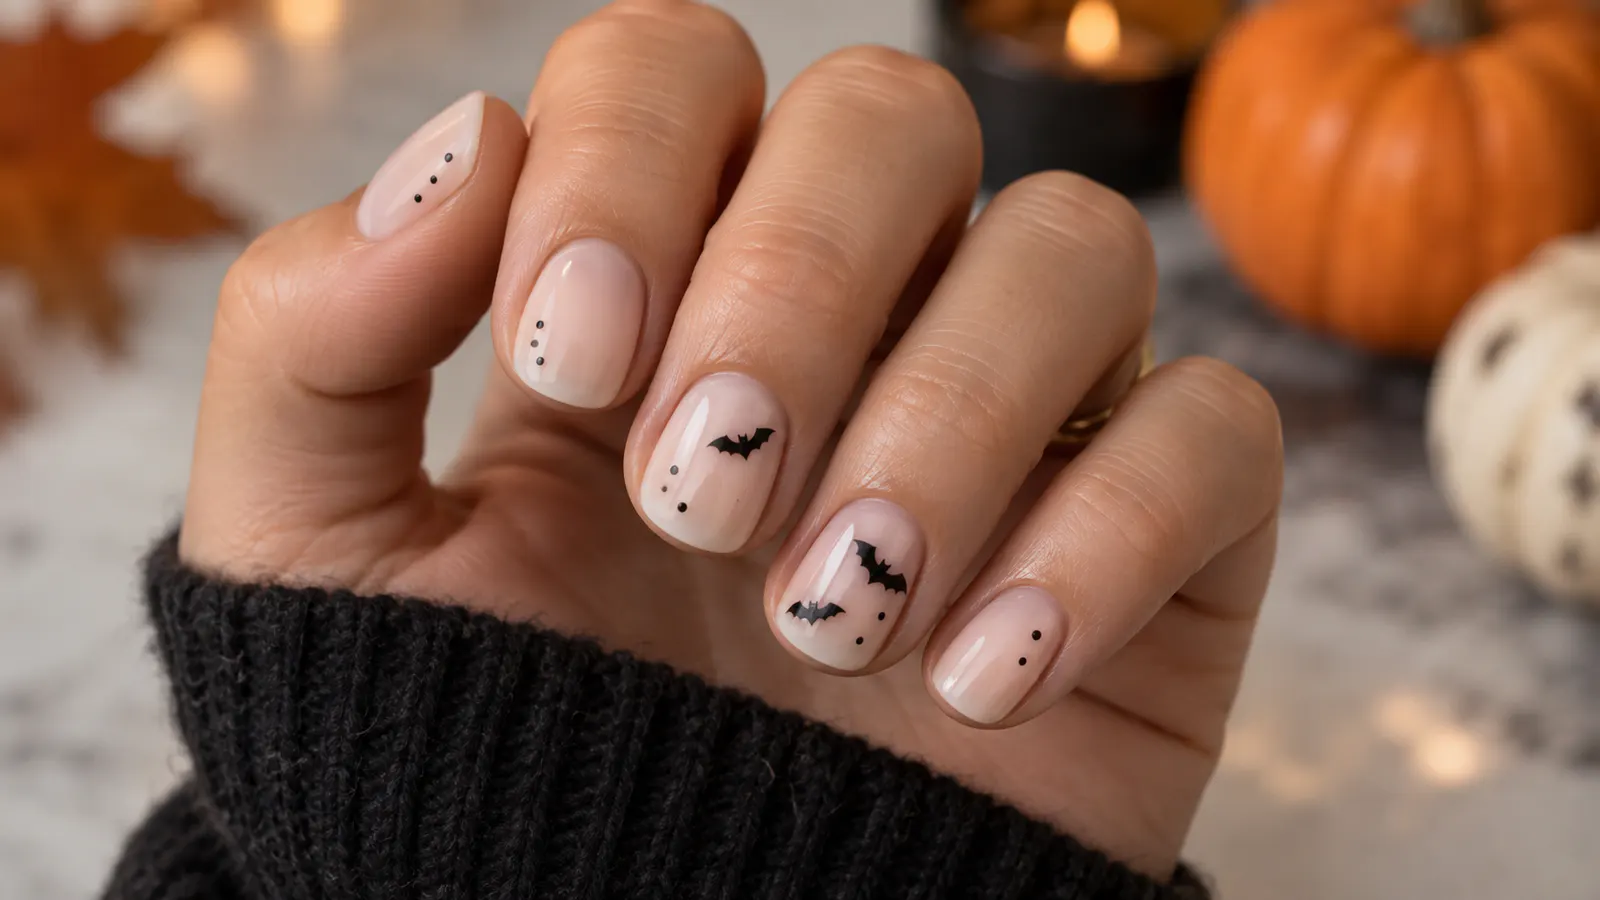
Tiny bat nails have the easy appeal of ghost accents but feel slightly sharper. A milky background gives the design breathing room, and a few dots connect the set without creating a repeated pattern.
Keep the wings compact and angular. On a small nail plate, one bat on each hand is more legible than several miniature shapes competing for space.
How to get the look
- Apply a sheer neutral base.
- Paint a small black body and two pointed wings.
- Balance the set with tiny dots, then top coat.
Best for: Short natural nails and minimalist Halloween nail art.
7. Moody tortoiseshell nails
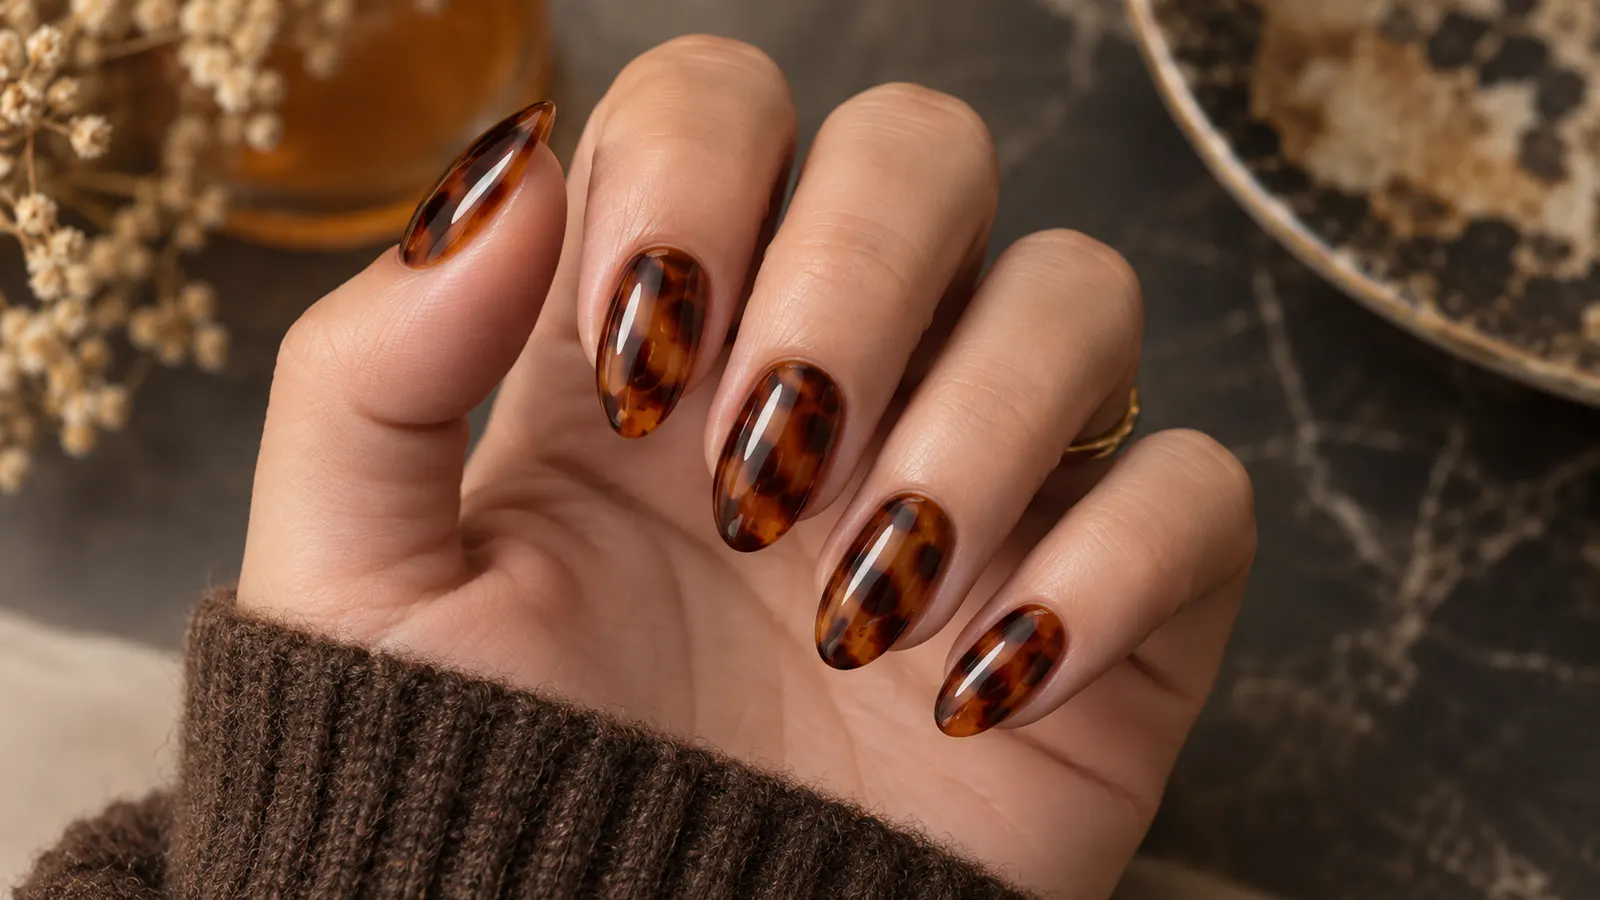
Tortoiseshell is not exclusively a Halloween design, which is why it is so useful. Its translucent amber layers and irregular dark patches complement the season without relying on a character.
The pattern should vary from nail to nail. Ask for soft-edged patches suspended between translucent layers; painting every mark on the surface removes its convincing depth.
How to get the look
- Start with a translucent amber layer.
- Add irregular caramel and dark-brown patches.
- Repeat a sheer amber layer and selected darker marks.
Best for: Medium almond nails and manicures worn beyond Halloween.
8. Smoky black aura nails
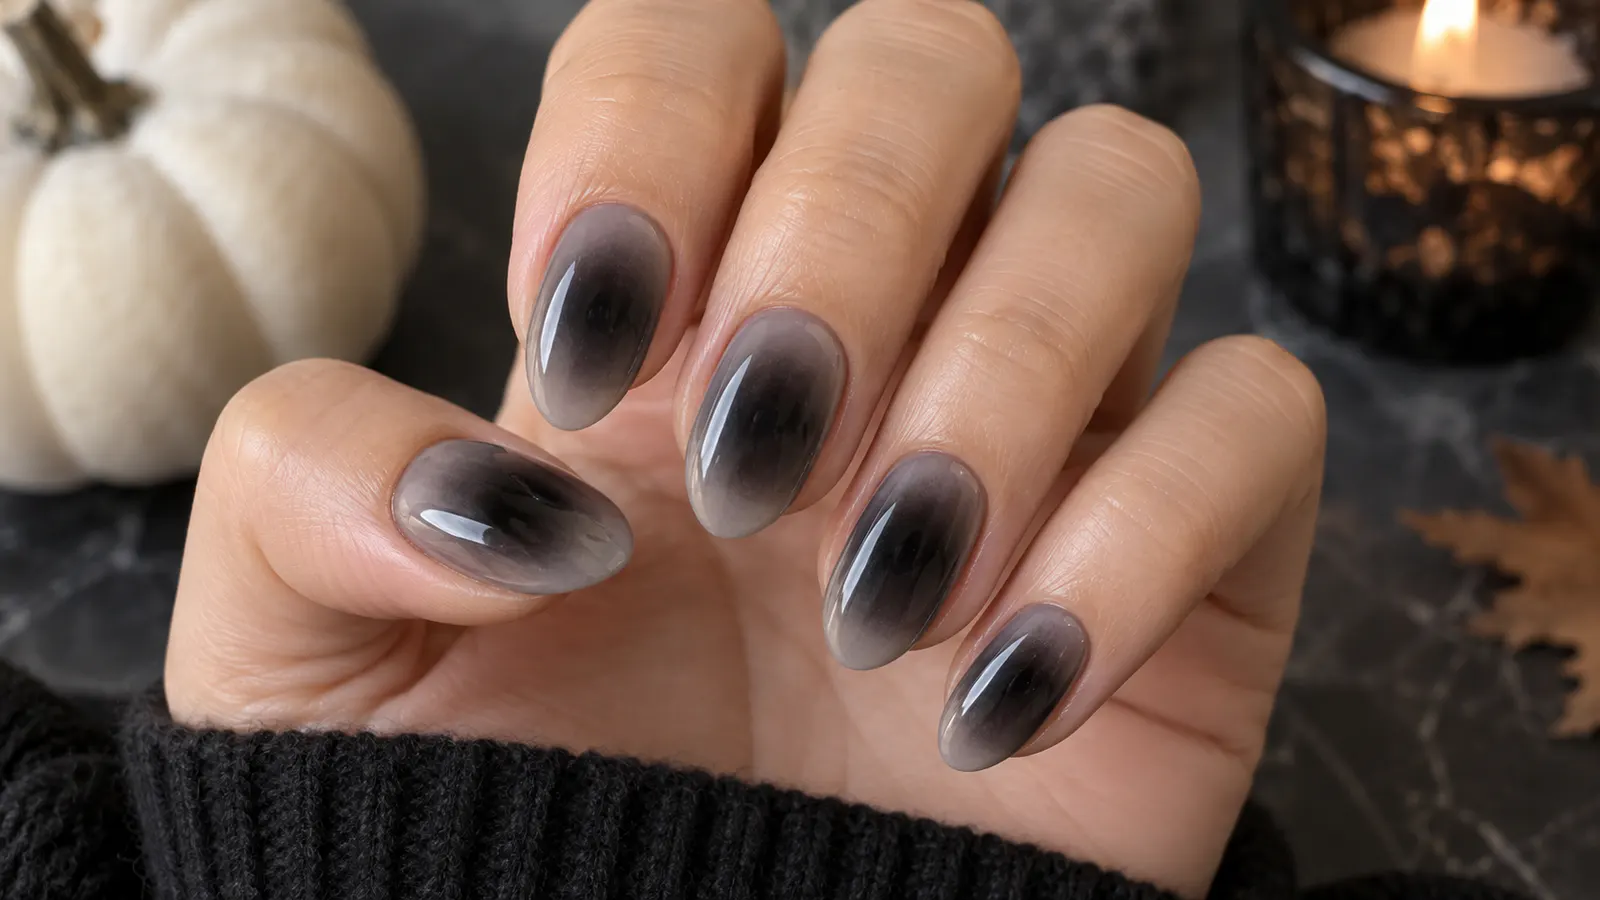
Aura nails give black polish a softer direction. The dark center fades into gray edges, creating a misty effect that suits Halloween without using a single motif.
A smooth gradient matters more than symmetry. If airbrushing is unavailable, a sponge can build the center gradually in thin passes, followed by a glassy top coat.
How to get the look
- Apply a translucent gray base.
- Diffuse black at the center with an airbrush or sponge.
- Soften any hard edge before adding gloss.
Best for: Medium oval nails, monochrome style and abstract looks.
9. Vampire-red French tips
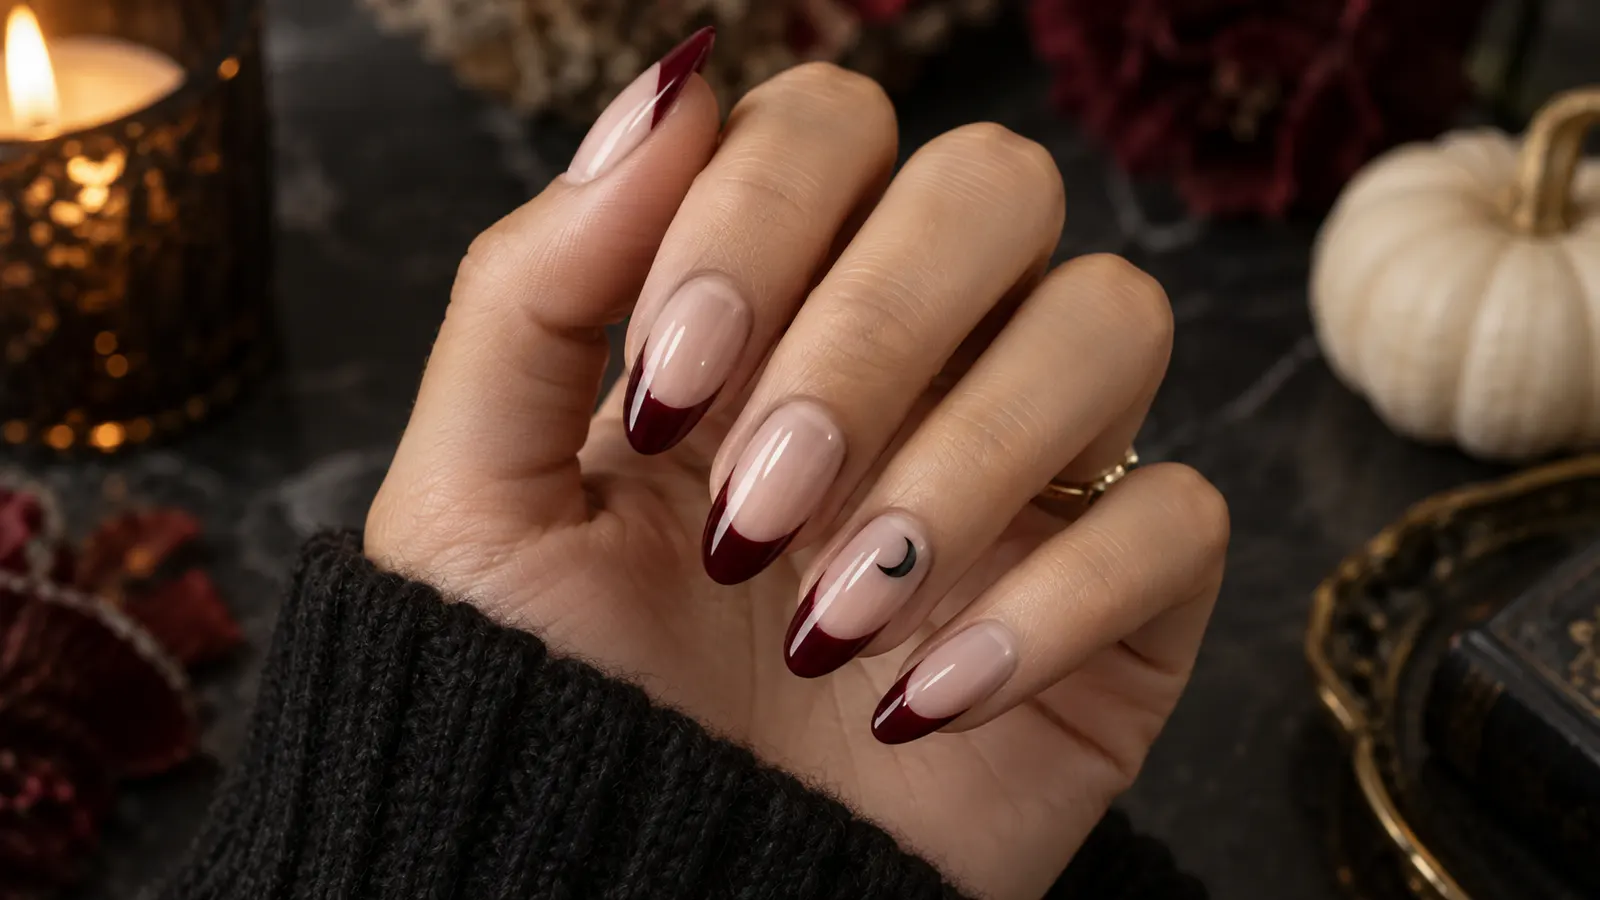
A wine-red French manicure captures the vampire mood without simulated drips or gore. The deeper the red, the more sophisticated the contrast becomes against a clean nude base.
On short nails, use a narrow curve; on longer almond nails, a slightly elongated V-shaped tip emphasizes the silhouette. One tiny crescent adds interest without distraction.
How to get the look
- Choose a nude base close to the natural nail bed.
- Paint curved or softly pointed tips in deep wine.
- Add one small crescent if desired, then seal.
Best for: Date-night manicures and subtle vampire-inspired nails.
10. Celestial midnight nails
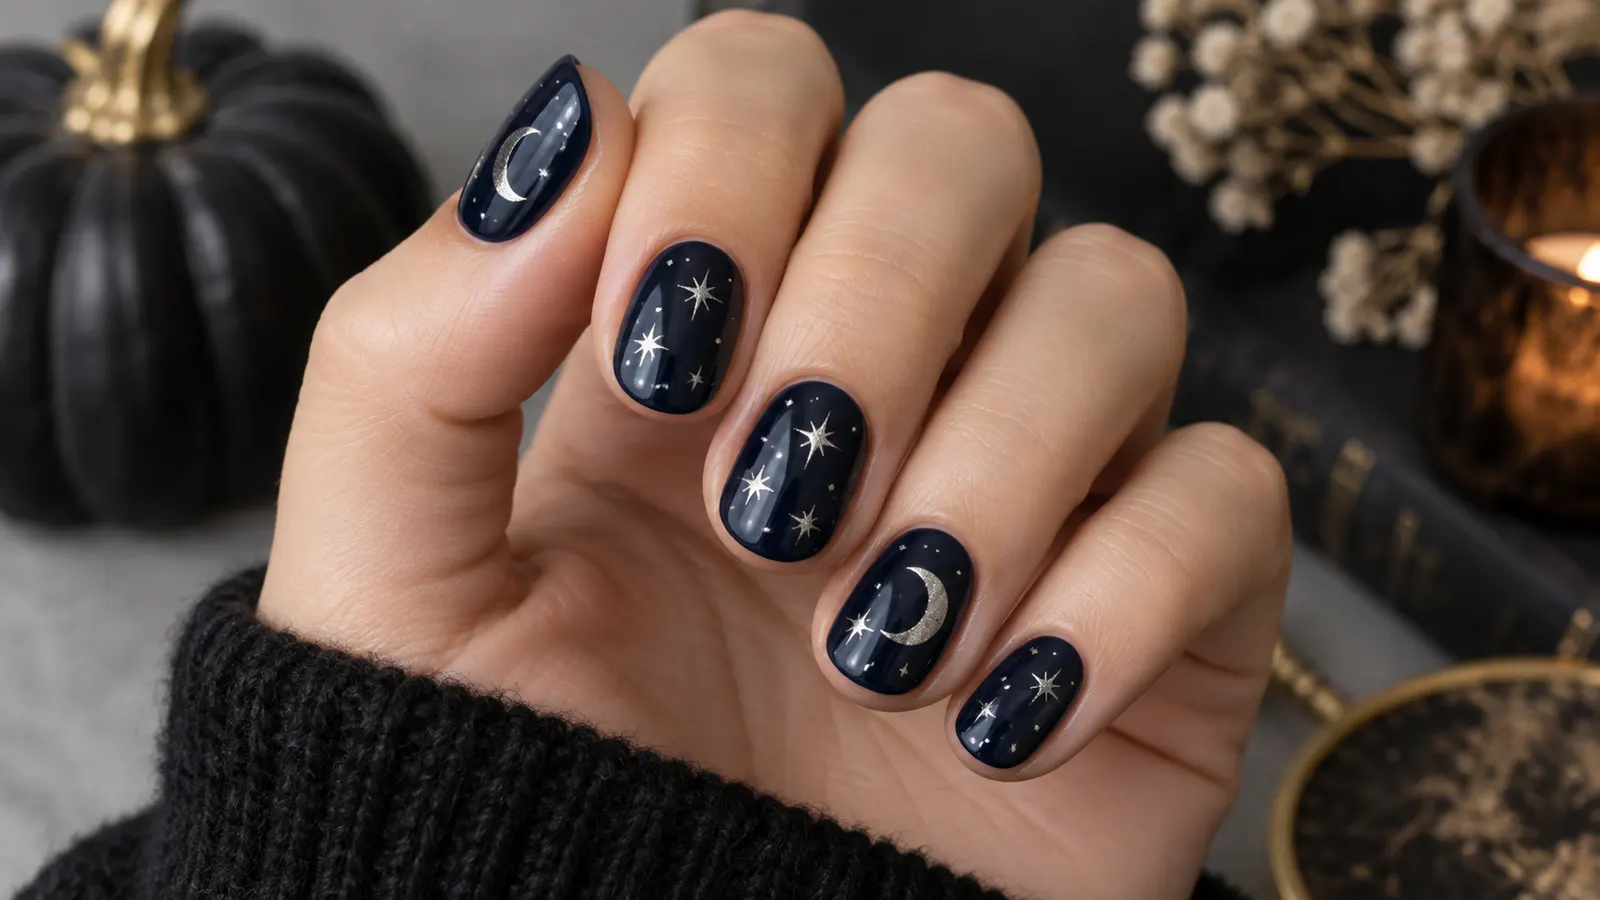
Celestial nails offer a softer alternative to orange and black. A nearly black navy base creates the night-sky effect, while small silver stars and moons catch the light.
Vary placement so every nail does not repeat the same sky. One larger crescent, two fine stars and a scattering of tiny dots are enough.
How to get the look
- Apply two coats of midnight navy.
- Place moons and stars asymmetrically.
- Use tiny silver dots to connect the design.
Best for: Short nails, cool-toned palettes and November-ready manicures.
11. Black-and-ivory checkerboard accents
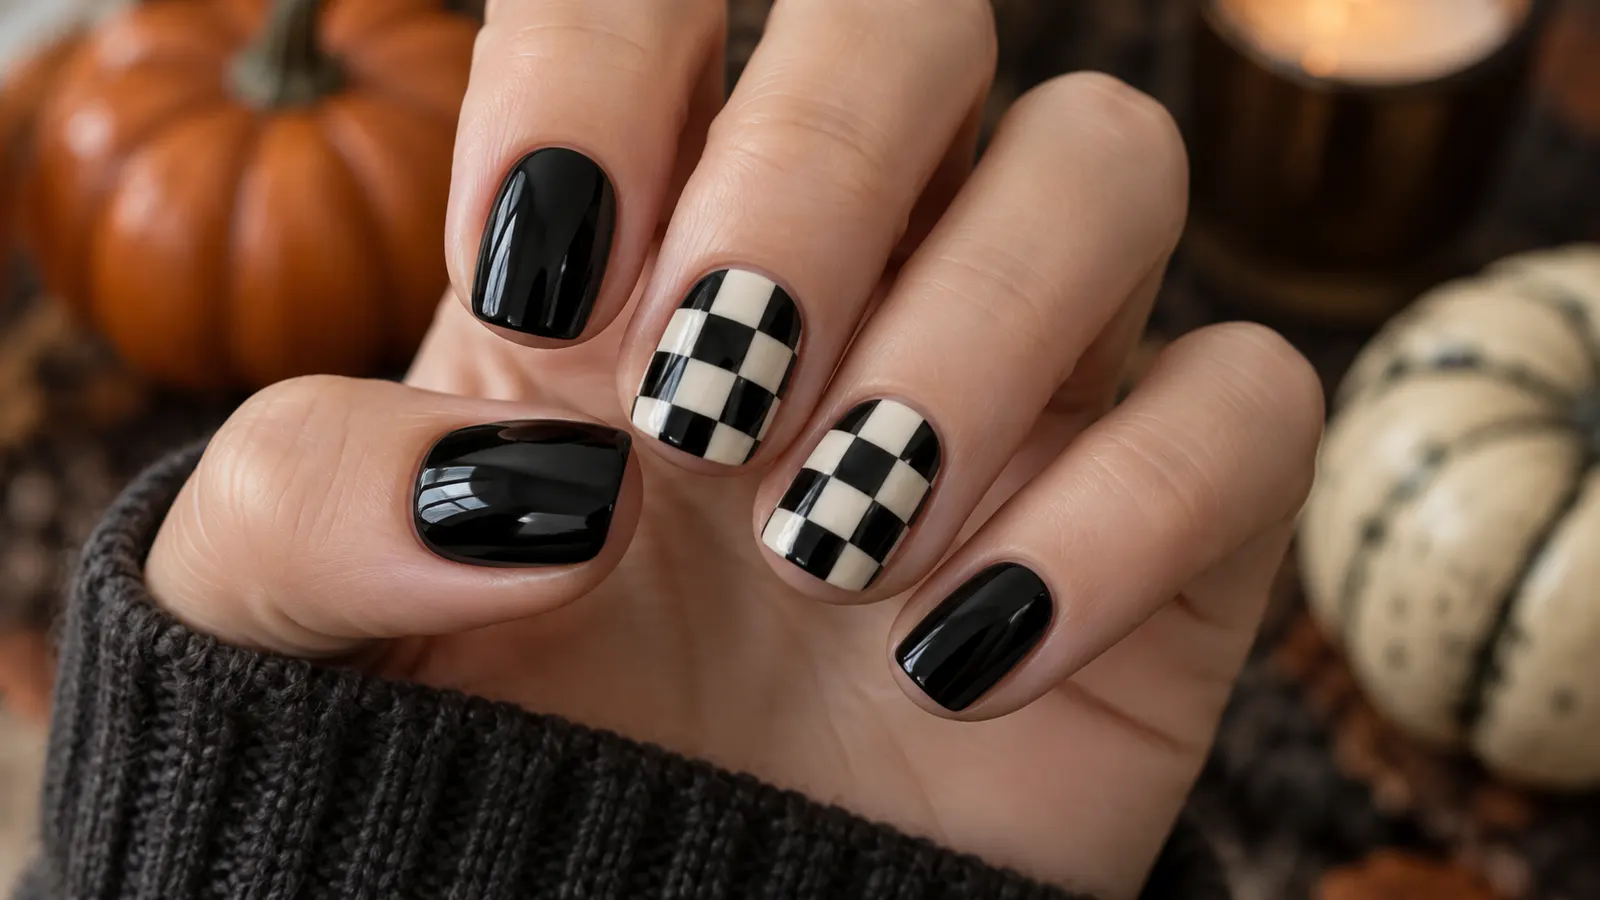
Checkerboard nails feel playful and graphic, especially when white is softened to ivory. Keeping the pattern on two nails and the rest solid black gives the eye somewhere to rest.
The squares should follow the curve of the nail rather than being forced into a perfect grid. A fine outline at the sidewalls keeps the pattern contained.
How to get the look
- Paint two accent nails ivory and the rest black.
- Divide each accent nail into a curved grid.
- Fill alternating squares and seal when opaque.
Best for: Short squoval nails and bold designs without detailed characters.
12. Soft candy-corn gradient
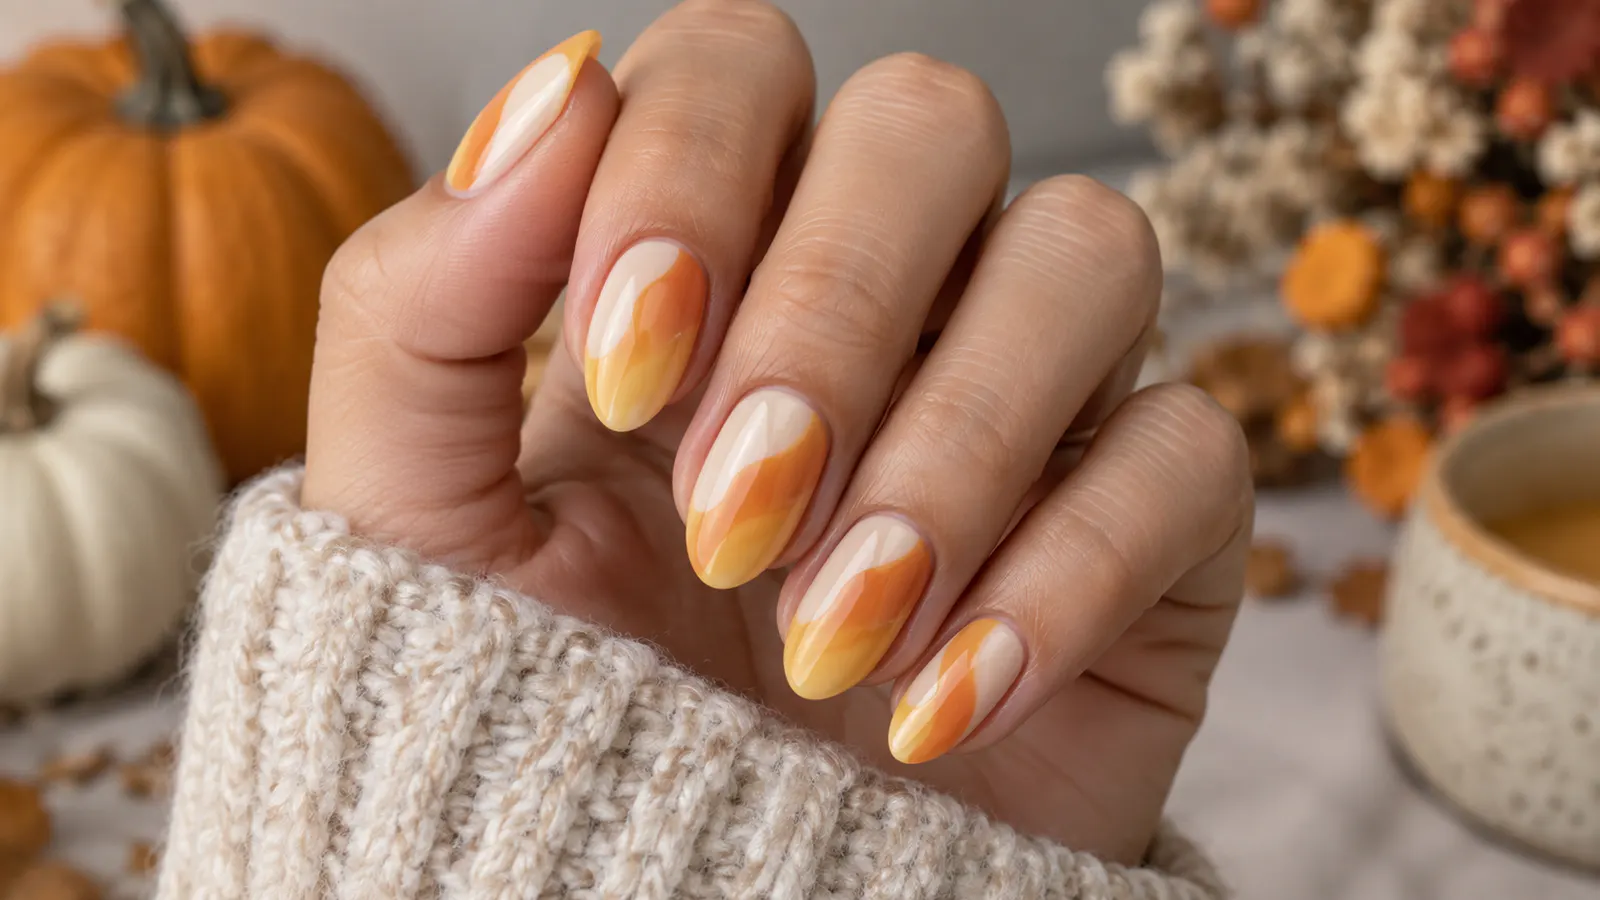
Candy-corn colors look sophisticated when blended rather than painted in strict stripes. Cream, muted orange and pale gold create a warm gradient that references the sweet without copying it literally.
Choose softened shades with translucency. The design should resemble overlapping light or an abstract sunset at first glance, with the candy reference appearing later.
How to get the look
- Apply a creamy translucent base.
- Blend muted orange and pale yellow diagonally.
- Repeat thin layers until transitions look smooth.
Best for: Warm palettes and cheerful Halloween nails without black polish.
13. Black lace accent nails
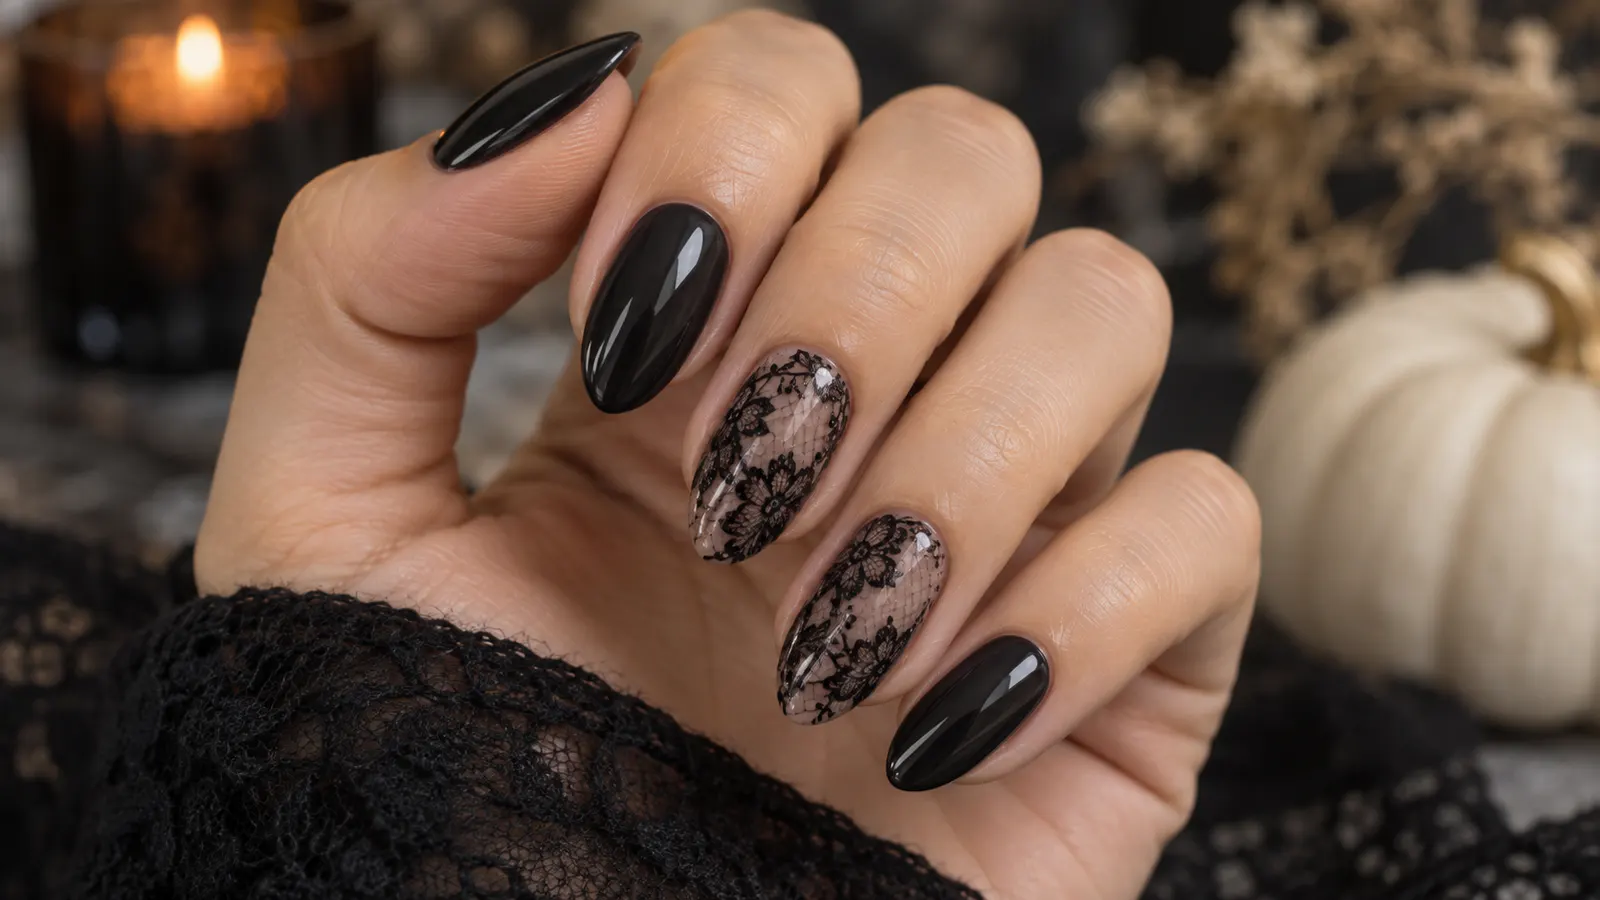
Black lace nails suit the romantic side of Halloween. A sheer nude base keeps the floral pattern visible, while surrounding solid-black nails make the set cohesive.
Because lace contains many small lines, it works best on one or two medium-length accents. Stamping plates or fine decals can produce cleaner detail than freehand painting.
How to get the look
- Create a sheer nude base on accent nails.
- Transfer a fine black lace pattern.
- Pair with glossy black nails and seal carefully.
Best for: Medium almond nails and dressier Halloween events.
14. Smoky purple jelly nails
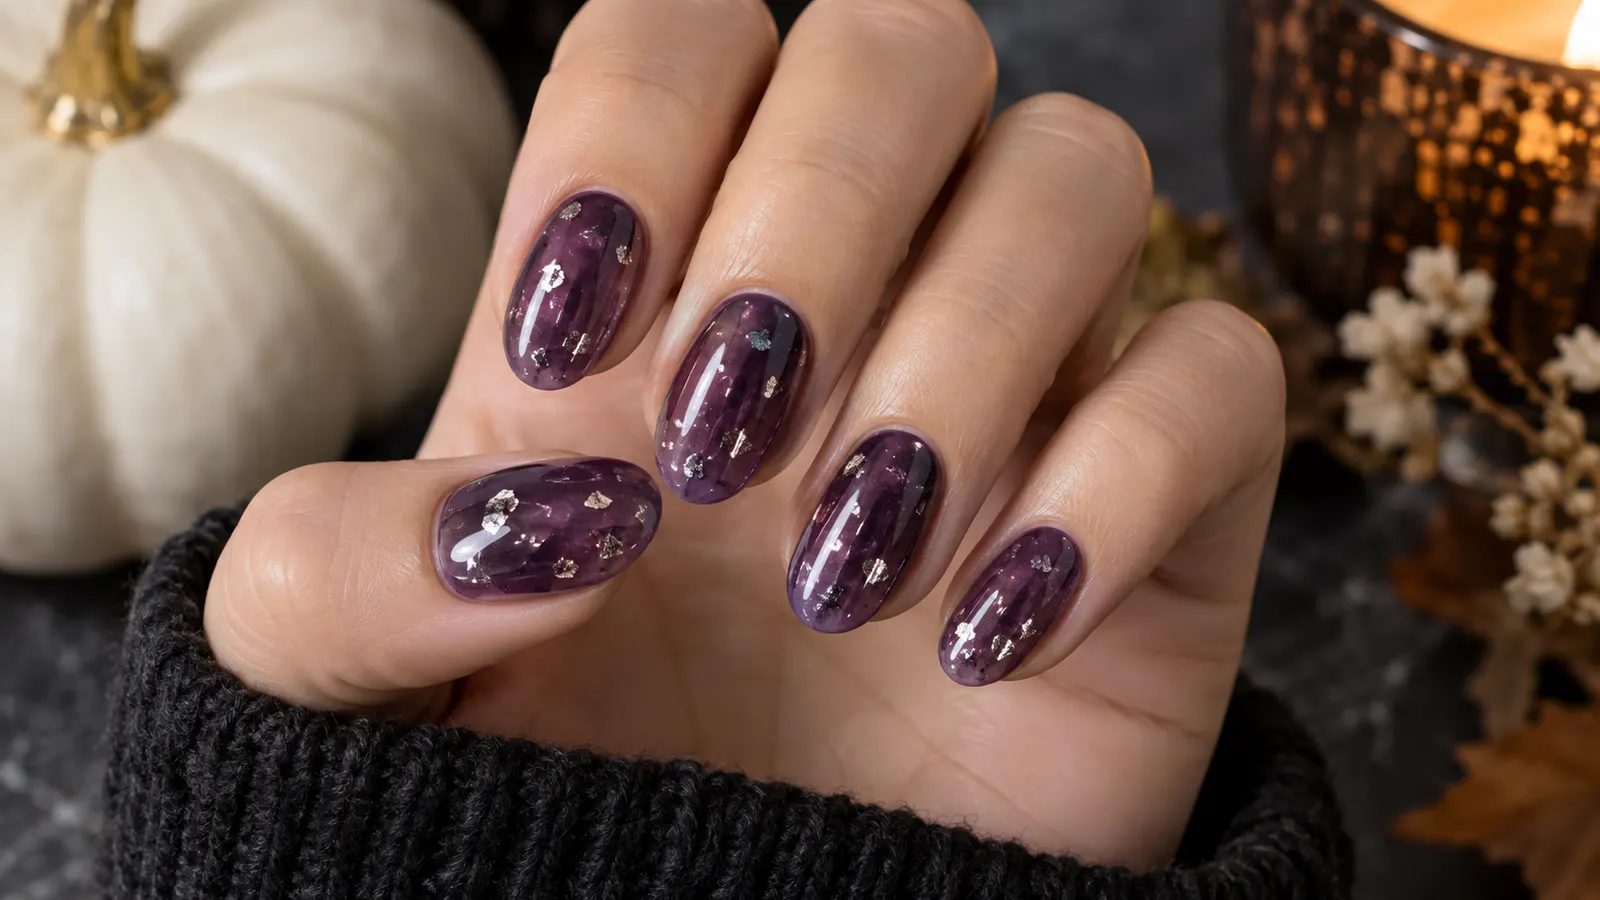
Smoky purple jelly nails feel mysterious while remaining lighter than solid plum. Their translucency lets every layer show through, and irregular silver foil adds movement.
Use foil sparingly so purple remains the feature. Two or three translucent coats build depth without becoming opaque, depending on the pigment and natural nail.
How to get the look
- Apply one thin coat of translucent smoky purple.
- Place a few small silver foil flakes.
- Build another jelly layer and add a leveling top coat.
Best for: Oval nails and dimensional color without painted motifs.
15. Tiny pumpkin outlines
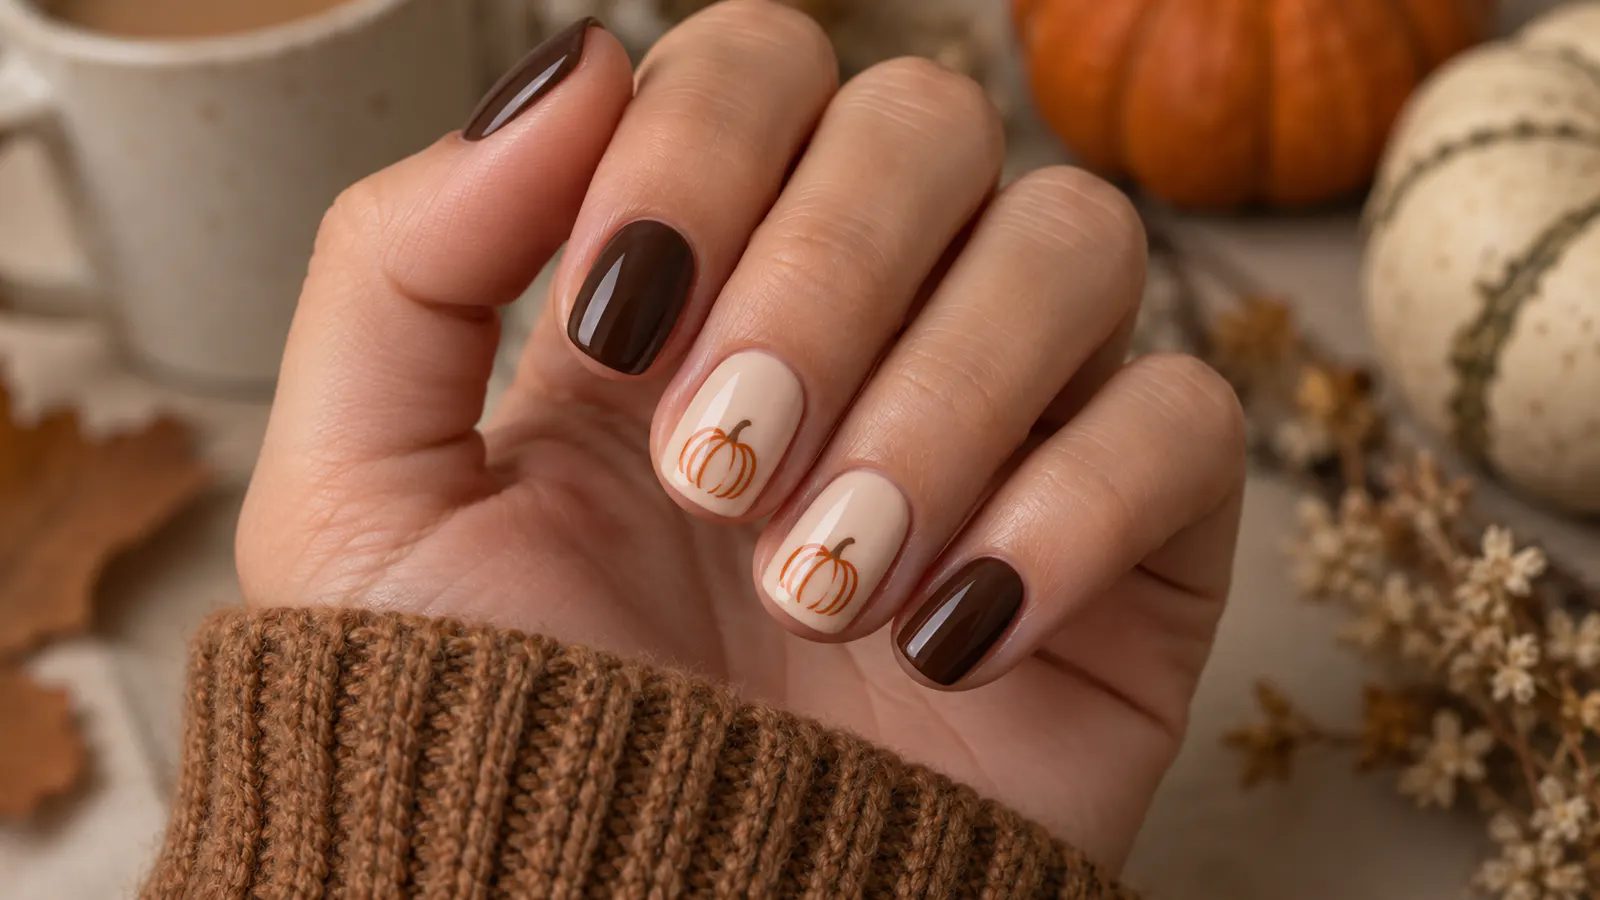
Tiny pumpkin outlines are quieter than bright jack-o’-lantern art. Burnt-orange lines over cream keep the motif light, and chocolate-brown companion nails connect it to an autumn wardrobe.
Skip the face and concentrate on curved pumpkin segments and a short stem. The simplified shape stays readable on short nails and avoids feeling juvenile.
How to get the look
- Paint accent nails cream and the rest chocolate brown.
- Draw a small oval and curved segments in burnt orange.
- Finish with a short stem and glossy top coat.
Best for: Short nails and warm neutral palettes.
16. Pumpkin-spice French tips
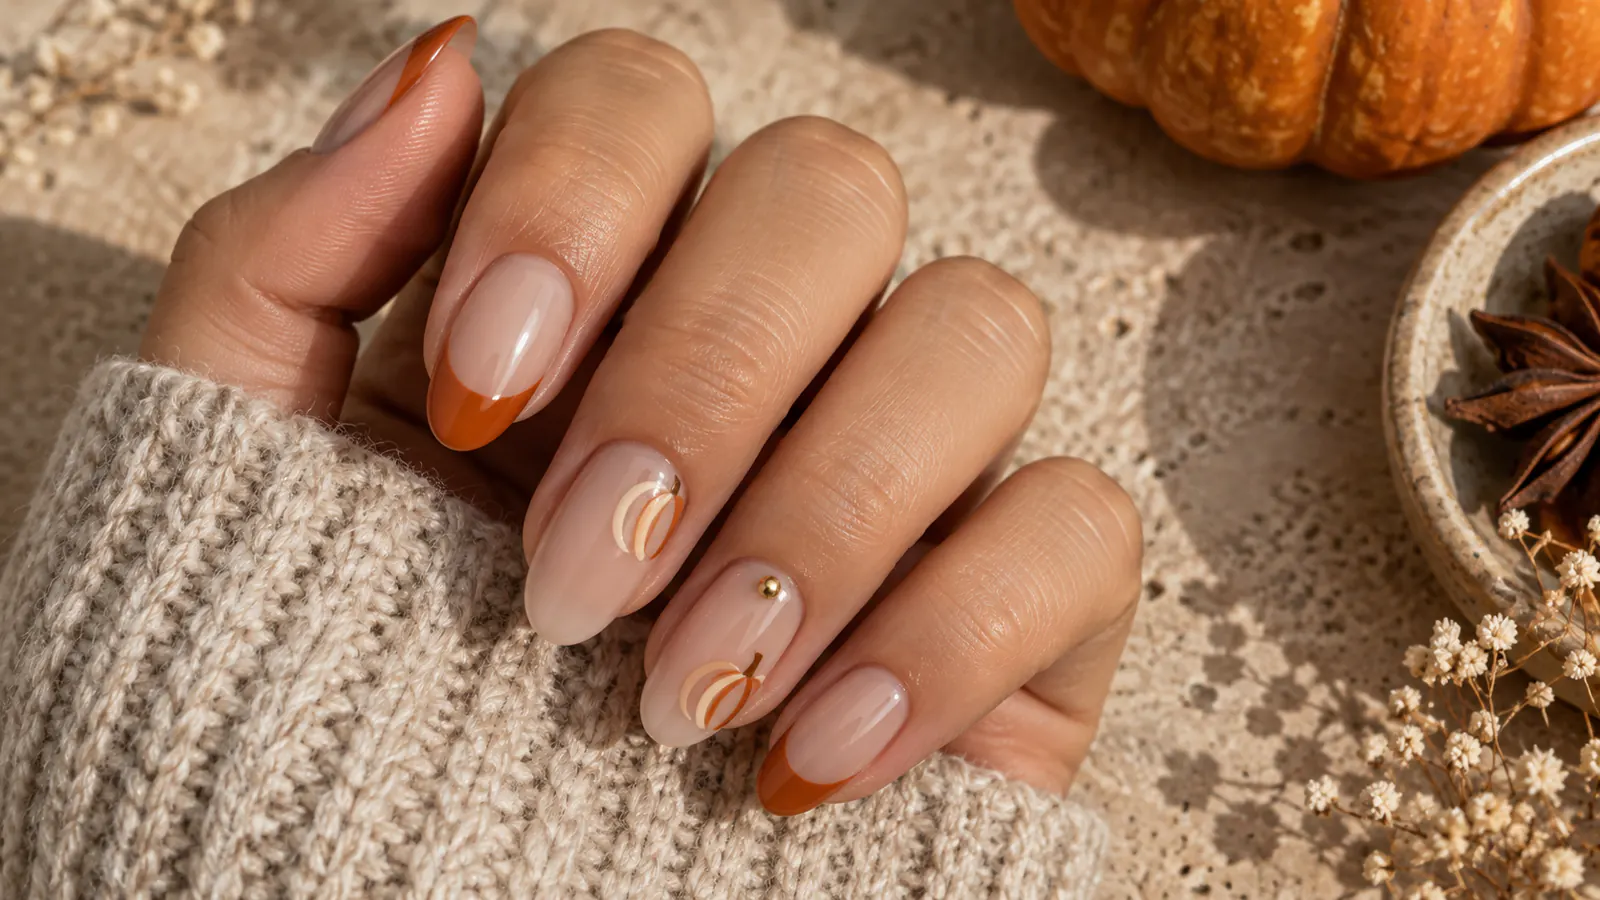
This pumpkin-spice French manicure mixes a seasonal orange tip with just enough miniature art to feel festive. Keeping the base transparent and the gold details fine prevents the warm palette from looking heavy.
Use the pumpkins on one or two nails and repeat the orange on every tip. That repetition makes a detailed accent feel like part of one coherent set.
How to get the look
- Apply a sheer beige base.
- Paint slim burnt-orange tips and two tiny pumpkin accents.
- Add fine gold details and finish with gloss.
Best for: Medium almond nails and warm autumn wardrobes.
17. Milky ghost French nails
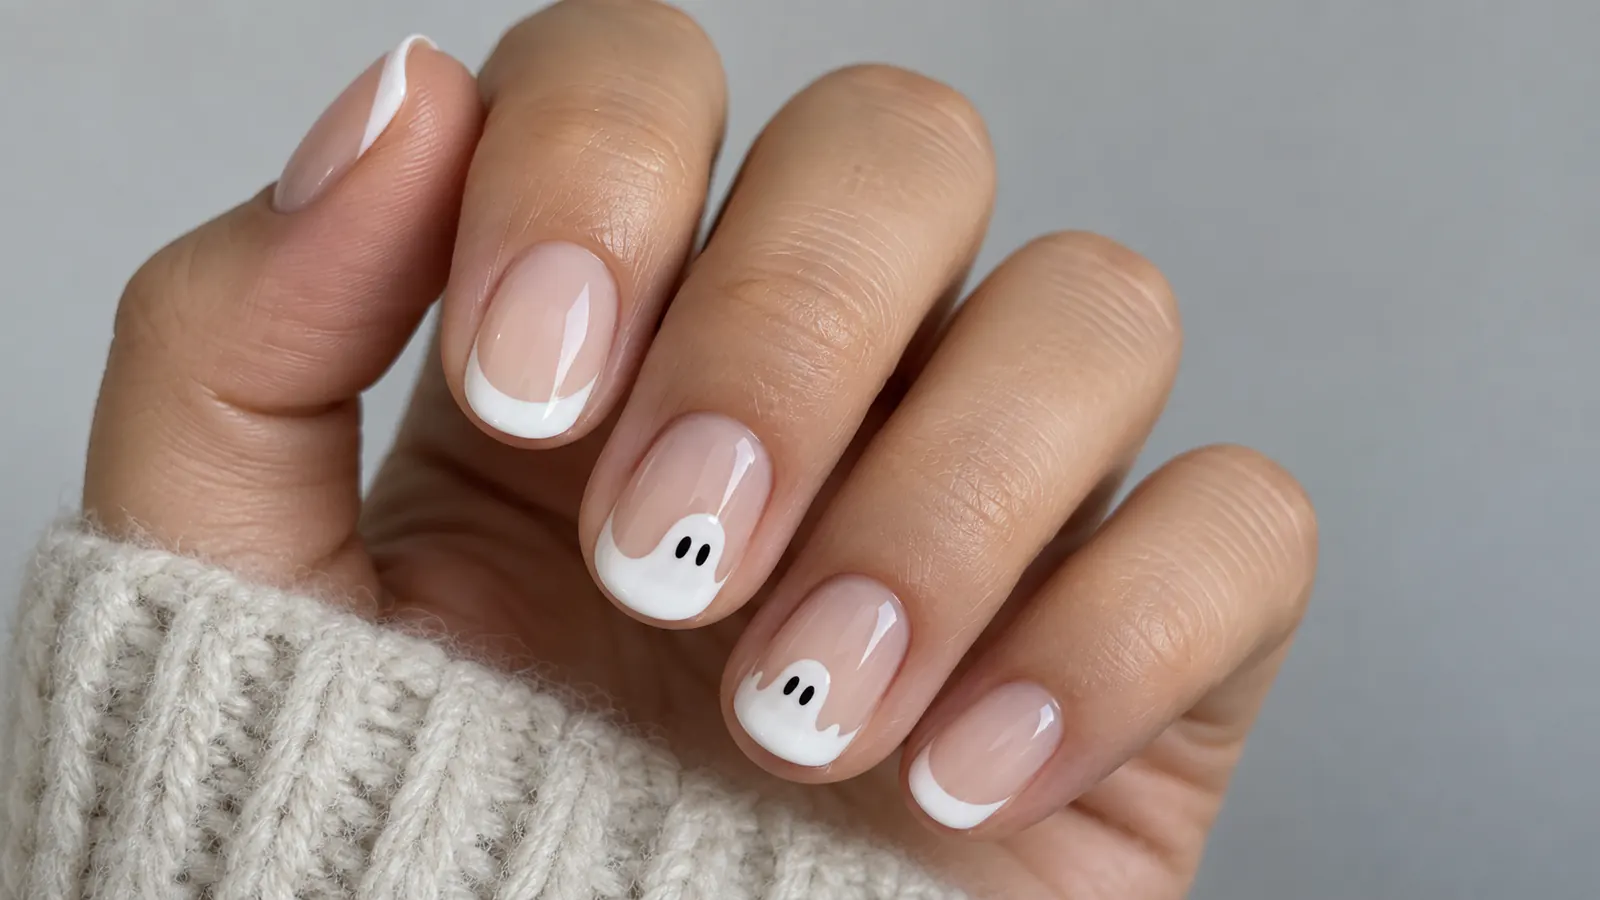
If you are searching for cute Halloween nails, these soft ghost tips are an easy place to start. The rounded white shapes echo a French tip while tiny eyes make the theme instantly readable.
Leave a little milky base visible around each ghost. The negative space keeps the manicure delicate and works especially well on short natural nails.
How to get the look
- Build a translucent milky base.
- Curve white polish over each tip with a softly uneven edge.
- Dot two small eyes and seal with gloss.
Best for: Short oval nails and simple at-home Halloween designs.
18. Black mirror chrome
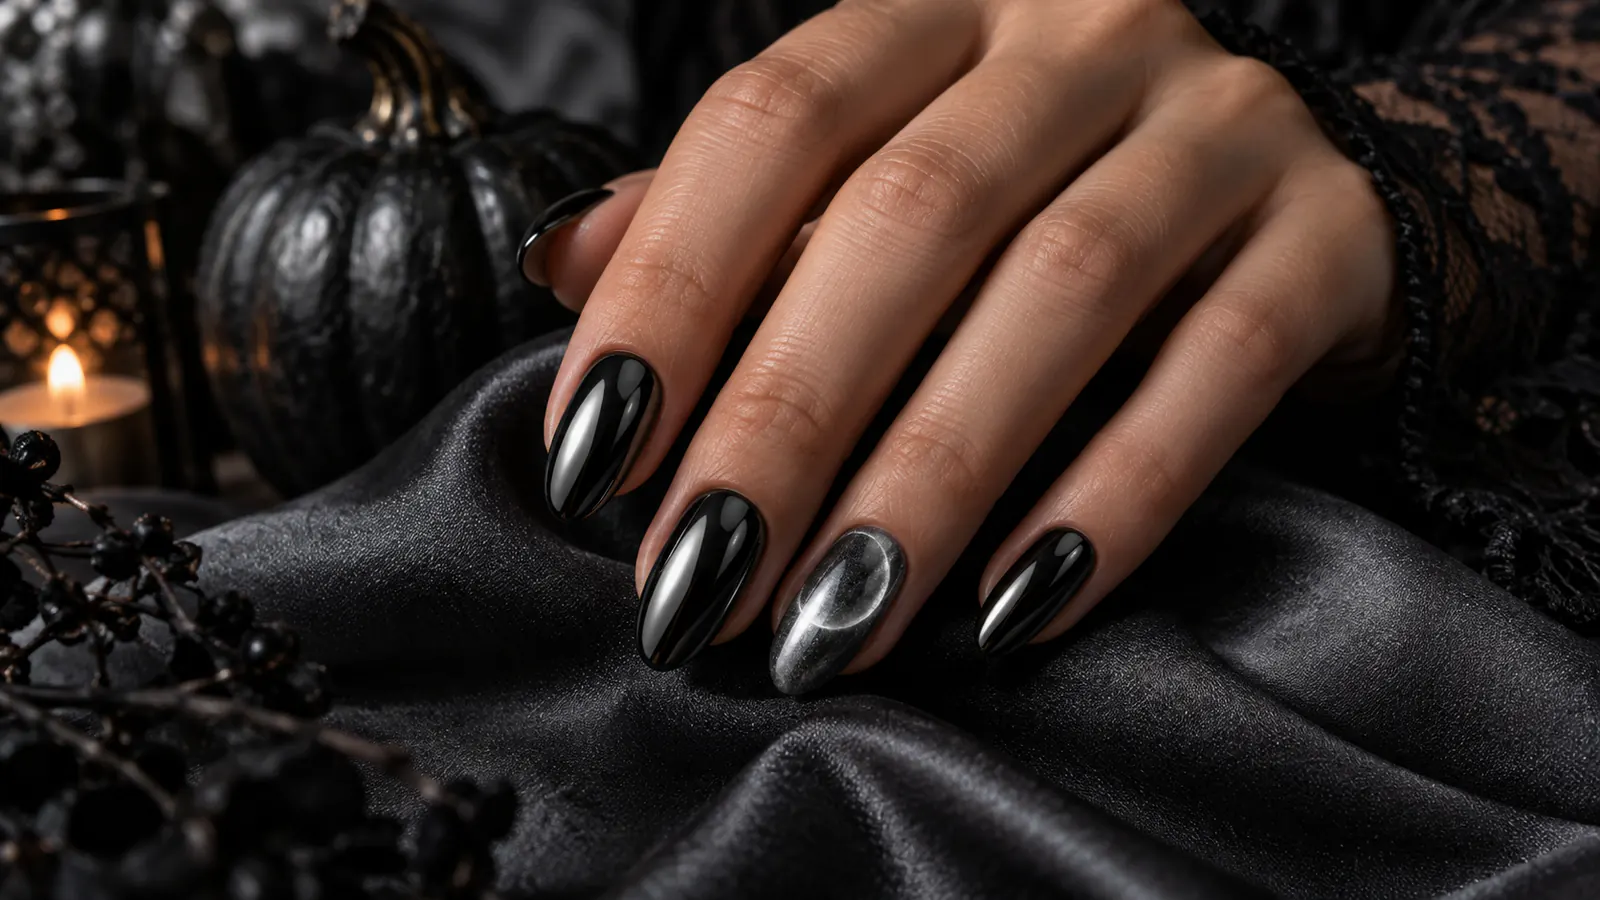
Black mirror chrome is sleek, dimensional and more fashion-led than literal Halloween art. Silver crescent accents catch the same light as the chrome and break up the dark set.
A smooth base is essential because chrome magnifies ridges. Ask for a very fine powder and carefully capped edges for a cleaner, longer-lasting reflection.
How to get the look
- Create an even black gel base.
- Rub in fine black chrome powder.
- Add sparse silver crescents before sealing.
Best for: Long almond nails, evening looks and dramatic minimalism.
19. Wine-red drip French
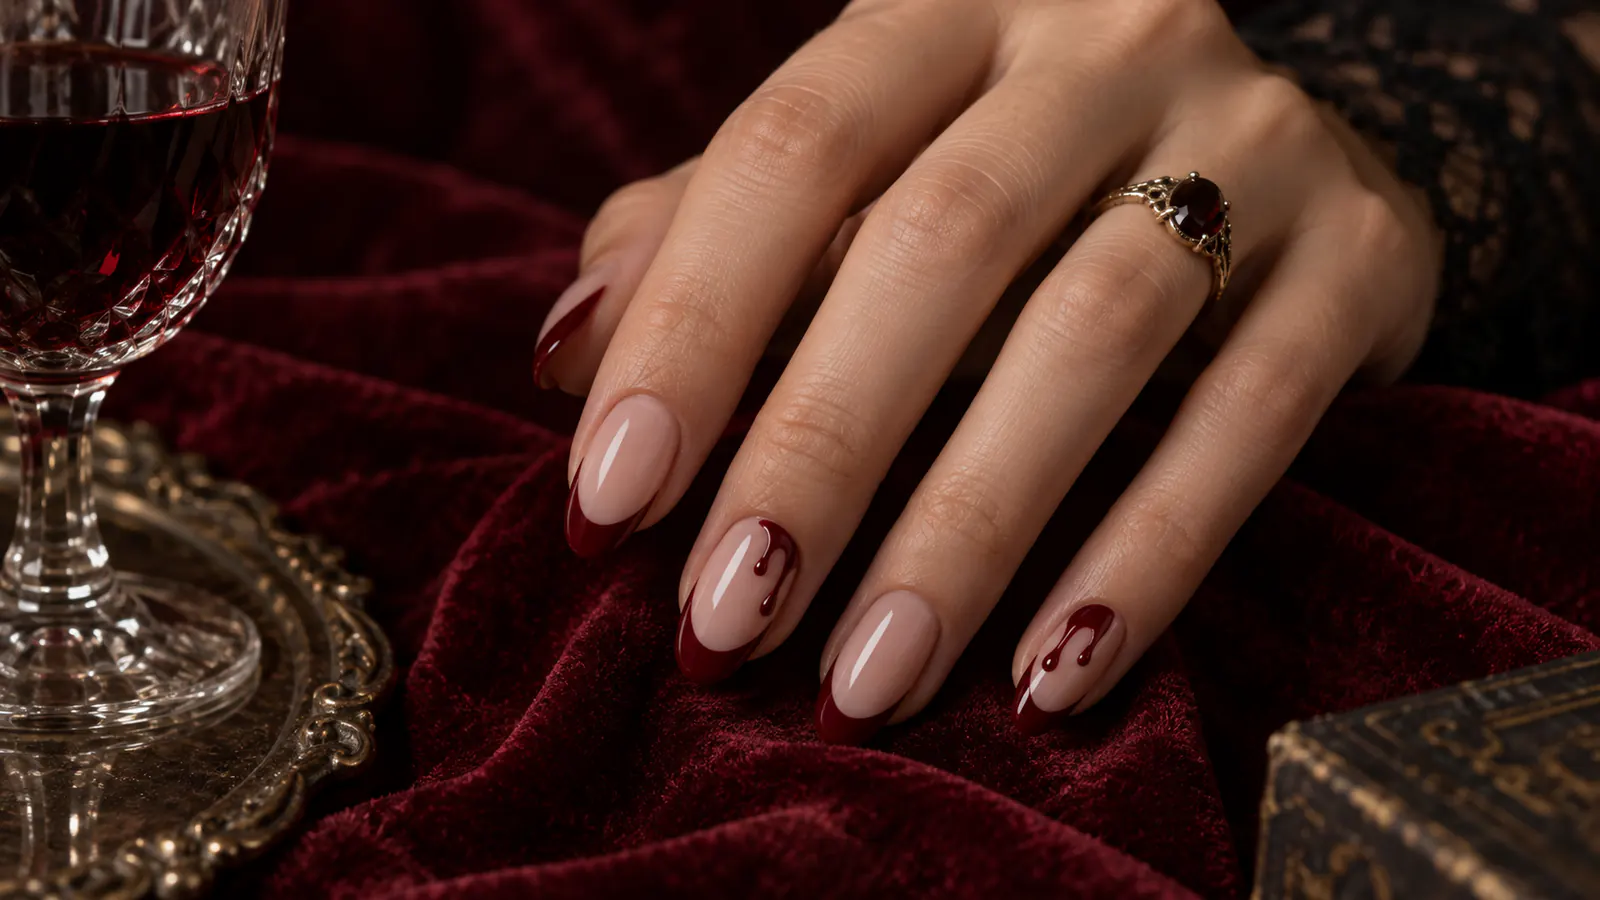
A deep wine French tip feels autumnal first and Halloween second. Extending two or three curved lines below the tip creates an abstract drip effect without using realistic or graphic imagery.
Keep the drops different lengths and leave most of the nail transparent. A rich black-cherry red looks sophisticated in low light and pairs easily with gold jewelry.
How to get the look
- Apply a neutral sheer base.
- Paint a curved wine-red French tip.
- Pull down a few rounded lines and top coat.
Best for: Almond nails and refined vampire-inspired manicures.
20. Negative-space spiderwebs
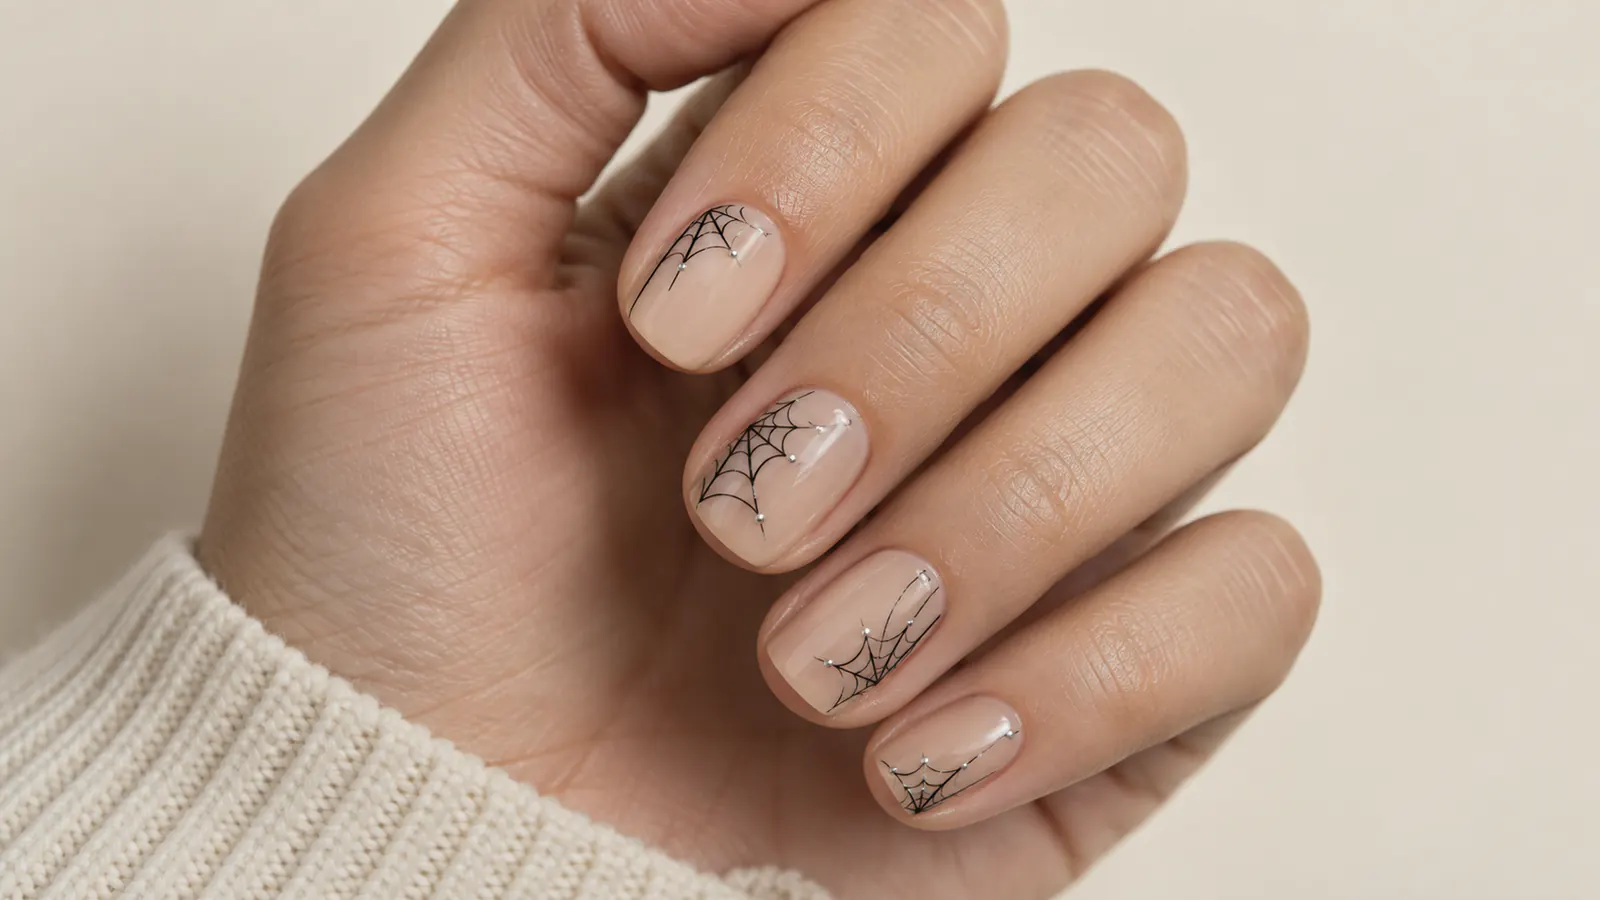
Negative-space spiderwebs are a strong option when you want recognizable Halloween nail art without a dark base. The clear background makes each fine line visible and keeps short nails from looking crowded.
Start each web from a different corner so the set feels organic. Tiny silver dots can fill empty areas without competing with the line work.
How to get the look
- Apply a clear or sheer pink base.
- Draw fine rays from one nail corner.
- Connect them with curved lines and add silver dots.
Best for: Short squoval nails and minimalist spooky designs.
21. Midnight-blue bat nails
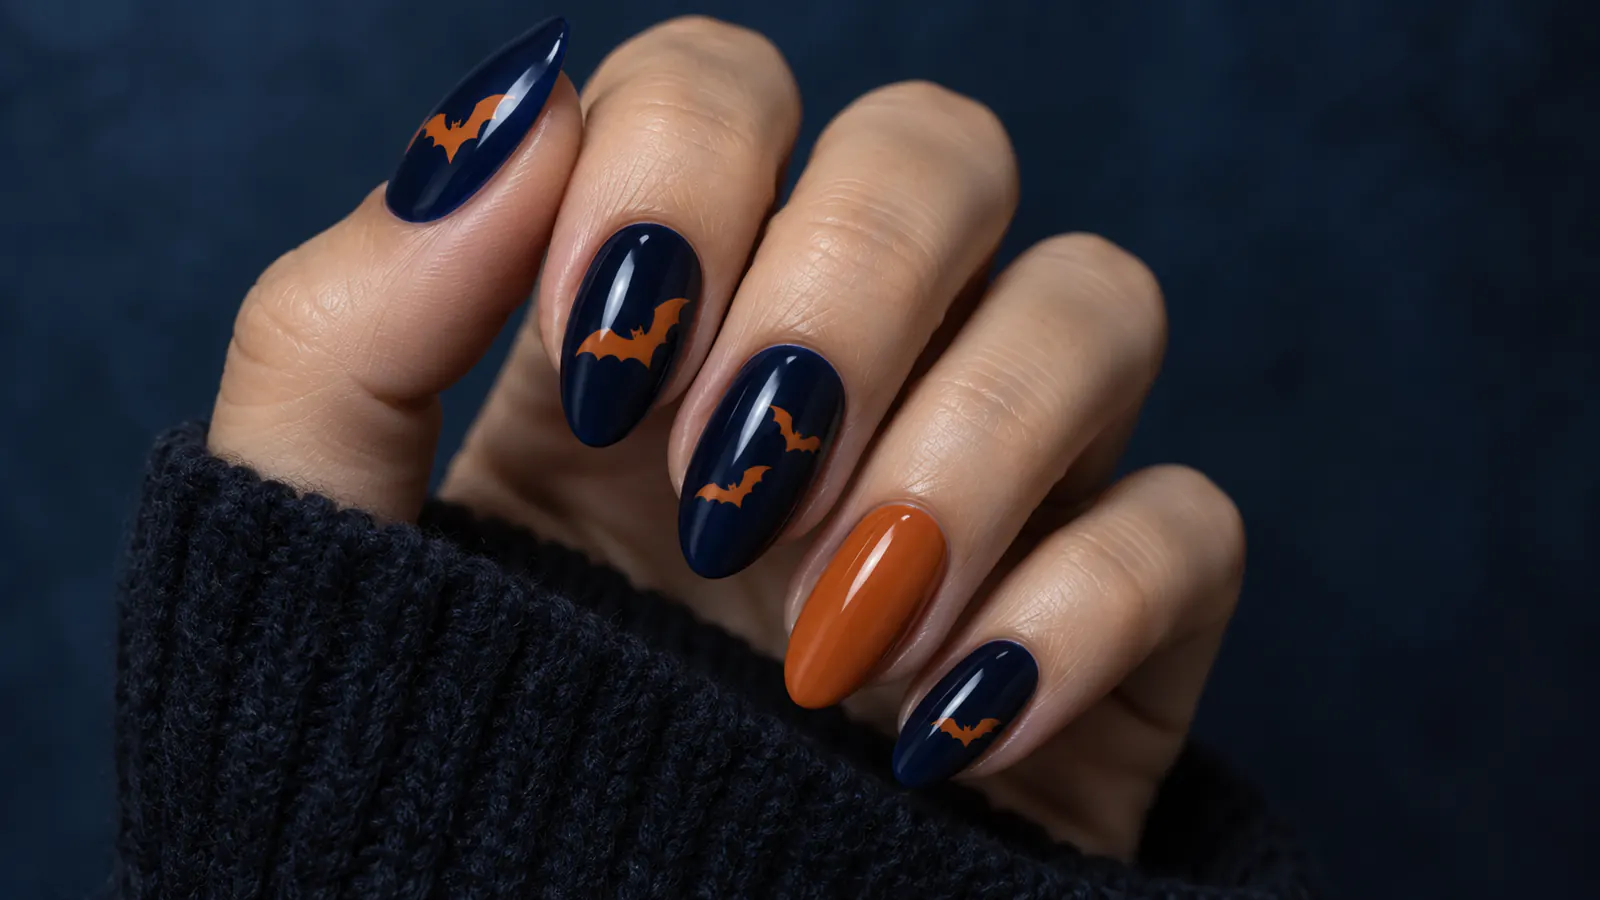
Midnight blue and burnt orange offer the contrast of traditional Halloween colors with a fresher finish. Small bat silhouettes give the set motion, especially when their sizes and angles vary.
Keep the shapes simple: a small body and two angular wings. Two decorated nails per hand are enough when the surrounding navy color is this saturated.
How to get the look
- Paint the set deep midnight blue.
- Add small burnt-orange bat silhouettes.
- Finish with high gloss for extra depth.
Best for: Short or medium nails and anyone avoiding solid black.
22. Smoky candy-corn ombré
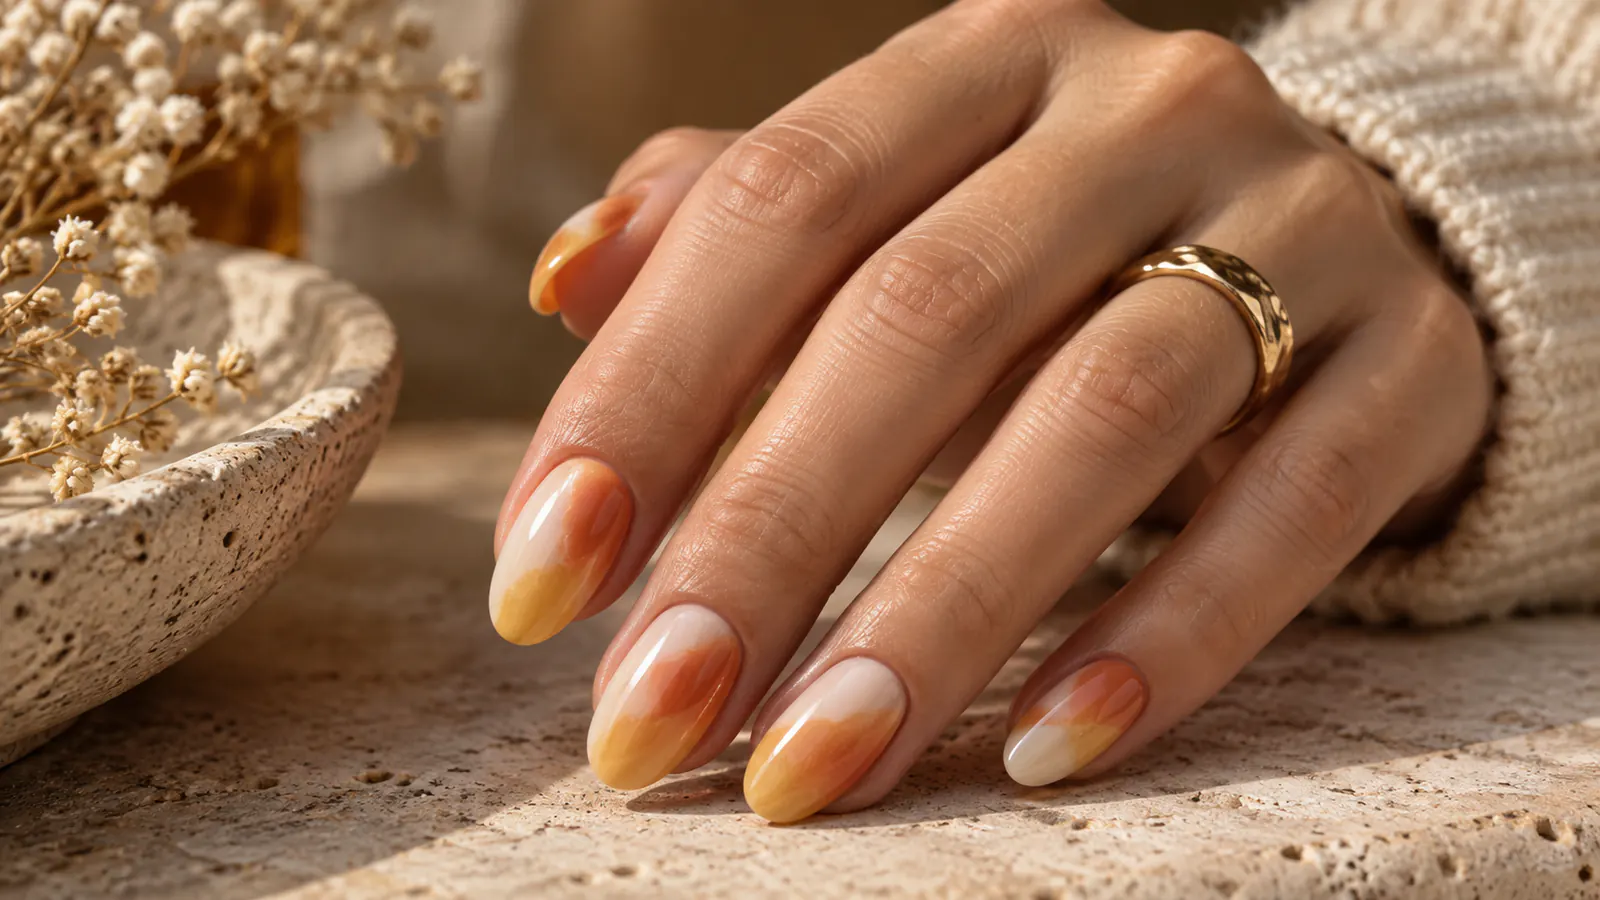
This soft gradient borrows cream, pumpkin orange and pale yellow from candy corn, then blends them into an atmospheric ombré. The result reads as seasonal color rather than novelty nail art.
Use a sponge or airbrush in thin translucent passes. Let the colors overlap irregularly so each nail has its own balance.
How to get the look
- Start with a translucent ivory base.
- Blend orange through the center and pale yellow near the tip.
- Soften the transitions and add a glossy top coat.
Best for: Medium almond nails and bright but sophisticated Halloween color.
23. Acid-green slime micro-tips
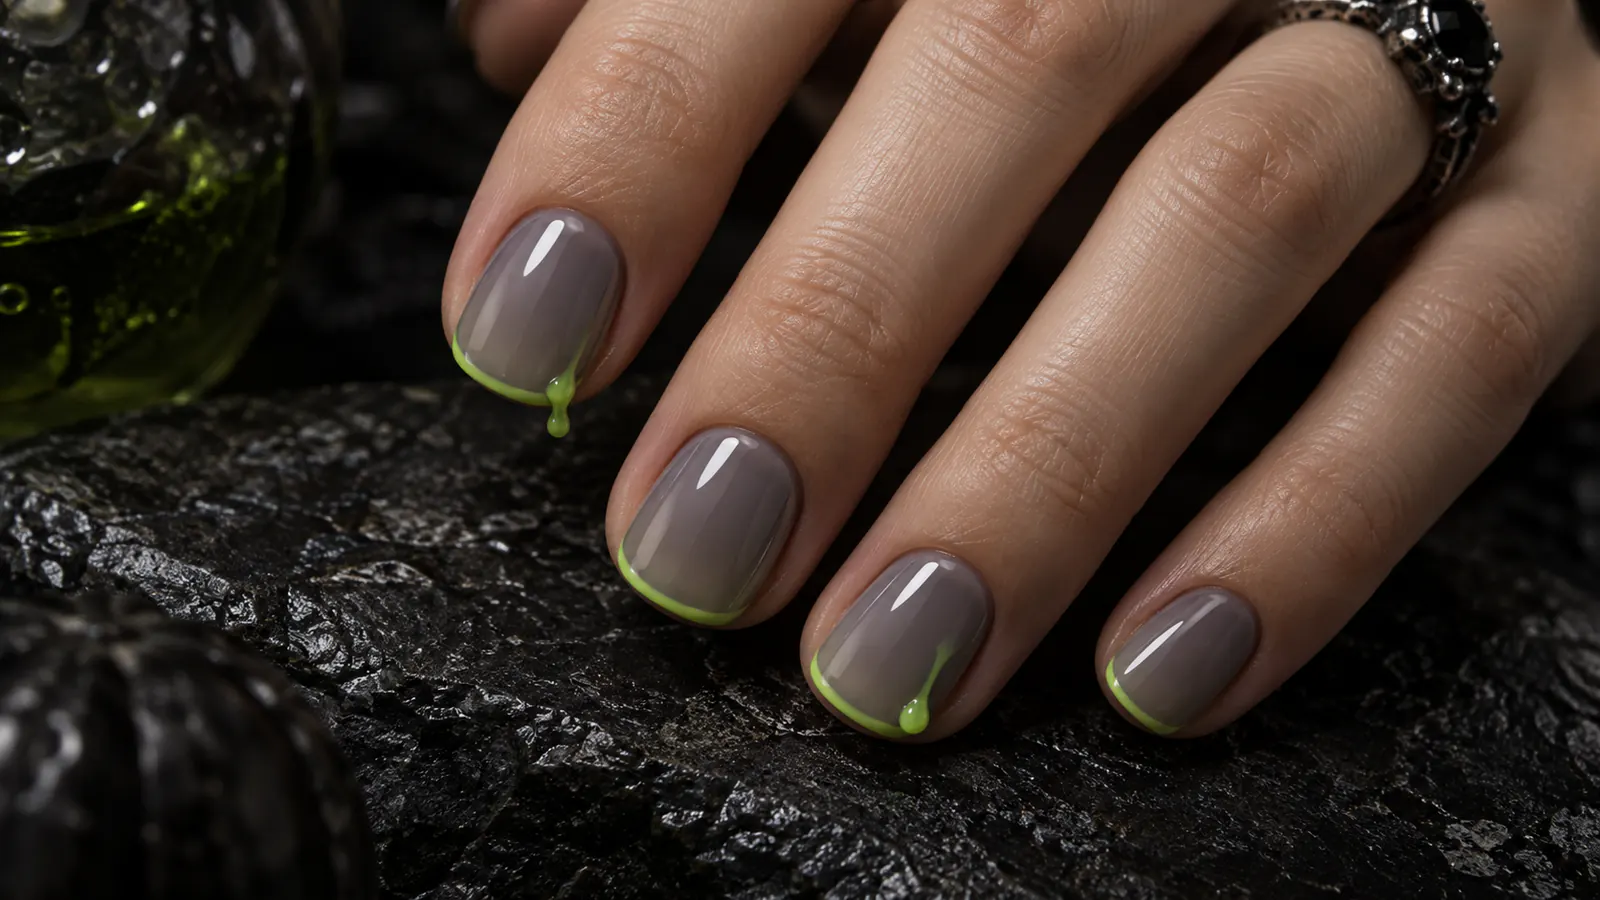
Acid green looks surprisingly wearable when confined to a micro-French tip. A cool gray base tempers the brightness, while two tiny rounded drops create the slime reference.
This is one of the easier Halloween nail ideas to adapt at home because the line does not need to be perfectly symmetrical. Keep it thin so the color remains an accent.
How to get the look
- Apply a cool translucent gray base.
- Paint a narrow acid-green tip.
- Add one or two rounded drops and seal.
Best for: Very short nails and playful high-contrast manicures.
24. Black cats and silver moons
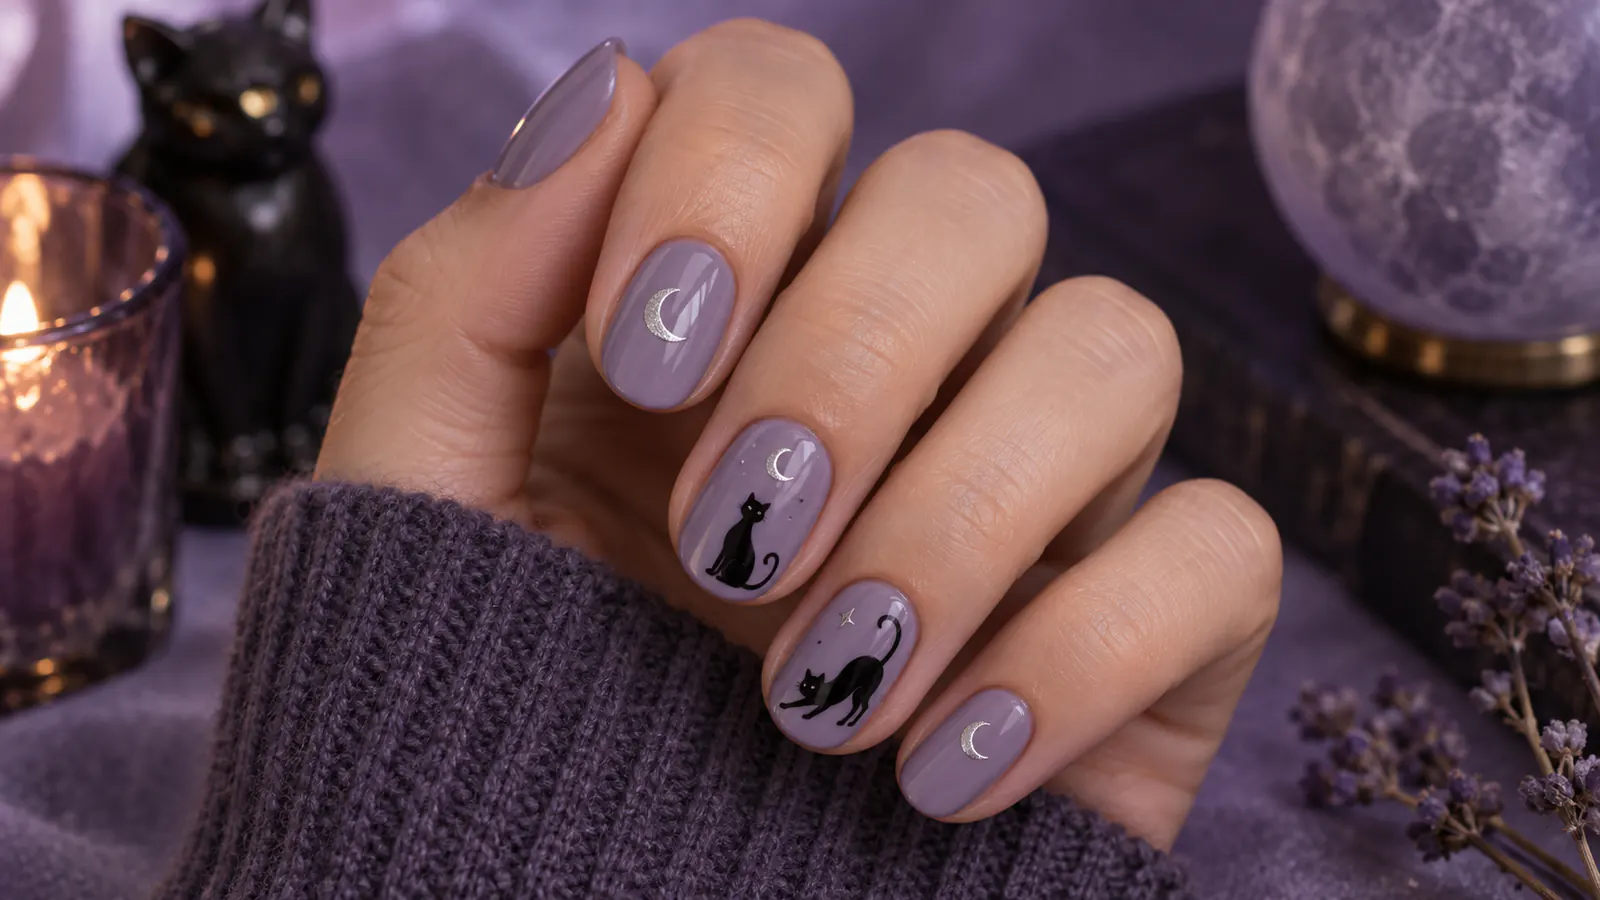
Black-cat nail art can stay elegant when the silhouette is reduced to pointed ears, a curved back and a fine tail. Dusty lavender adds a soft, unexpected base for the familiar Halloween motif.
Alternate cat accents with small silver crescents rather than placing both on every nail. The varied layout gives each detail enough breathing room.
How to get the look
- Paint a dusty-lavender base.
- Add simplified black cat silhouettes on accent nails.
- Balance with silver crescents and finish with gloss.
Best for: Cute Halloween nails and softer color palettes.
25. Amethyst chrome stars
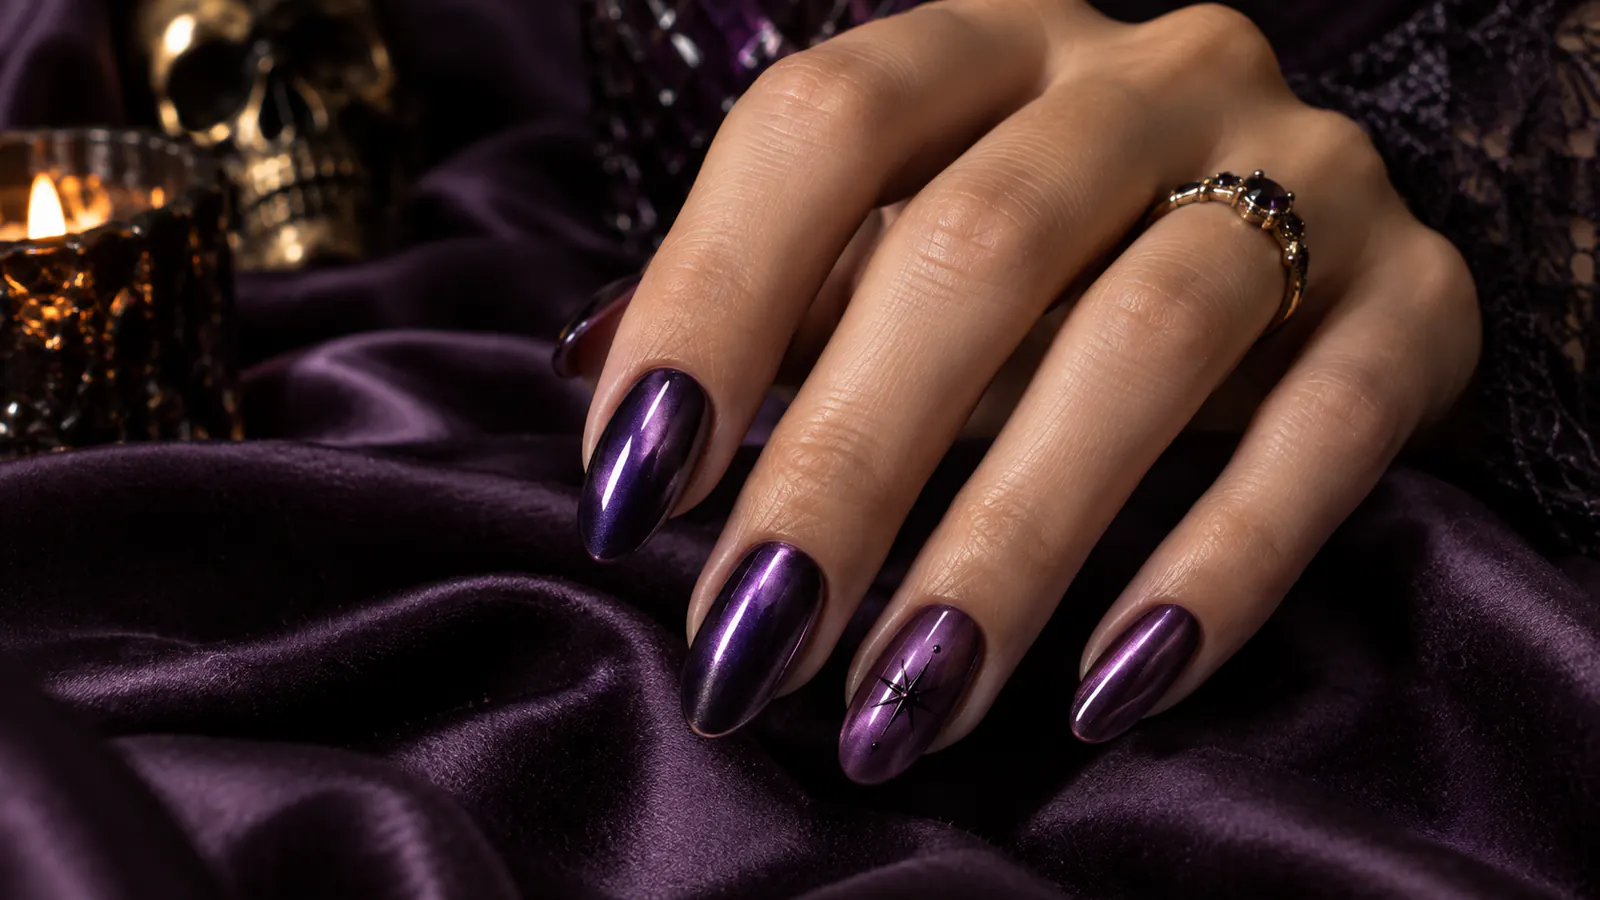
Amethyst chrome combines a jewel-tone purple base with a cool reflective shift. Delicate starbursts emphasize the light-catching finish without hiding it.
Choose one or two stars per nail and vary their size. Too much line art can interrupt the smooth chrome surface that makes this design special.
How to get the look
- Apply a deep purple gel base.
- Rub in an amethyst chrome powder.
- Draw sparse silver starbursts and seal.
Best for: Medium almond nails and celestial Halloween looks.
26. Minimal mummy-wrap nails
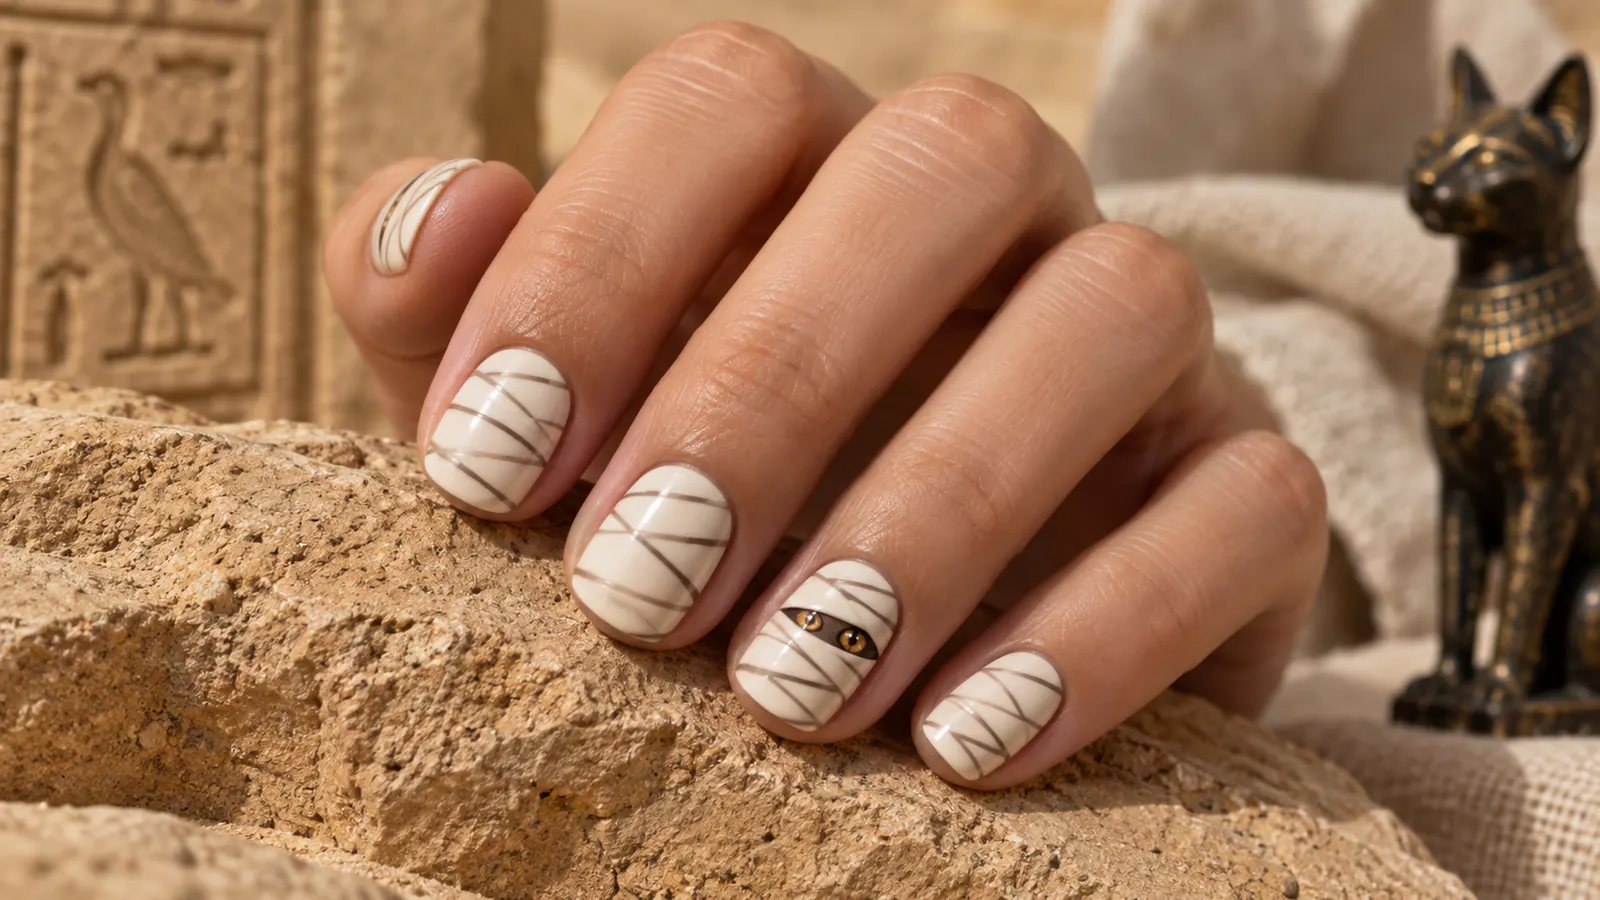
Mummy nails work best when the wrapped lines are irregular and the colors are softened. Ivory and taupe create depth, while one pair of tiny amber eyes adds a restrained focal point.
Leave several nails as simple wraps and reserve the eyes for one accent. This keeps the pattern clean on short or medium lengths.
How to get the look
- Apply a warm ivory base.
- Layer uneven taupe bandage lines.
- Add two tiny amber eyes to one accent nail.
Best for: Short nails and easy graphic Halloween nail art.
27. Skeleton hand line art
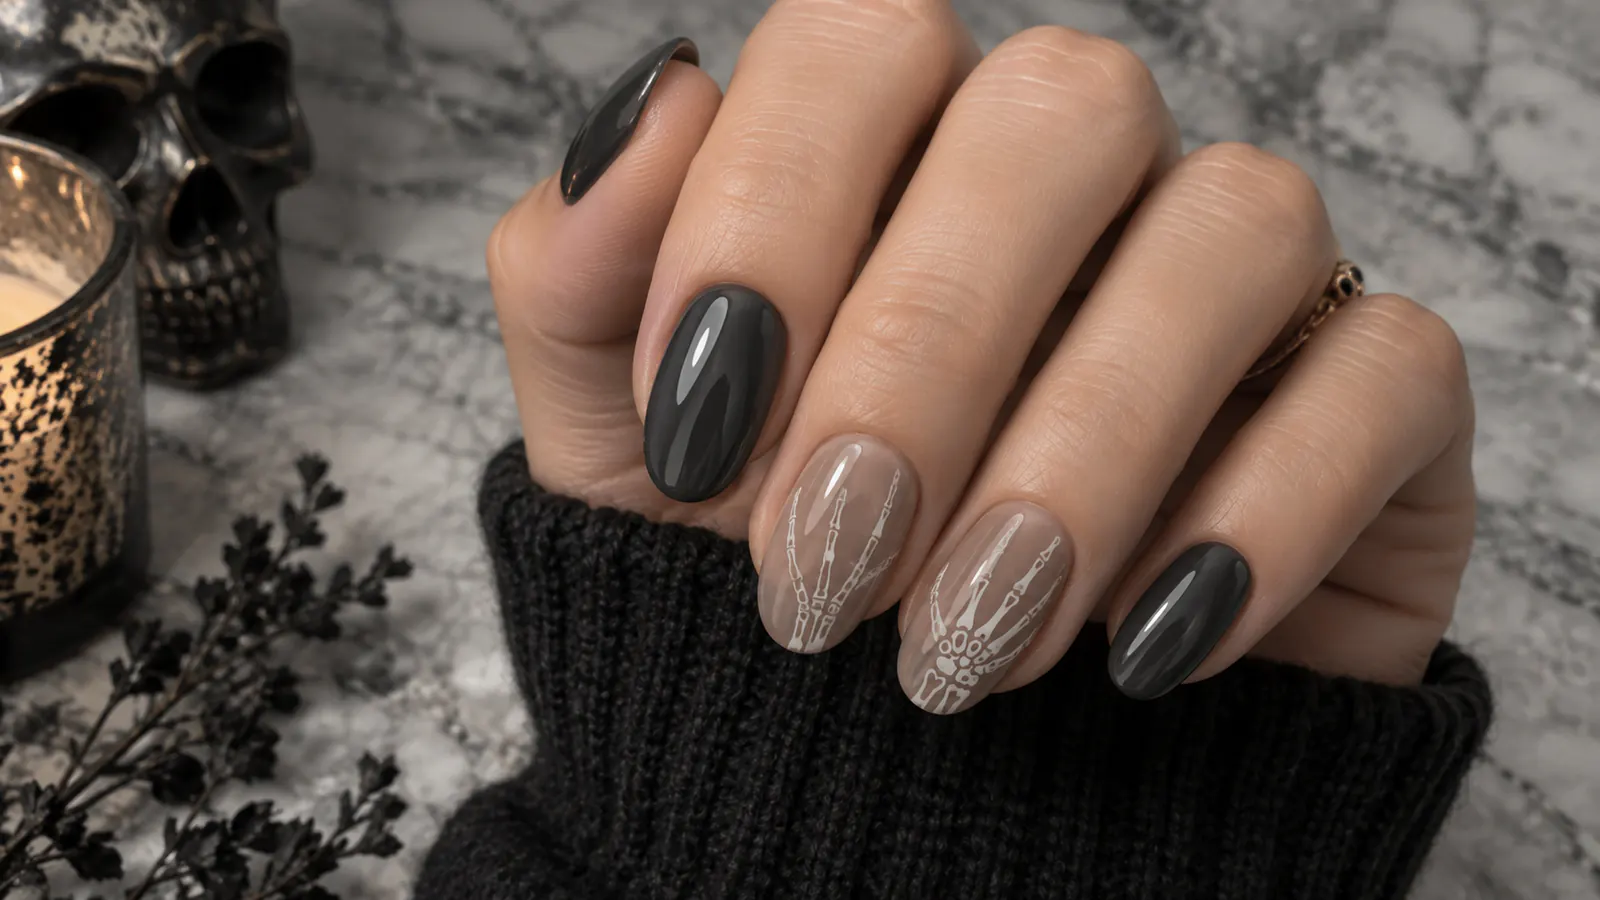
Skeleton line art gives a literal Halloween motif a clean editorial treatment. A smoky beige or charcoal base reduces contrast just enough to keep the white bones from feeling harsh.
Use the design on two nails and let the remaining nails carry the base color. A detail brush or fine decal is the most reliable way to preserve the narrow joints.
How to get the look
- Paint a smoky neutral base.
- Map the palm and fingers with fine white lines.
- Add small joints, then level with top coat.
Best for: Medium nails and precise monochrome designs.
28. Surreal eye accents
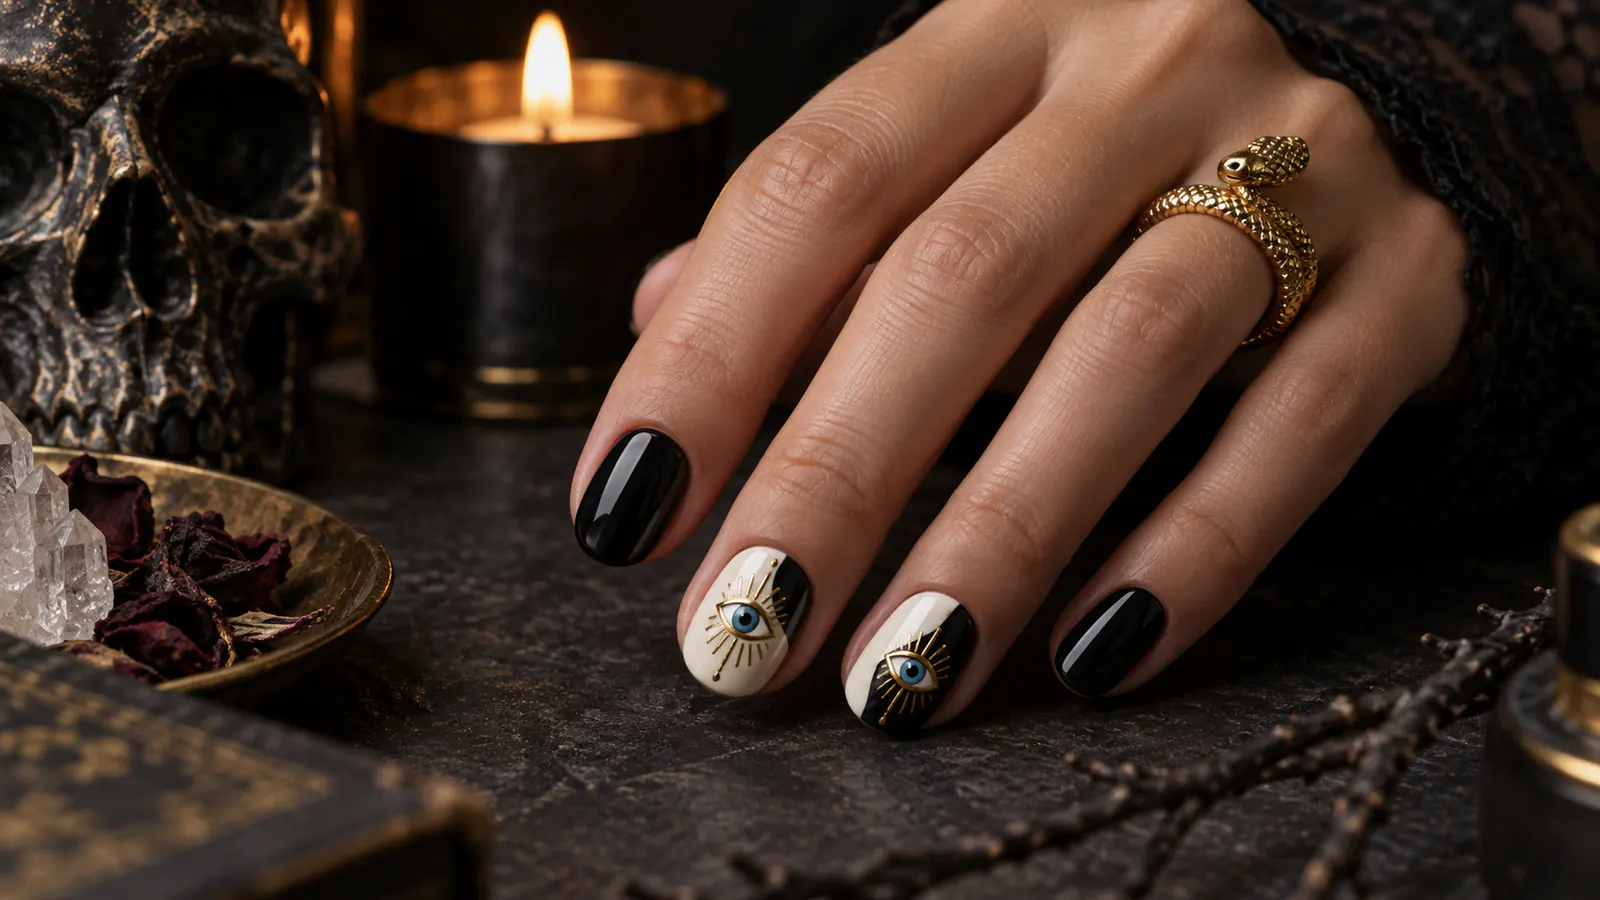
Surreal eye motifs feel eerie without leaning into gore. Cream, black and one clear blue iris form a strong palette, while fine gold rays create a jewelry-like finish.
One detailed eye on each hand is enough. Repeat the gold as tiny dots or lines elsewhere so the accent does not feel isolated.
How to get the look
- Create alternating cream and black nails.
- Paint one blue eye motif on each hand.
- Add restrained gold rays and a glossy finish.
Best for: Statement accent nails and artistic Halloween manicures.
29. Forest-green celestial nails
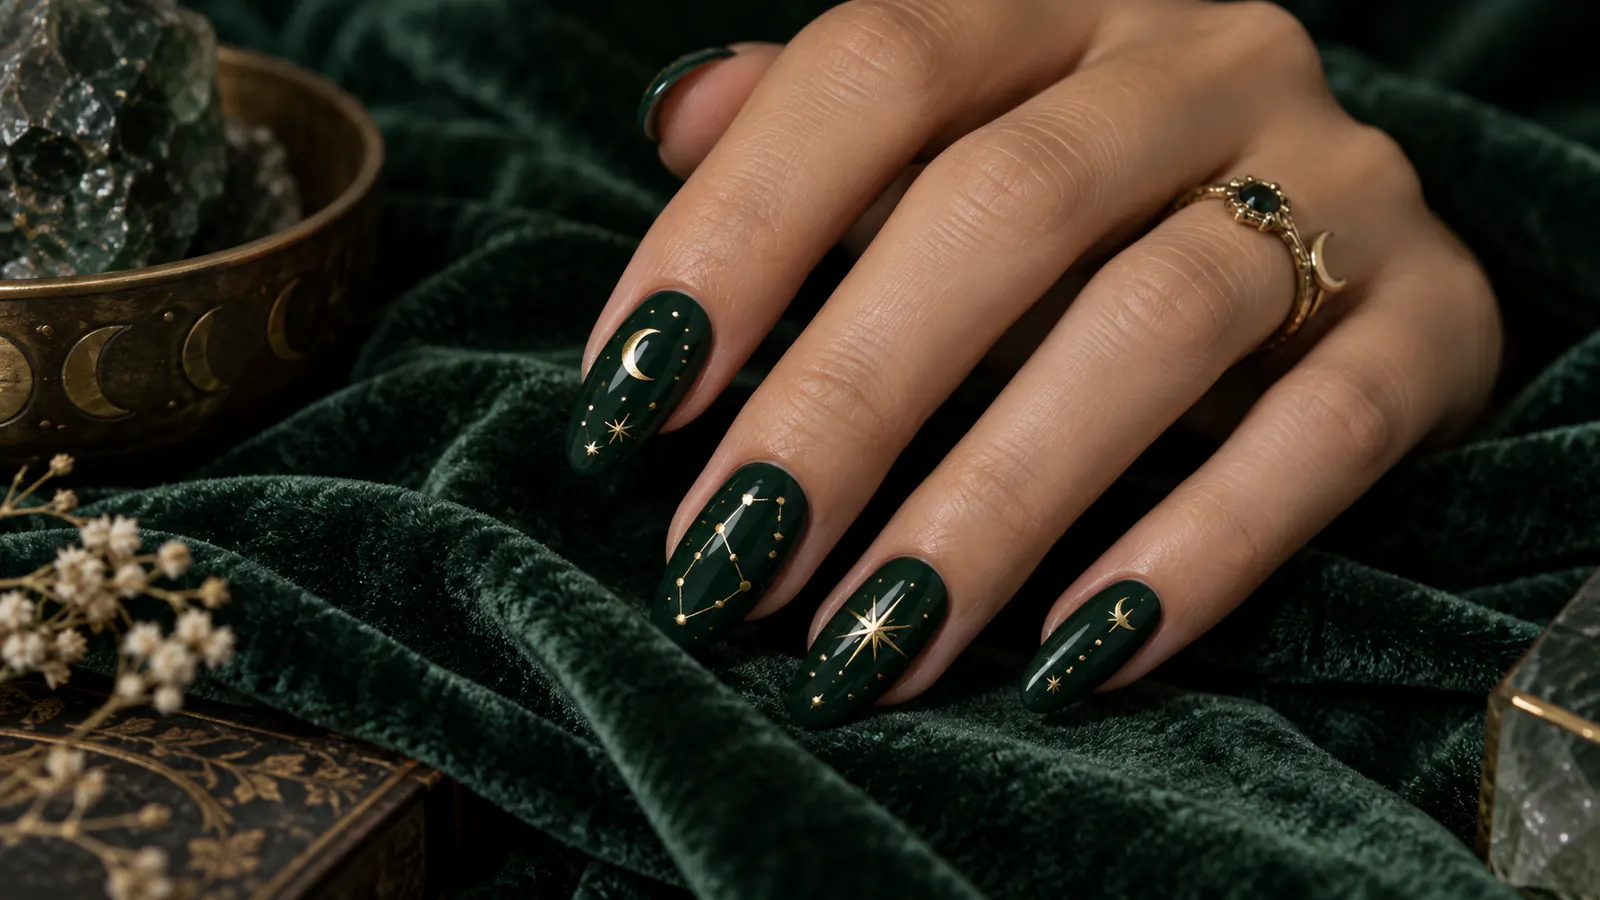
Dark green is a sophisticated alternative to black for witchy nail art. Gold moons, stars and constellation lines add warmth and remain wearable through November.
Mix solid green nails with two translucent celestial accents. The lighter spaces stop the metallic details from disappearing against the deep base.
How to get the look
- Apply deep forest-green polish.
- Add fine gold moons and stars.
- Connect selected dots with delicate constellation lines.
Best for: Short or medium nails and elevated witchy style.
30. Matte-and-gloss black nails
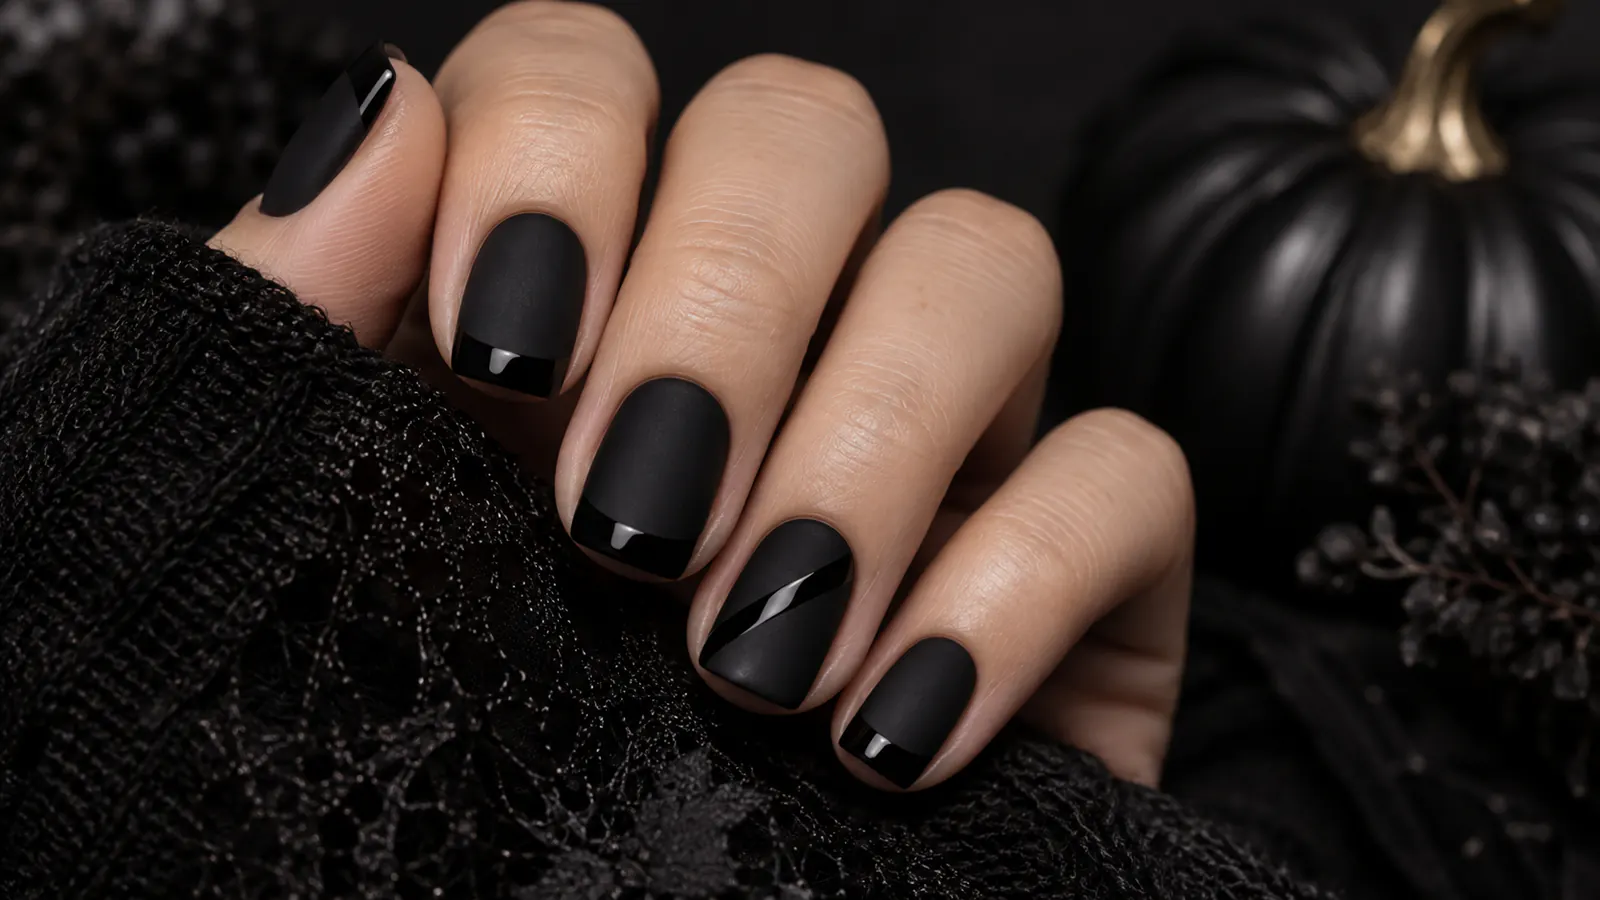
Matte-and-gloss black nails prove that one color can still have dimension. Glossy tips, arcs and diagonal panels appear only when the light moves, giving the manicure a quiet graphic quality.
Apply the matte top coat first, then paint glossy details over it. Avoid a final all-over top coat because it would erase the contrast.
How to get the look
- Paint all nails opaque black.
- Apply matte top coat and let it cure.
- Add glossy black tips or diagonal shapes.
Best for: Short nails, minimalists and easy salon requests.
31. Vampire-red ombré
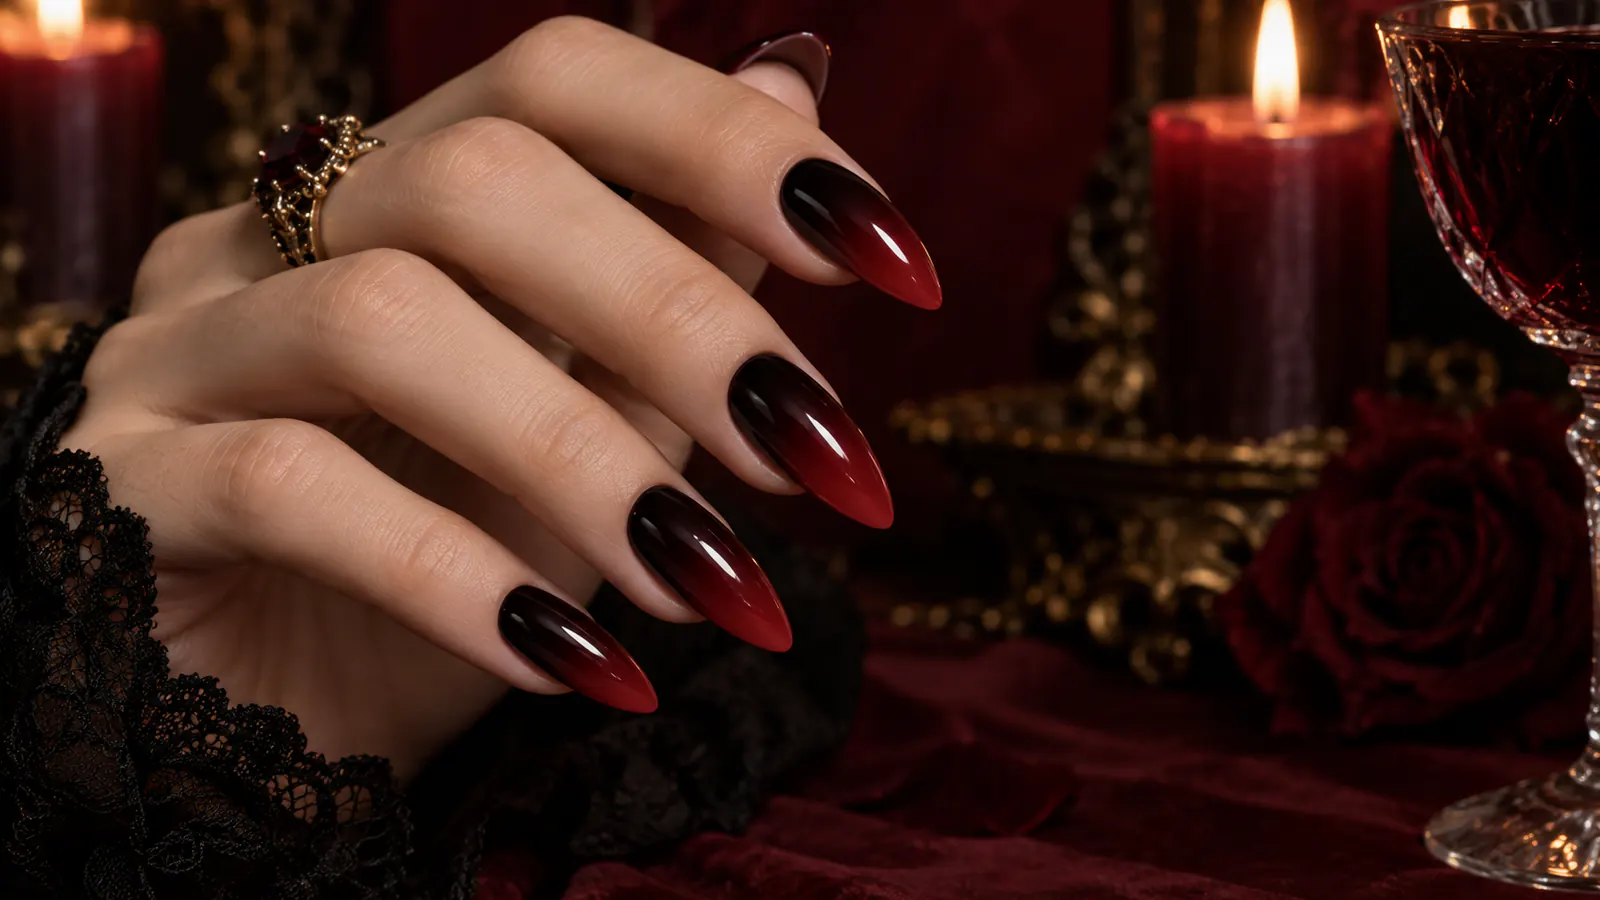
Vampire-red ombré uses color and light rather than painted motifs. The black-cherry perimeter creates depth while a brighter crimson center makes each nail appear illuminated.
The transition should stay smooth and translucent. A glassy top coat is important because any texture interrupts the glowing effect.
How to get the look
- Lay down a deep black-cherry base.
- Blend crimson into the center of each nail.
- Repeat thin layers and finish with high gloss.
Best for: Almond nails and dramatic color without nail art.
32. Misty graveyard silhouettes
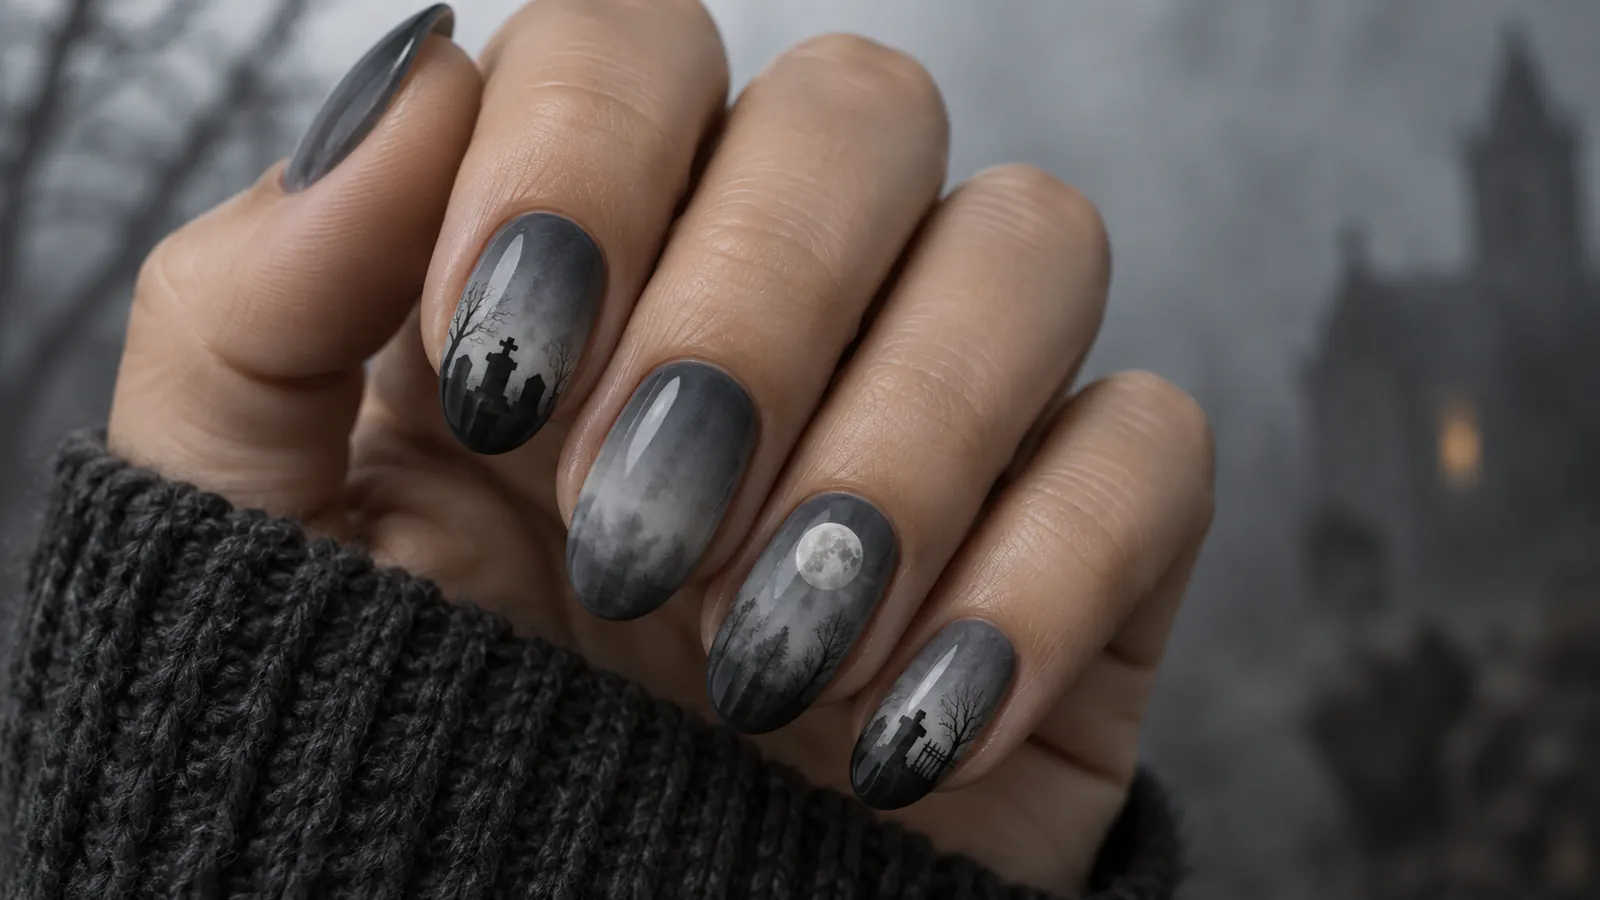
A misty gray gradient provides depth for very small cemetery silhouettes. Keeping the trees and headstones distant and fine makes the scene atmospheric rather than theatrical.
Use the landscape across two or three nails instead of repeating it. Solid smoky gray on the remaining nails keeps the panorama readable.
How to get the look
- Blend light and medium gray into a foggy base.
- Paint tiny distant trees and headstones.
- Soften selected edges before sealing.
Best for: Medium-length nails and detailed salon art.
33. Charcoal aura nails
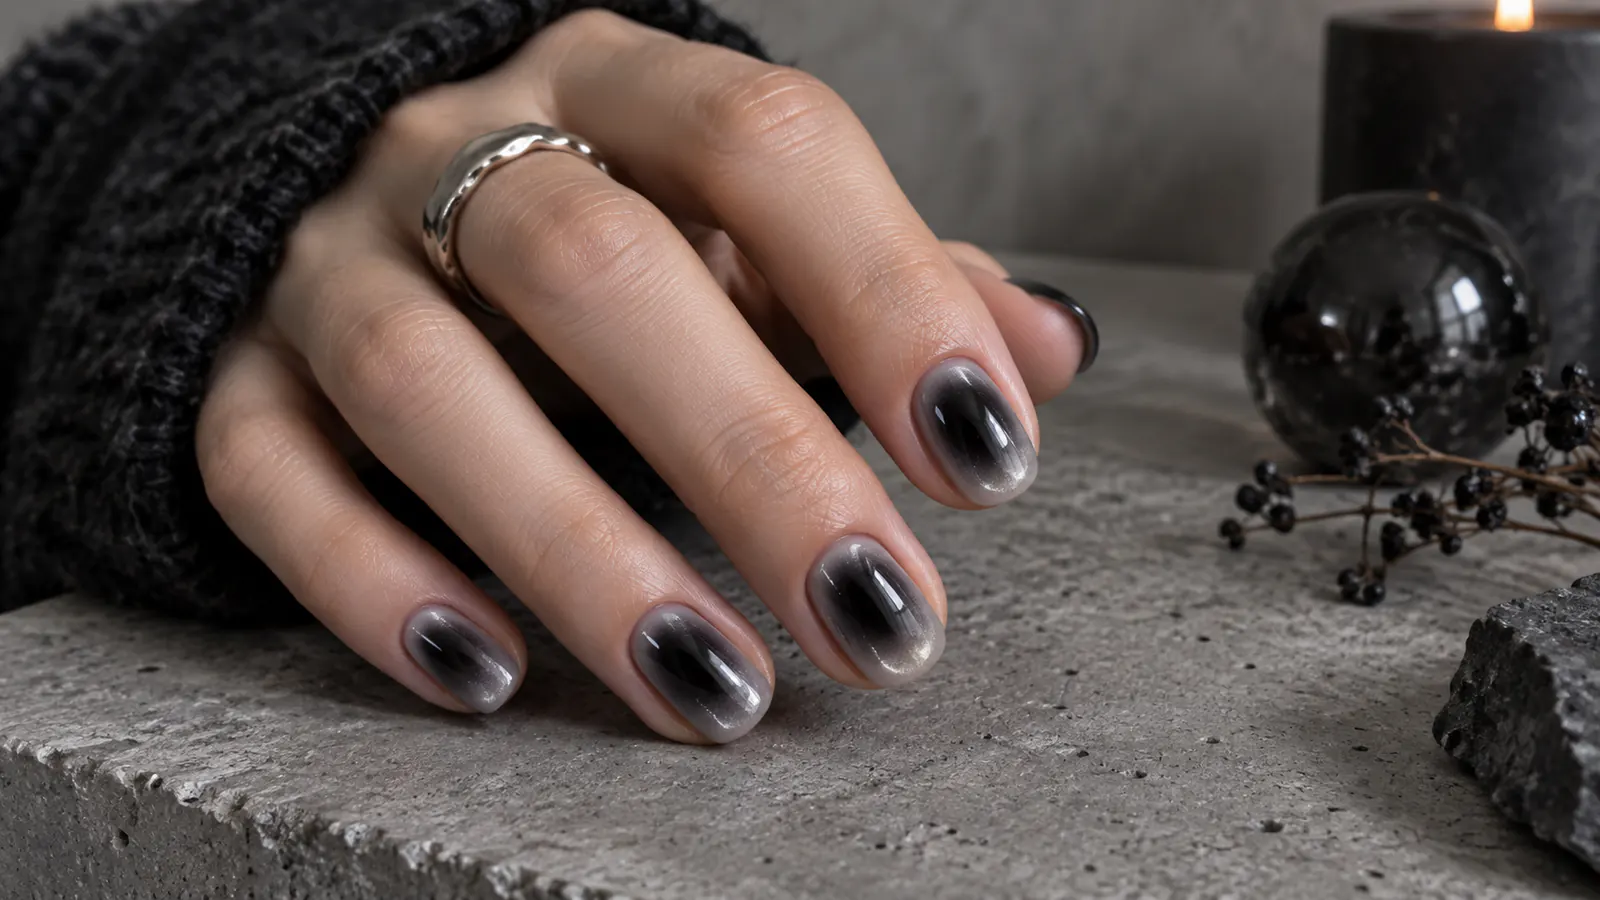
Charcoal aura nails are an abstract route into Halloween beauty. Soft black centers and gray edges feel smoky, while a thin pearl halo catches light around the gradient.
This look is forgiving on short nails because the blend does not rely on exact symmetry. Keep the shimmer extremely fine for a polished result.
How to get the look
- Apply a translucent gray base.
- Diffuse charcoal and black through the center.
- Add a fine pearly halo and top coat.
Best for: Short nails and understated smoky manicures.
34. Orange-and-black checkerboard
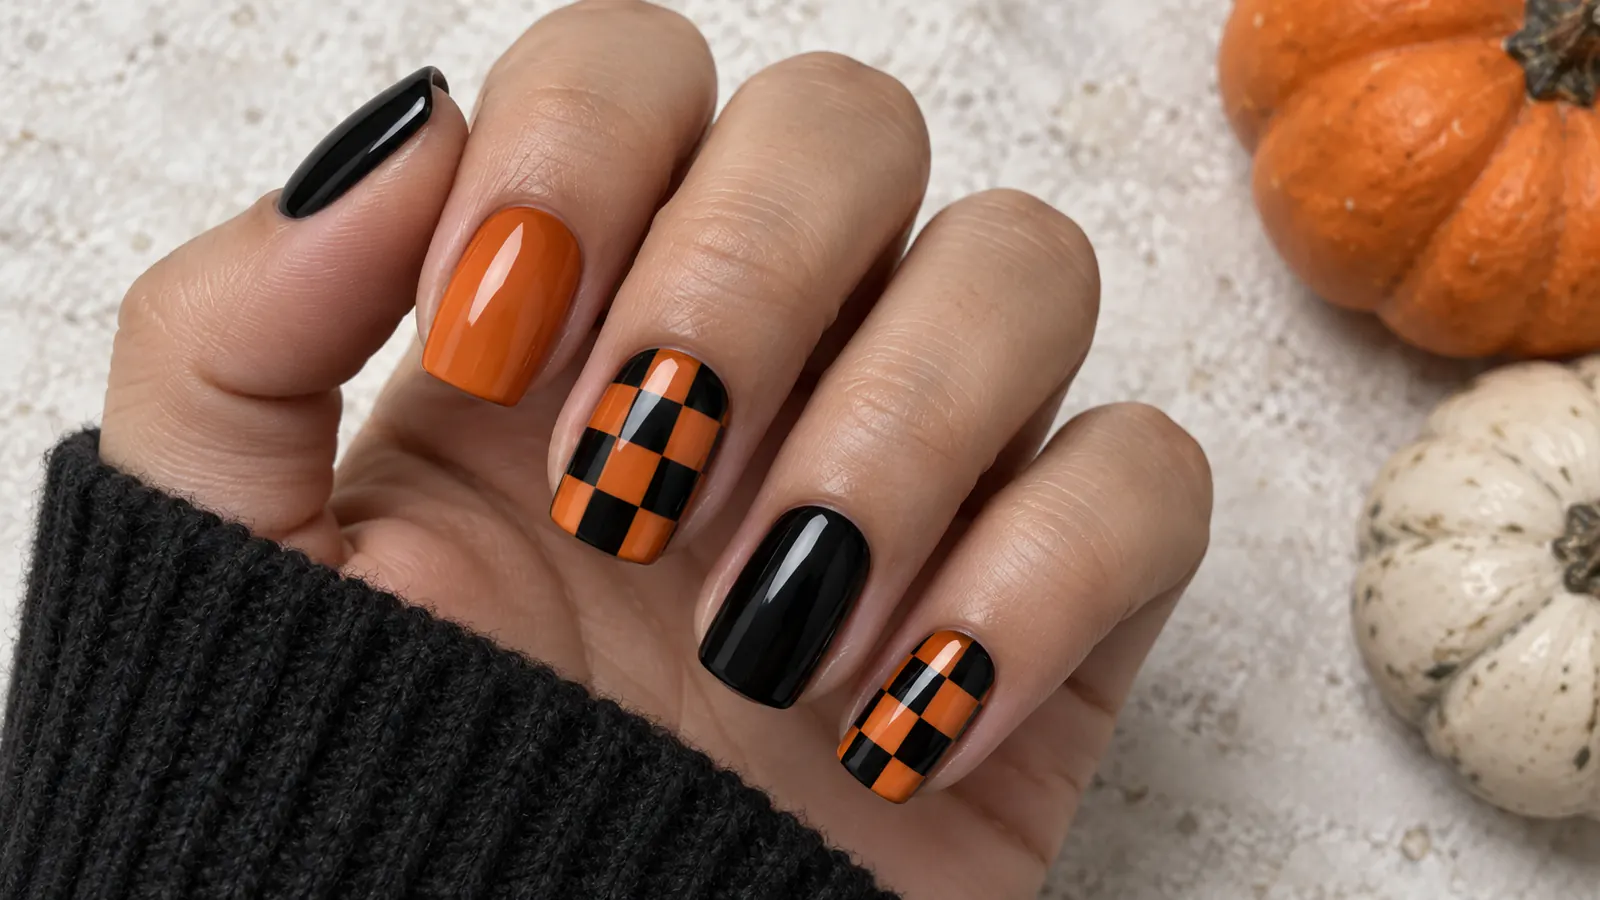
Burnt orange makes a black checkerboard immediately seasonal. Following the natural curve of the nail keeps the grid flattering instead of forcing perfectly square boxes onto a rounded surface.
Use the full pattern on two nails and simplify the others with solid color or partial checks. That variation makes the set easier to read.
How to get the look
- Paint a burnt-orange base.
- Map a curved grid with a fine black liner.
- Fill alternating sections and add gloss.
Best for: Short squoval nails and bold retro Halloween style.
35. Pearl-white cobwebs
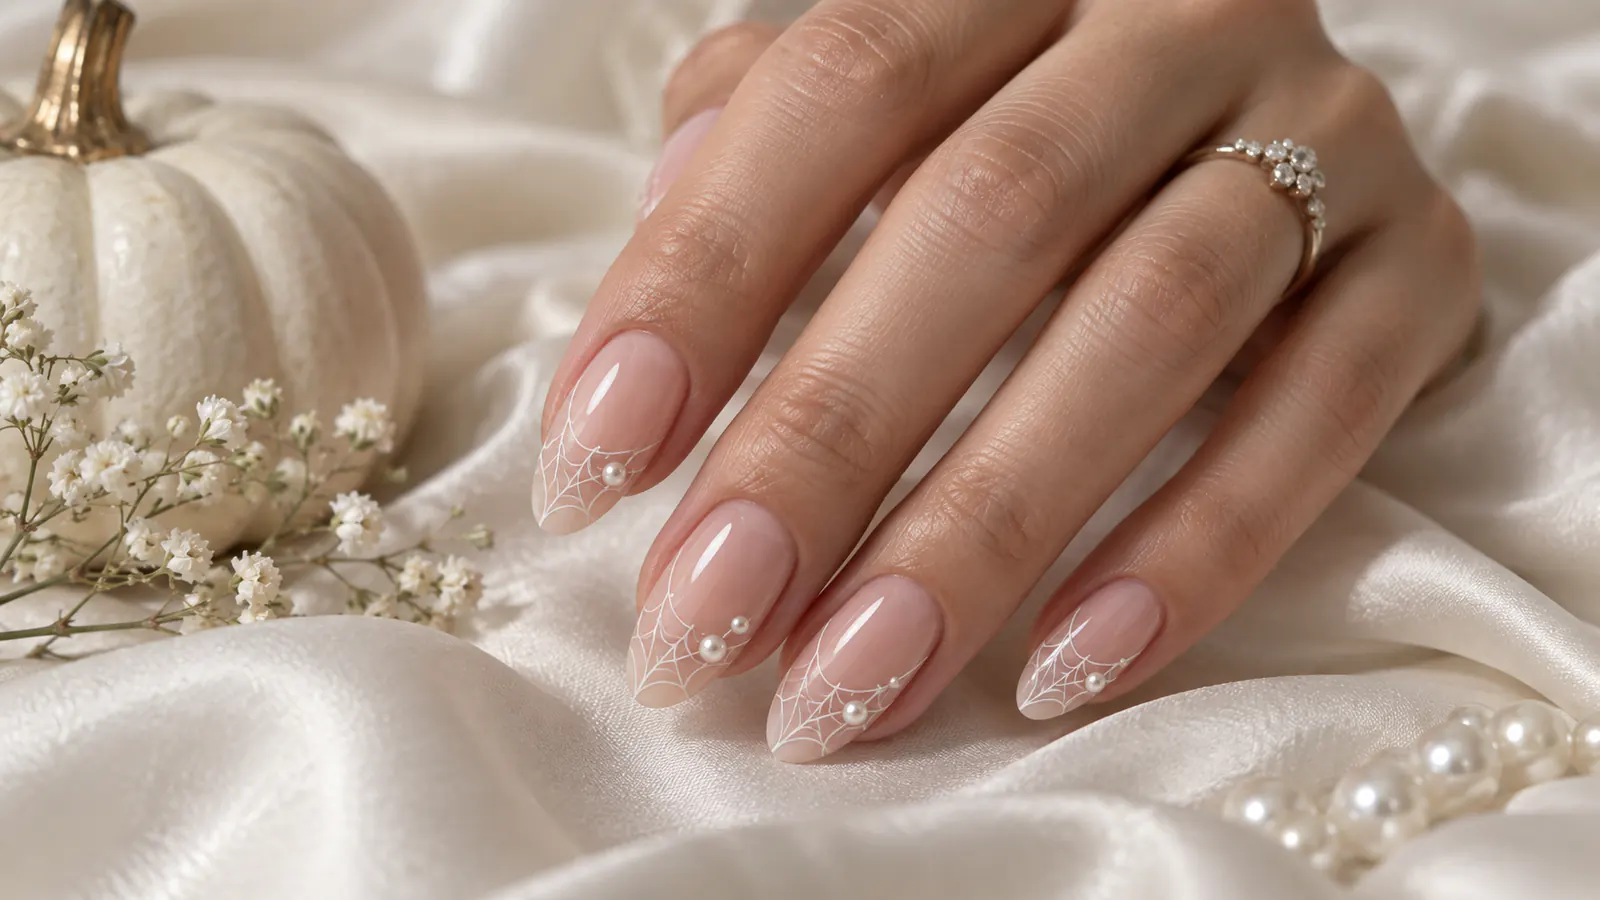
White cobwebs over blush polish are subtle enough for readers who rarely wear dark nail color. A pearly finish and tiny crystal-like dots make the lines visible as the hand moves.
Keep the web asymmetrical and begin it at a corner. The motif should cover only part of the nail so the sheer base remains the main feature.
How to get the look
- Apply a sheer blush base.
- Draw corner webs in pearl-white polish.
- Add a few reflective dots and seal.
Best for: Neutral palettes, weddings and delicate Halloween nails.
36. Emerald cat-eye nails
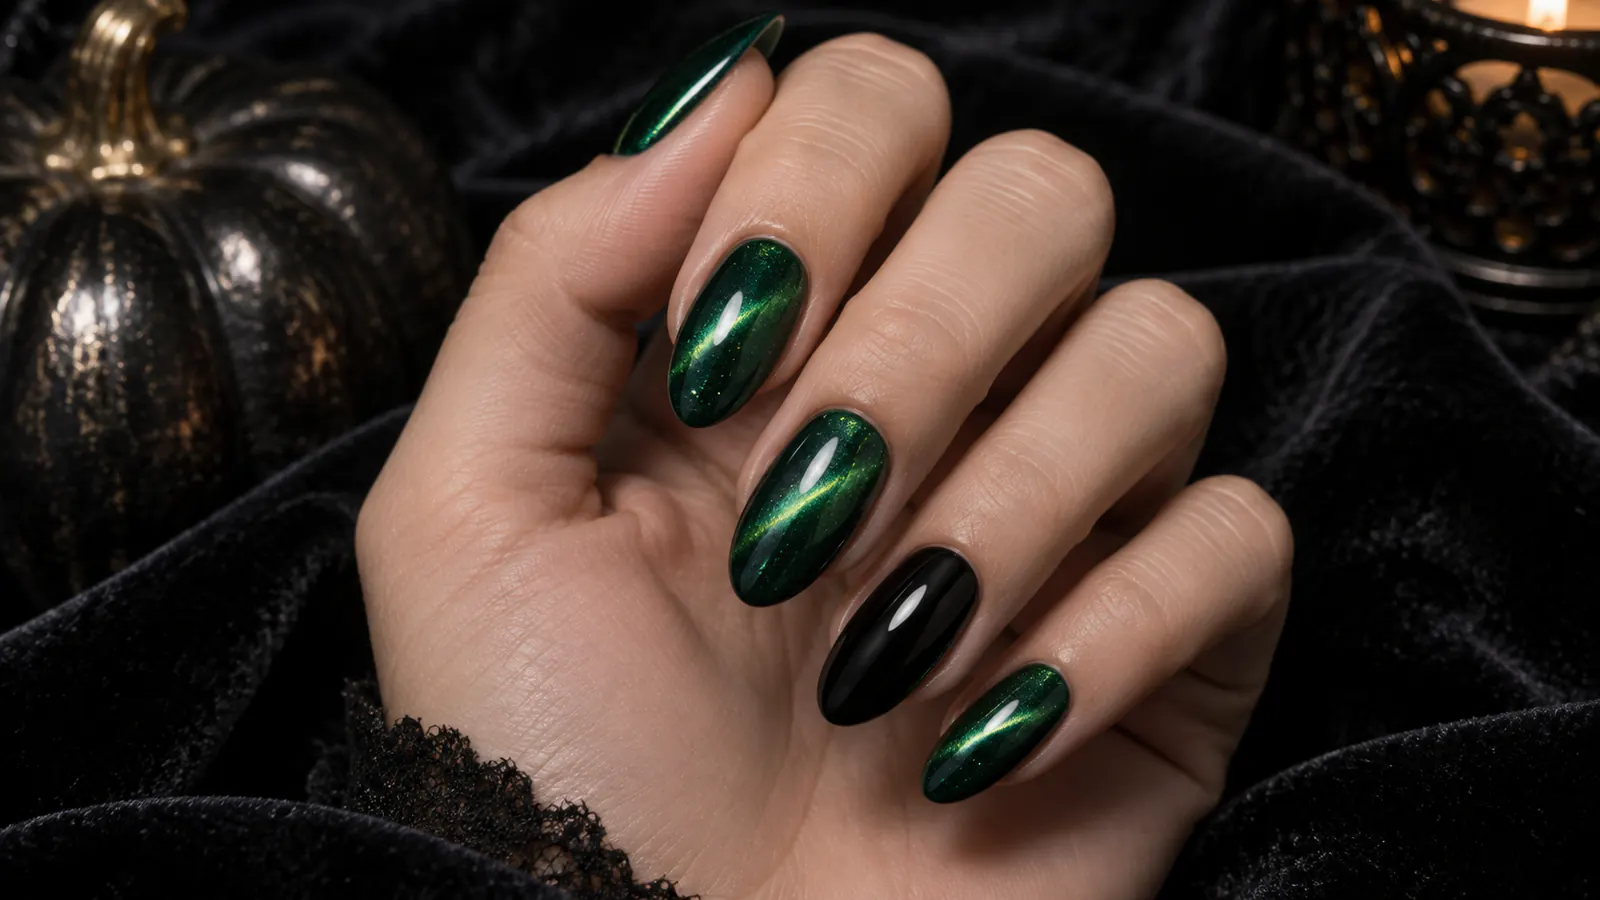
Emerald cat-eye polish produces a moving stripe of light that feels luxurious and slightly mysterious. One black accent sharpens the green without adding detailed art.
For the strongest effect, hold the magnet at the same angle on every nail. A dark base will deepen the emerald and make the luminous line appear brighter.
How to get the look
- Apply a black or deep-green base.
- Float on emerald magnetic polish.
- Shape the light with a magnet, cure and seal.
Best for: One-color lovers and fast salon Halloween manicures.
37. Tiny pumpkin-patch nails
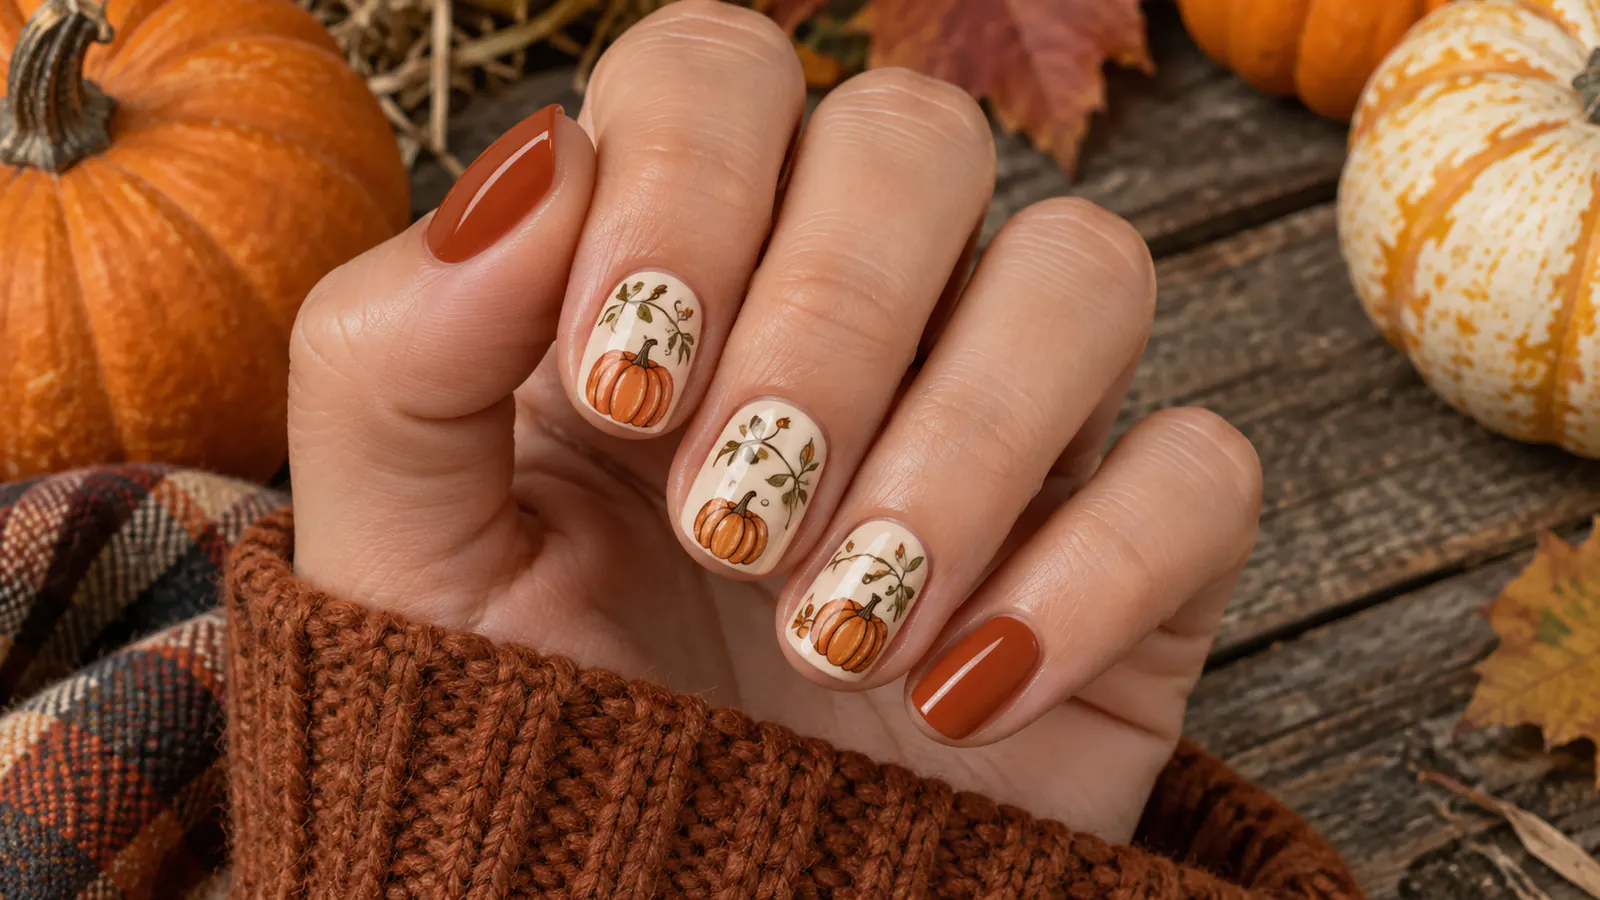
Tiny pumpkins, fine vines and a few muted leaves create a warmer Halloween look. Cream space around each element keeps the illustration from becoming busy.
Vary the pumpkin sizes and place some partially outside the nail edge. The cropped composition feels more natural than centering one identical pumpkin on every nail.
How to get the look
- Paint a warm cream base.
- Add small rust-orange pumpkin shapes.
- Connect a few with brown vines and muted leaves.
Best for: Short or medium nails and cute seasonal designs.
38. Pastel ghost party
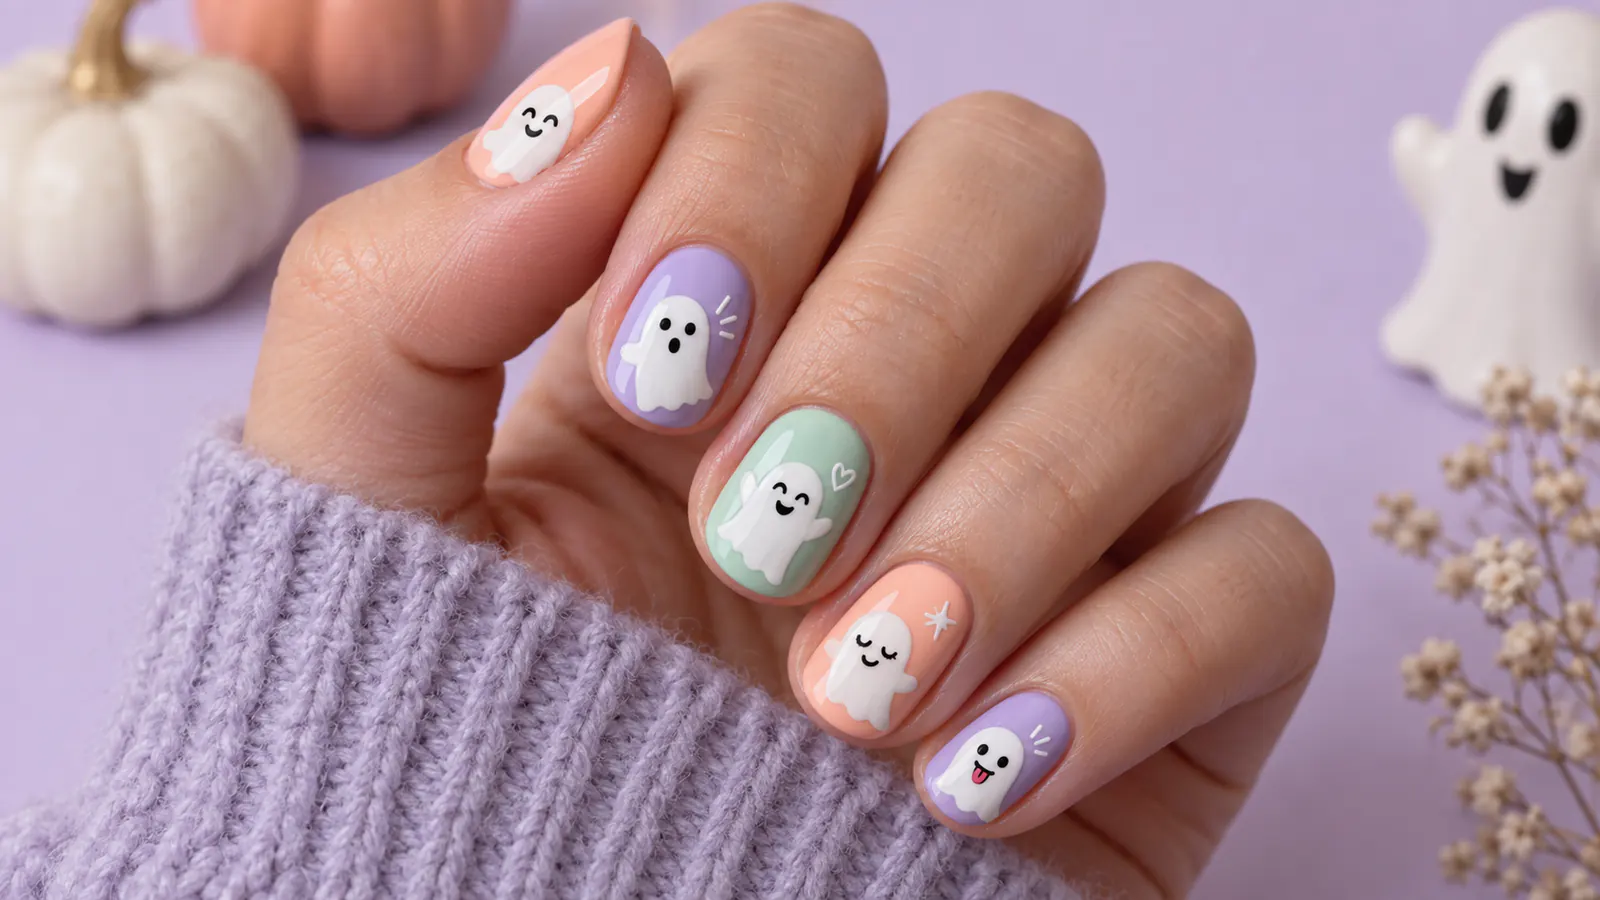
Pastel ghosts are bright, friendly and especially suited to cute Halloween nail searches. Soft peach, lilac and mint create variety while repeating the same white motif keeps the set cohesive.
Use confetti dots sparingly and leave several nails mostly plain. The ghosts should remain the clearest element even in a colorful palette.
How to get the look
- Alternate soft peach, lilac and mint bases.
- Paint small white ghosts on selected nails.
- Add tiny confetti dots and black eyes.
Best for: Cute nail inspiration and playful short manicures.
39. Midnight tarot stars
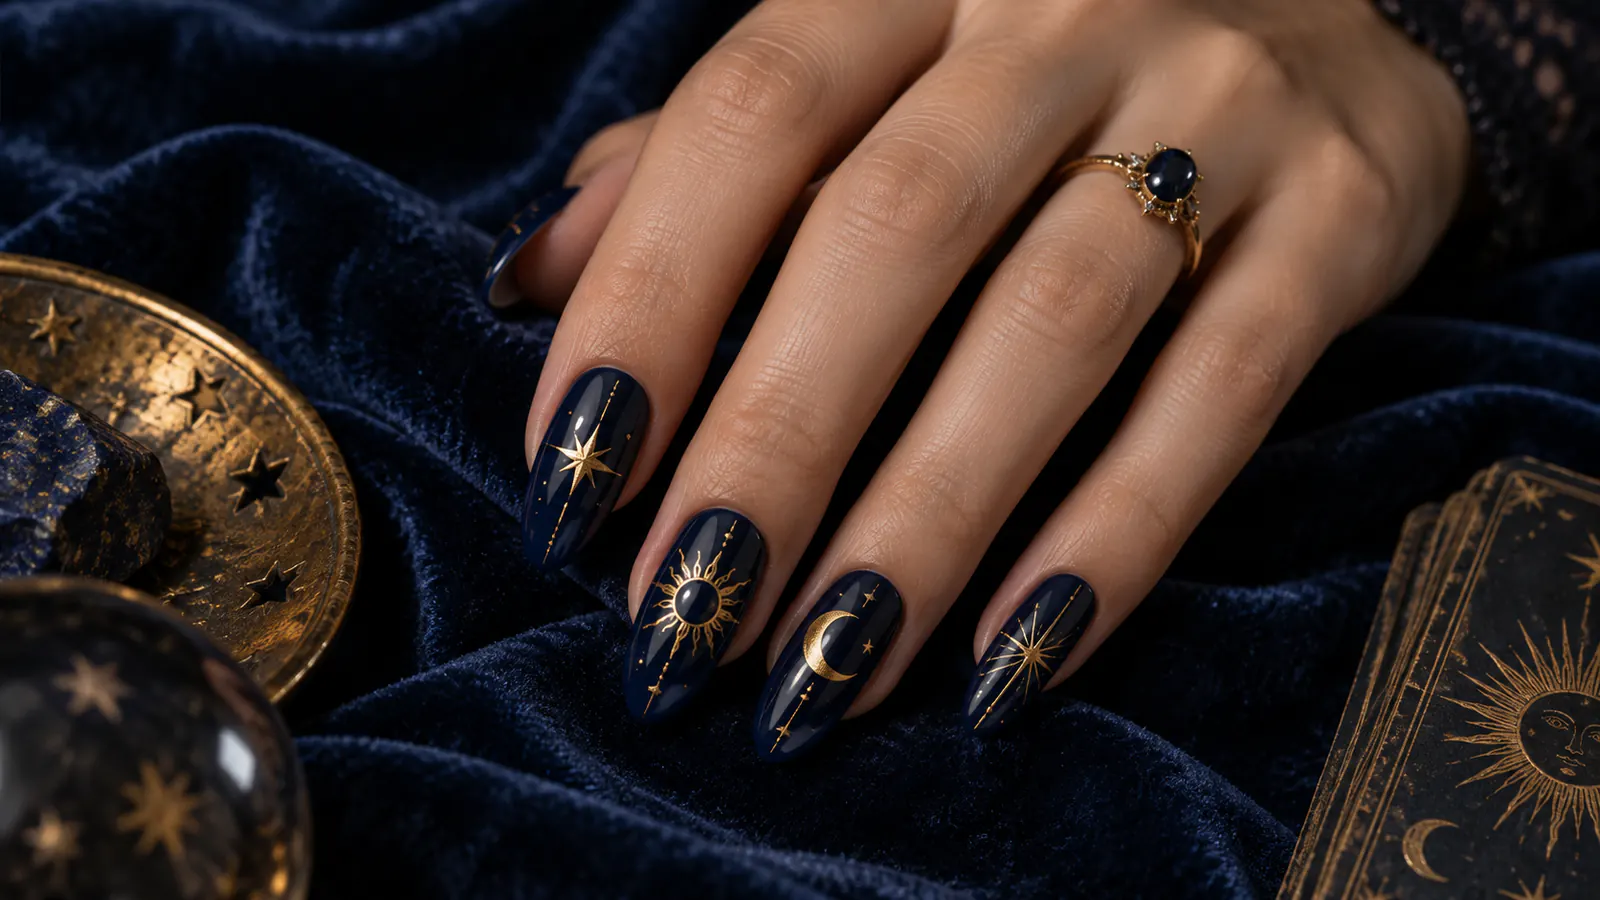
Tarot-inspired stars and moons bring a mystical mood without copying a specific card illustration. Midnight blue creates a softer contrast than black and lets the fine gold details glow.
Choose a few simple symbols and repeat them at different scales. Leaving some nails solid makes the tiny line work feel intentional.
How to get the look
- Apply a deep midnight-blue base.
- Draw selected moons and star symbols in gold.
- Add tiny dots, then finish with gloss.
Best for: Medium nails and refined mystical themes.
40. Romantic black-lace nails
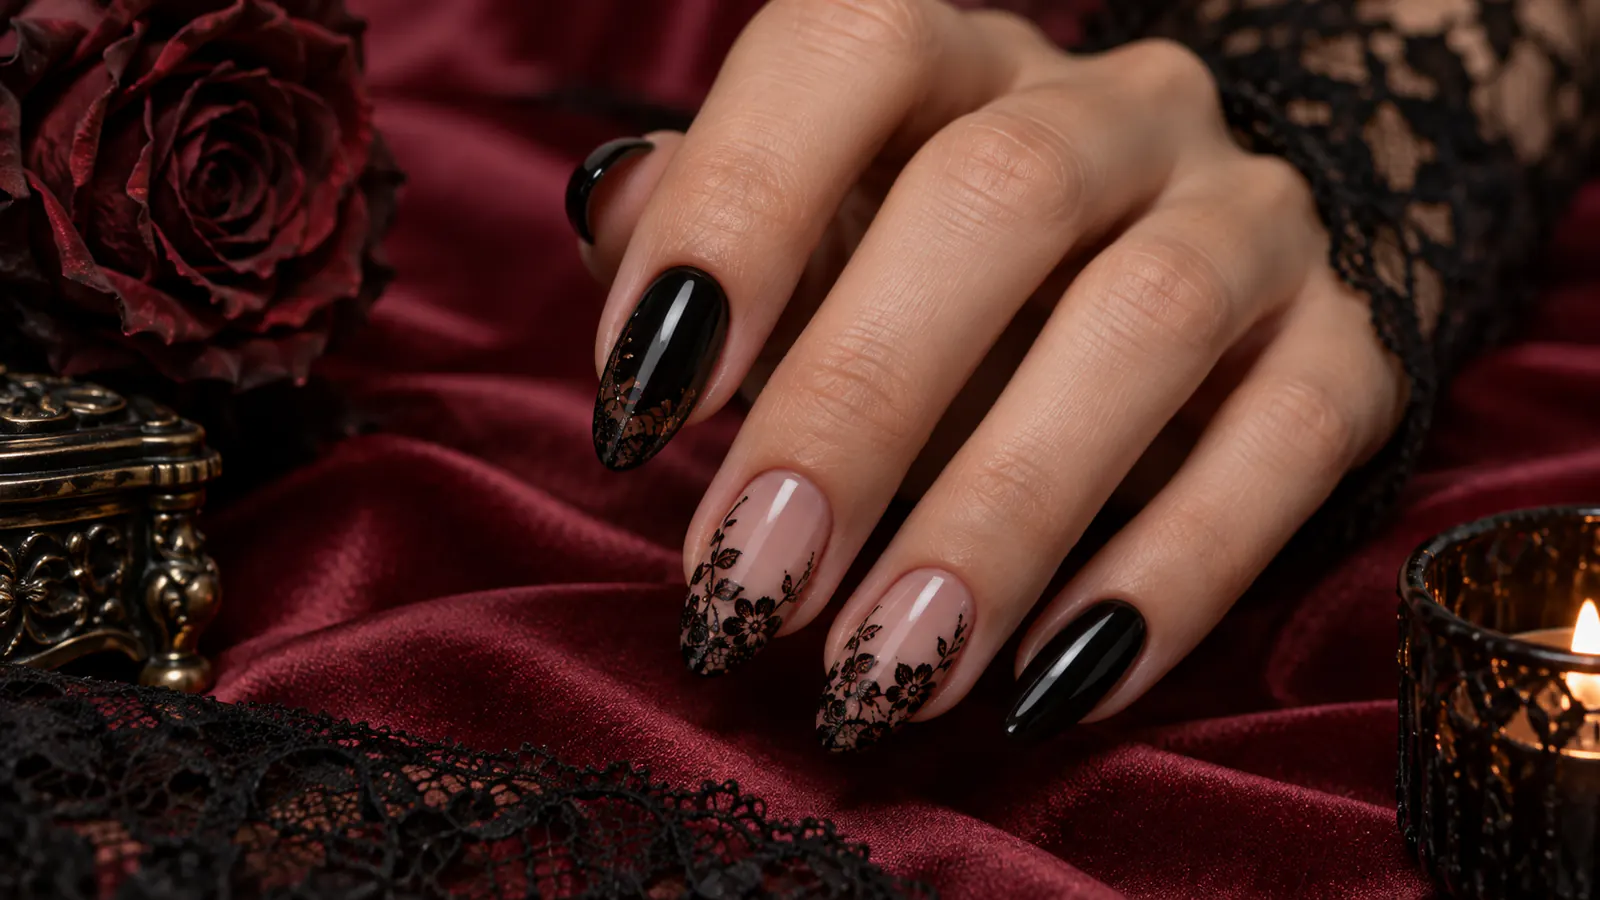
Black lace over rose beige offers a softer, romantic alternative to solid dark nails. The contrast is still clear, but the warm base makes the set easy to pair with everyday clothes.
Use narrow lace panels or corner details instead of covering the full nail. This preserves negative space and helps intricate lines stay legible.
How to get the look
- Apply a rose-beige base.
- Stamp or draw slim black lace panels.
- Clean the sidewalls and seal carefully.
Best for: Date-night manicures and medium almond nails.
41. Tortoiseshell moon accents
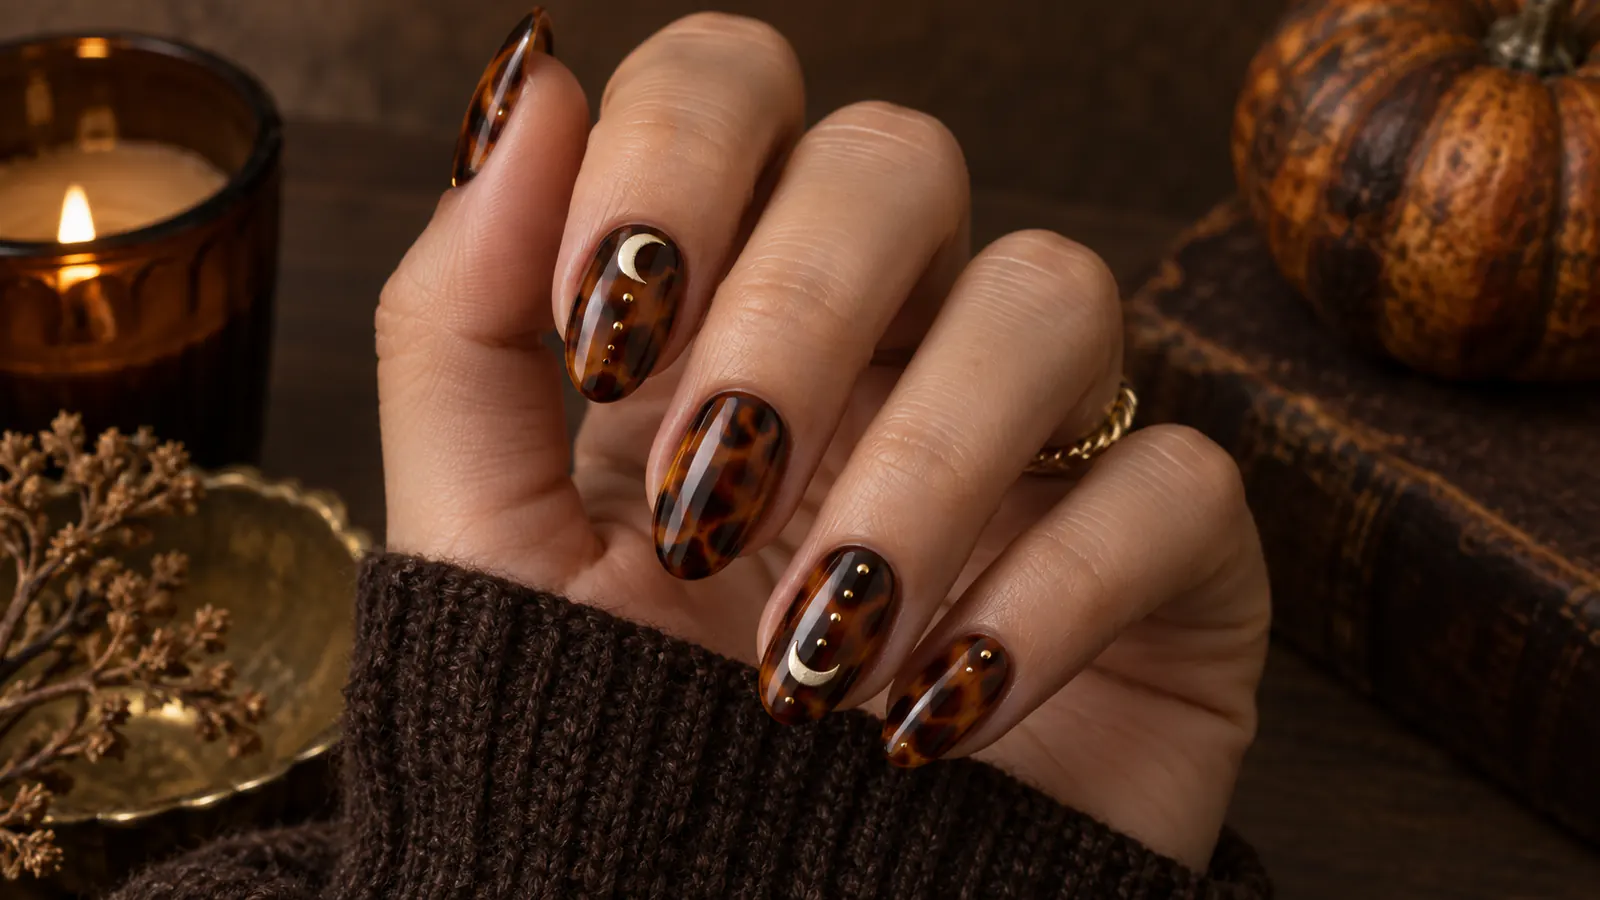
Tortoiseshell already has the amber depth of autumn. Adding tiny gold crescents turns it into a subtle Halloween manicure that still looks current after the holiday.
Place the moons over lighter amber areas so they remain visible. The irregular brown pattern should stay varied from nail to nail.
How to get the look
- Layer translucent amber and brown patches.
- Add tiny gold crescents to selected nails.
- Finish with a thick leveling top coat.
Best for: Long-wear seasonal manicures and warm neutral style.
42. Silver chrome web nails
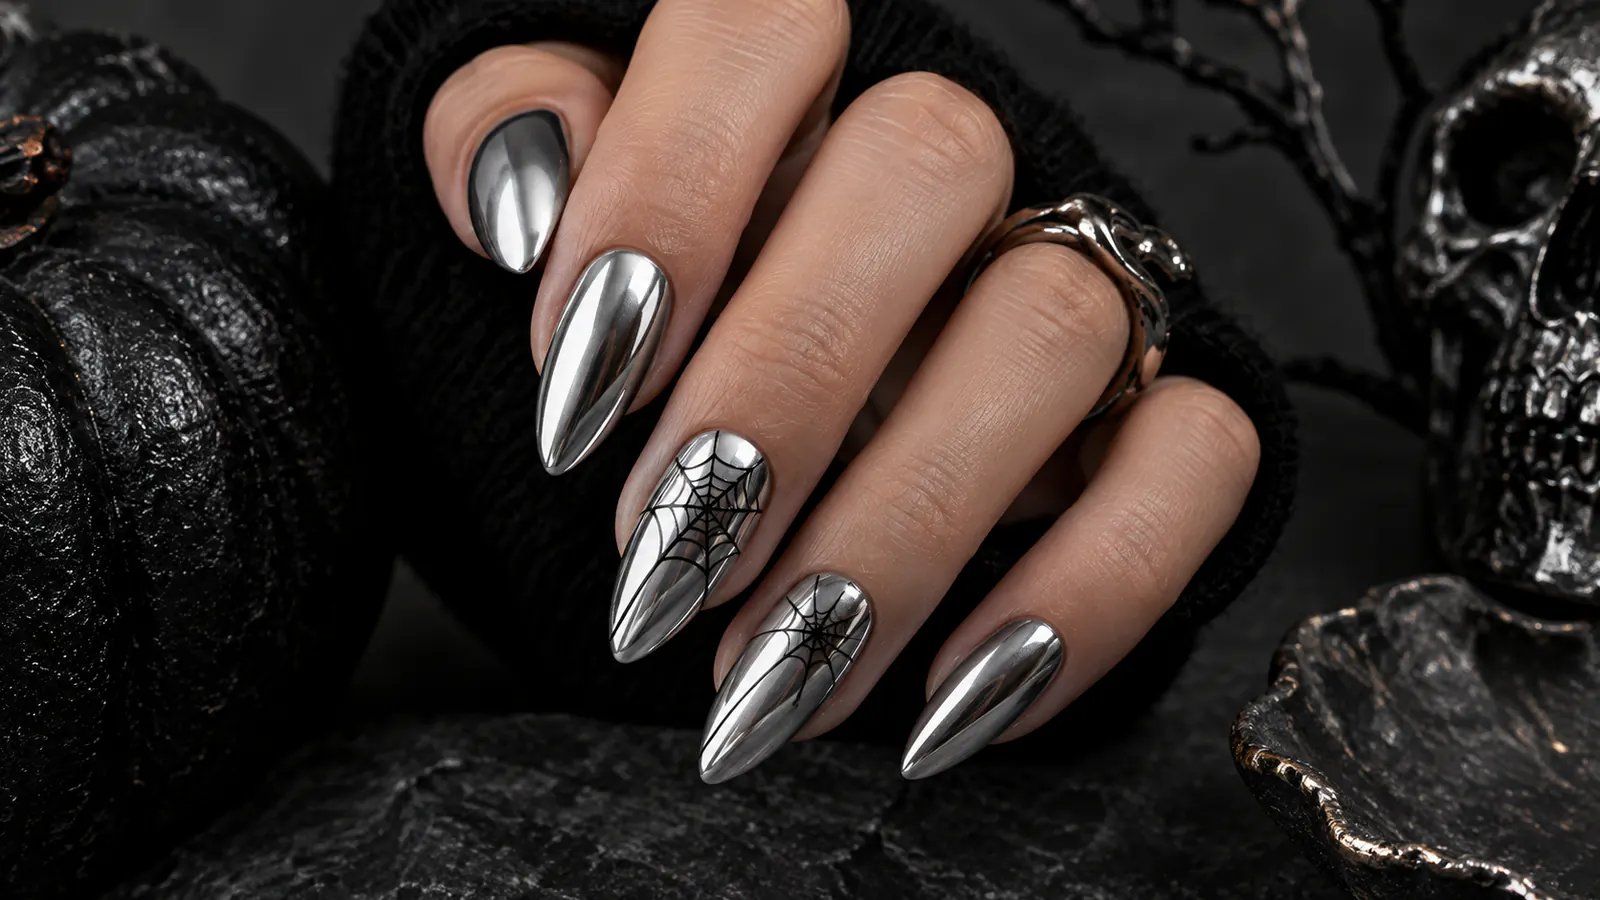
Silver chrome brings a futuristic edge to classic spiderweb art. Fine black lines remain crisp against the reflective surface, while glossy black companion nails ground the shine.
Limit the web to one or two nails because chrome is already visually active. Keep the black lines thin and seal without dragging them.
How to get the look
- Create a smooth silver chrome base.
- Draw a fine black corner web.
- Pair with glossy black nails and seal.
Best for: Statement nails, parties and cool-toned accessories.
43. Black-cherry rose nails
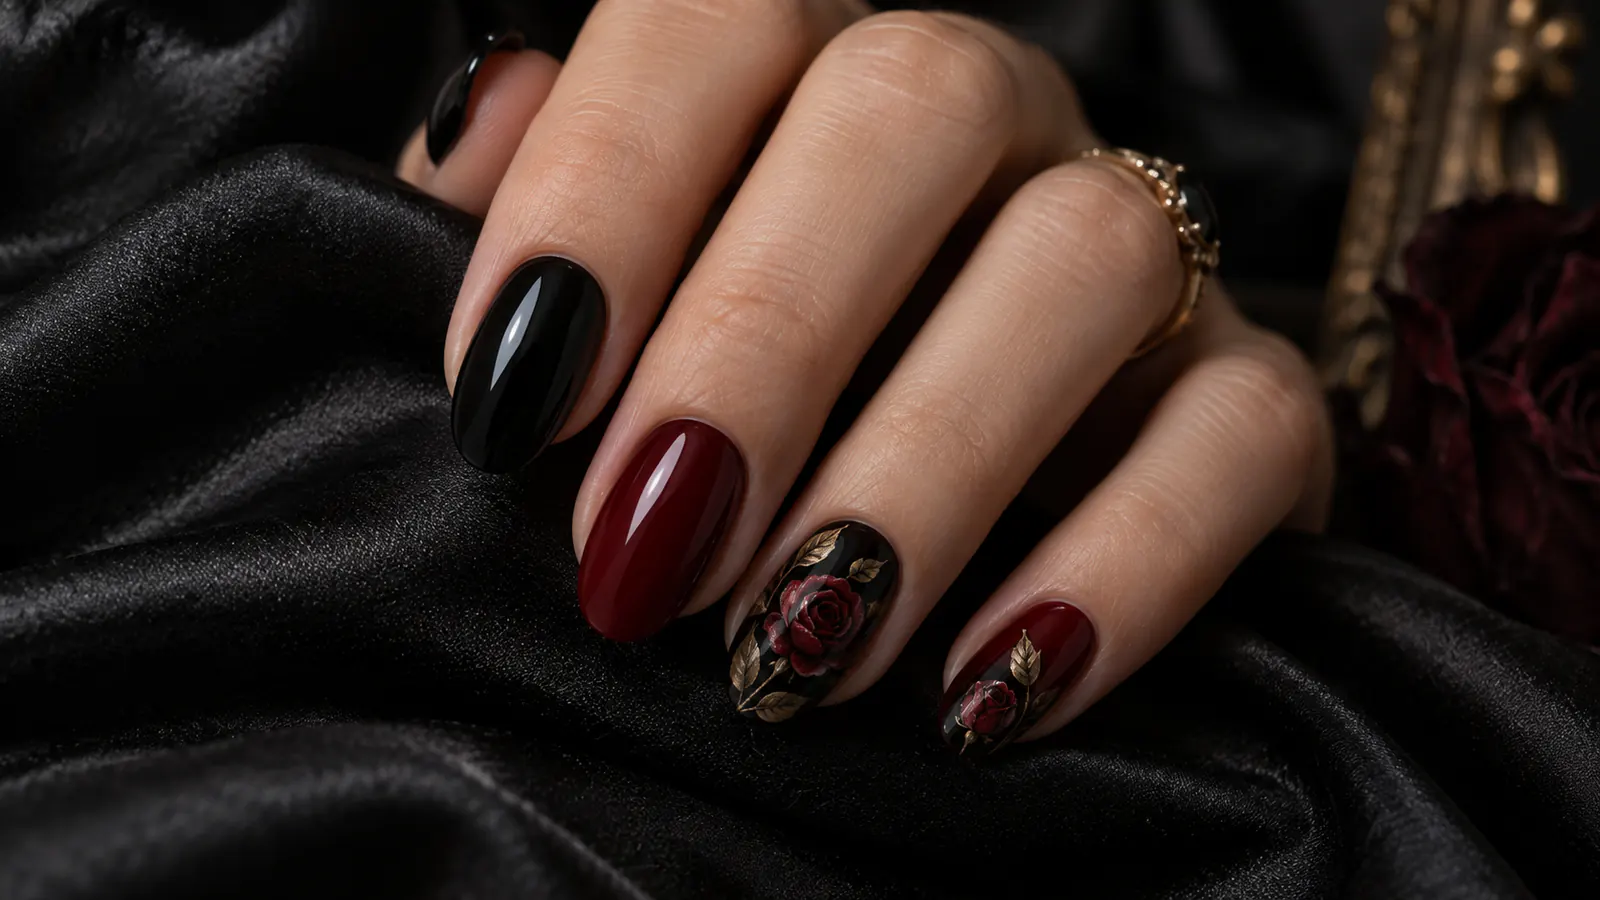
Black-cherry polish has enough depth to feel vampy without being plain black. Tonal rose silhouettes add gothic romance that appears gradually in changing light.
Paint the flowers with a shade only slightly darker than the base. This low contrast is what makes the pattern elegant rather than illustrative.
How to get the look
- Apply a glossy black-cherry base.
- Paint tonal rose silhouettes on two nails.
- Add fine wine highlights and top coat.
Best for: Romantic Halloween looks and medium almond nails.
44. Stitched black French tips
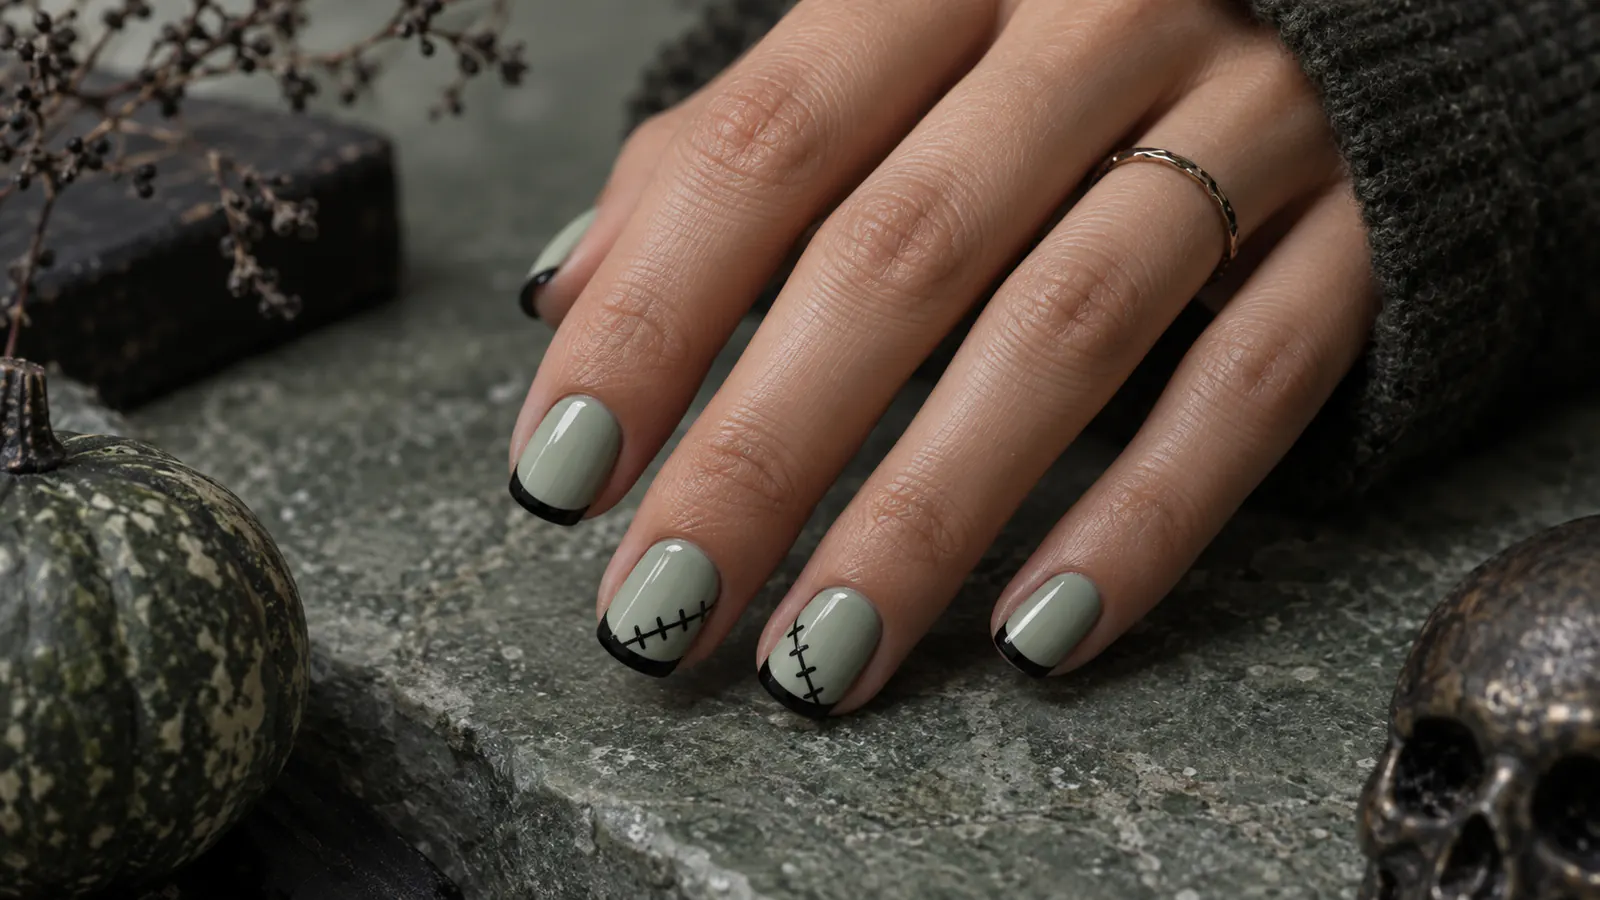
Pale sage and black create a cool, slightly unexpected Halloween palette. Short stitch marks along one side of the French line add a handmade detail that remains easy to recognize.
Keep the tip narrow and use only three or four stitches per accent. A thin brush gives cleaner results than trying to place many tiny decals.
How to get the look
- Apply a pale-sage base.
- Paint slim black French tips.
- Add short stitch marks on selected nails.
Best for: Short nails and simple graphic nail art.
45. Haunted-house sunset nails
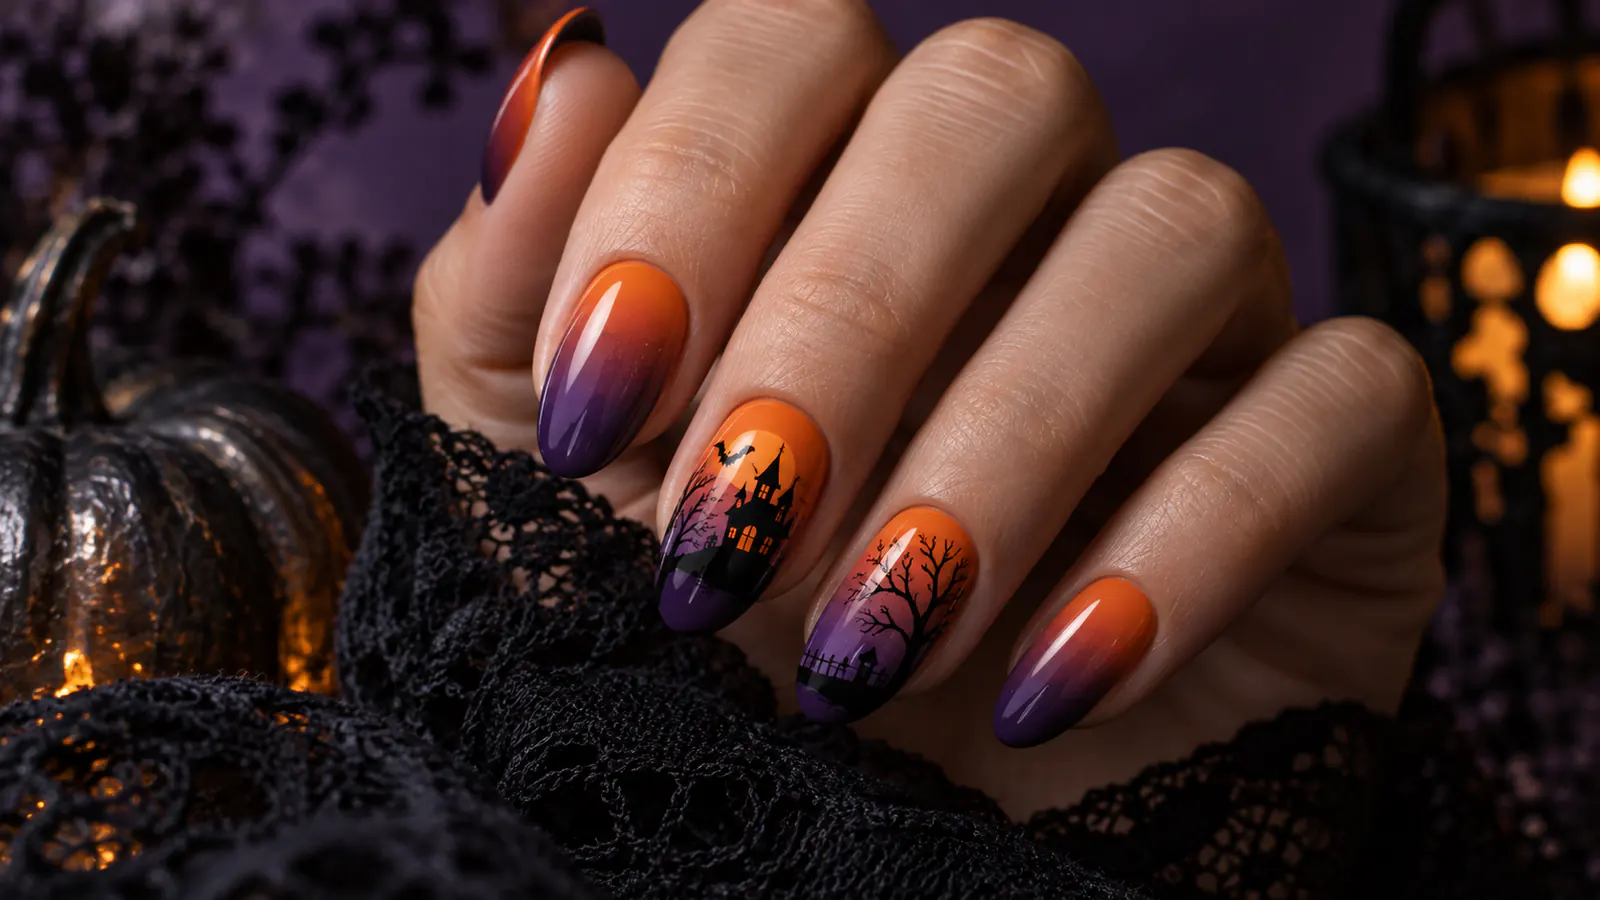
An orange-to-purple gradient captures the late-October sky and provides enough contrast for a miniature black house. Spreading the scene across only two nails keeps it readable.
The silhouette does not need architectural detail. A peaked roof, a few windows and one bare tree communicate the idea at nail scale.
How to get the look
- Blend orange into dusky purple.
- Paint a small black house and bare tree.
- Add tiny warm windows and seal.
Best for: Detailed salon art and medium-to-long nails.
46. Tiny witch hats and stars
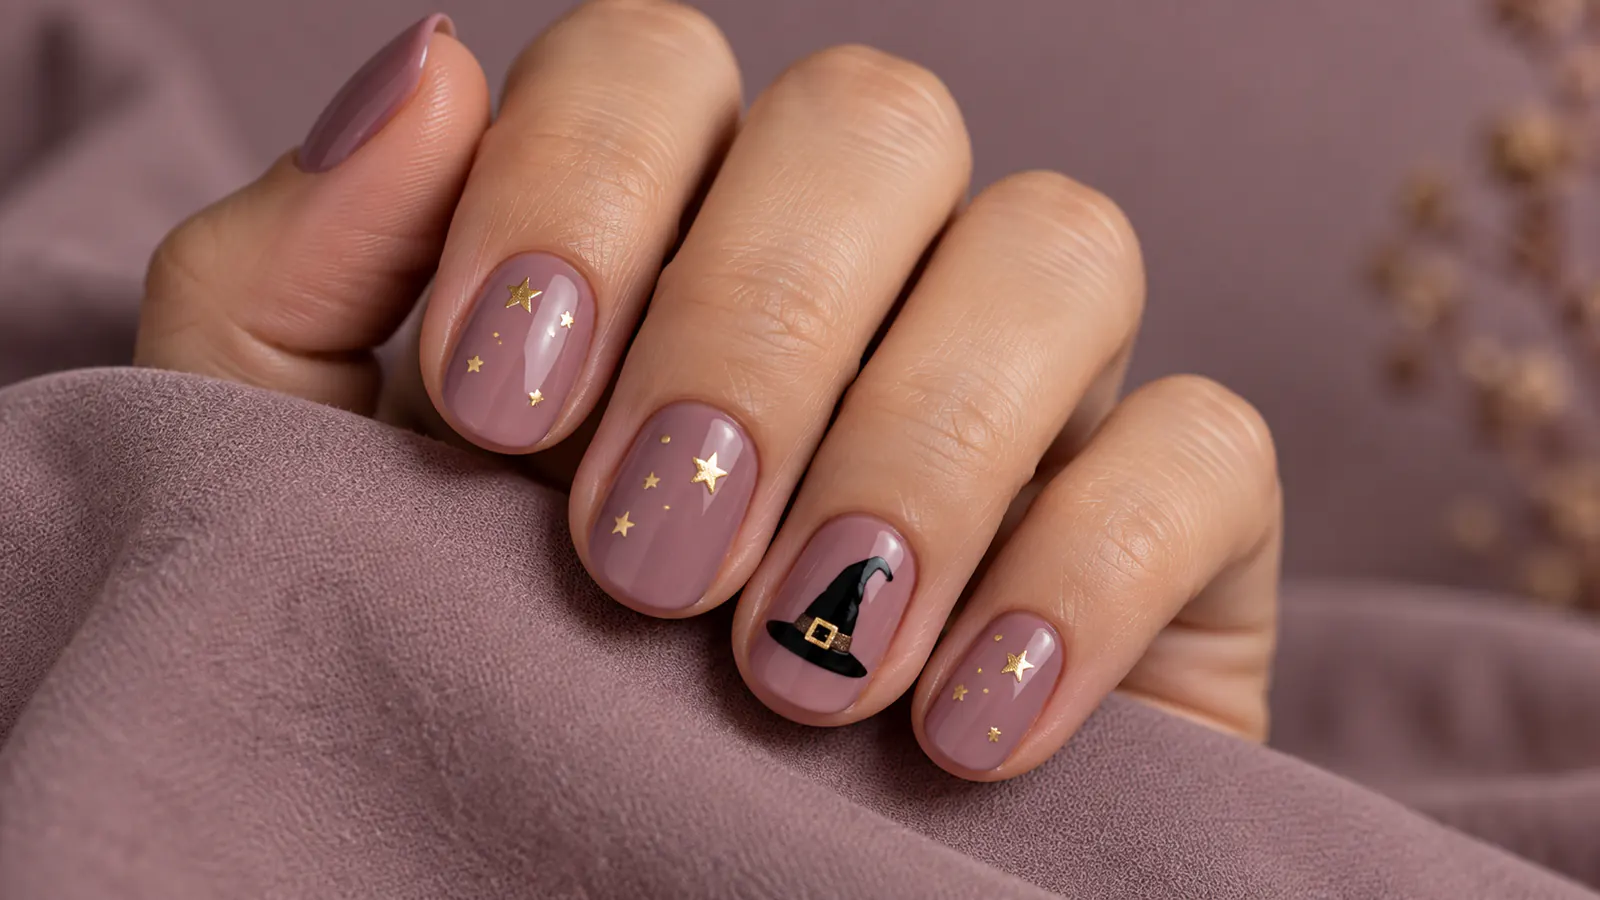
Tiny witch hats feel polished when simplified into clean silhouettes and paired with muted mauve. Fine gold stars add light and connect the accent nails to the rest of the manicure.
Use one hat per hand and repeat only the stars. This avoids the sticker-like effect that can happen when every nail carries the same character.
How to get the look
- Paint a muted mauve base.
- Add one small black witch hat per hand.
- Scatter a few fine gold stars and seal.
Best for: Cute but sophisticated Halloween nails.
47. Neon ghost accents
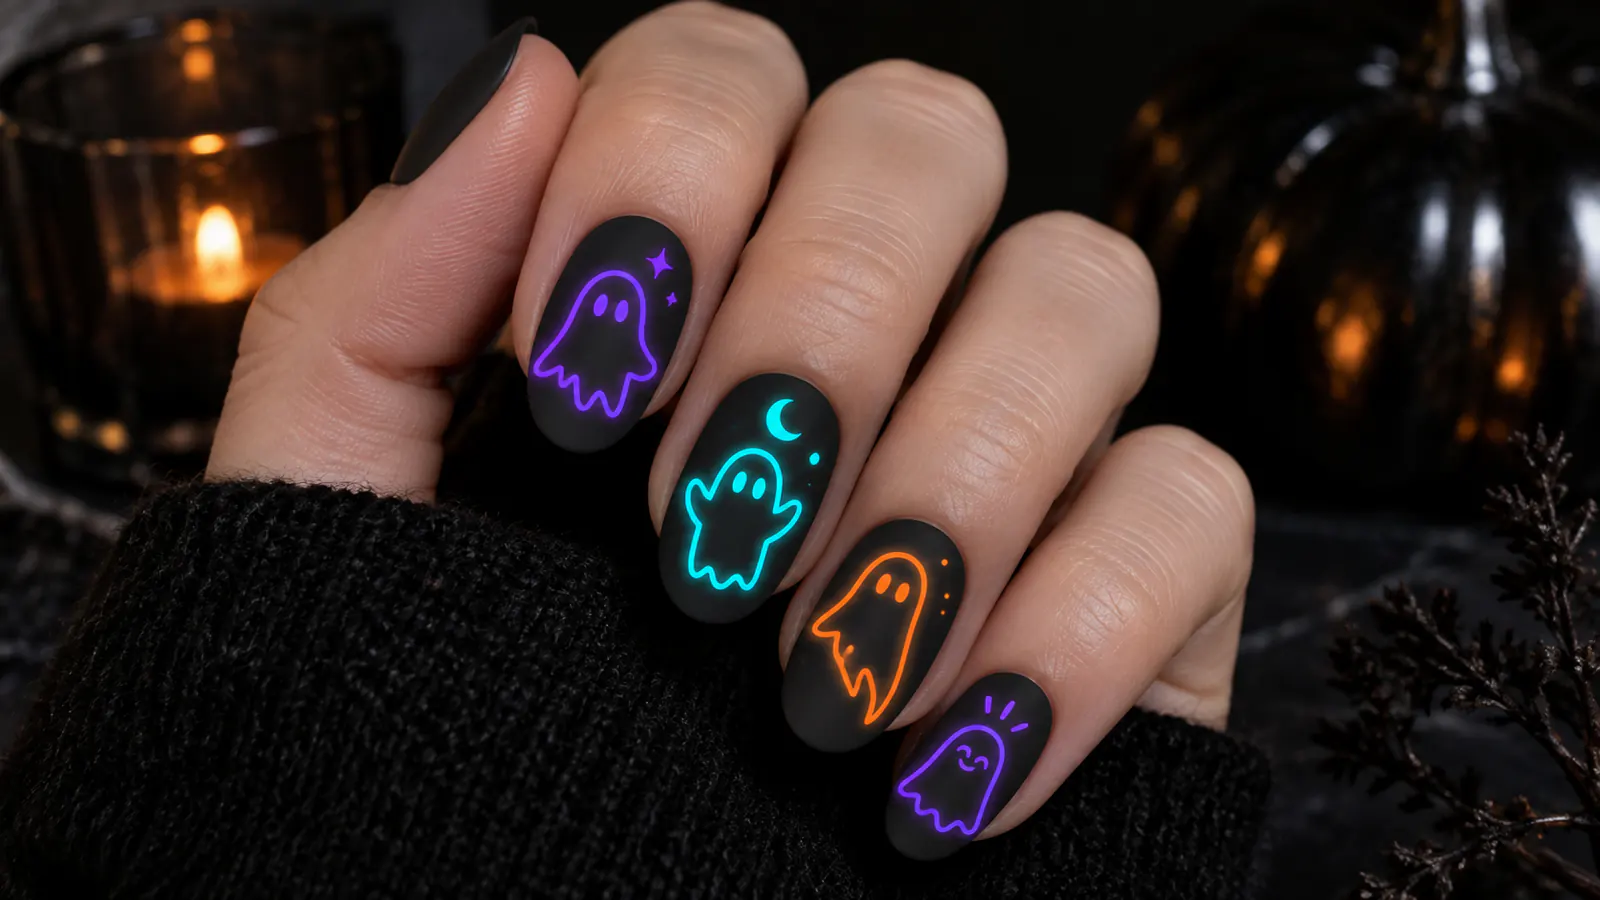
Neon ghosts bring a playful, modern direction to Halloween nail art. A matte charcoal background makes pink, green and blue details appear brighter without requiring full neon nails.
Keep the ghost forms small and consistent, then vary the colors. A matte base with glossy neon accents adds another layer of contrast.
How to get the look
- Apply charcoal polish and a matte top coat.
- Paint small neon ghost shapes.
- Add eyes and leave the accents glossy.
Best for: Parties, bold color lovers and short nails.
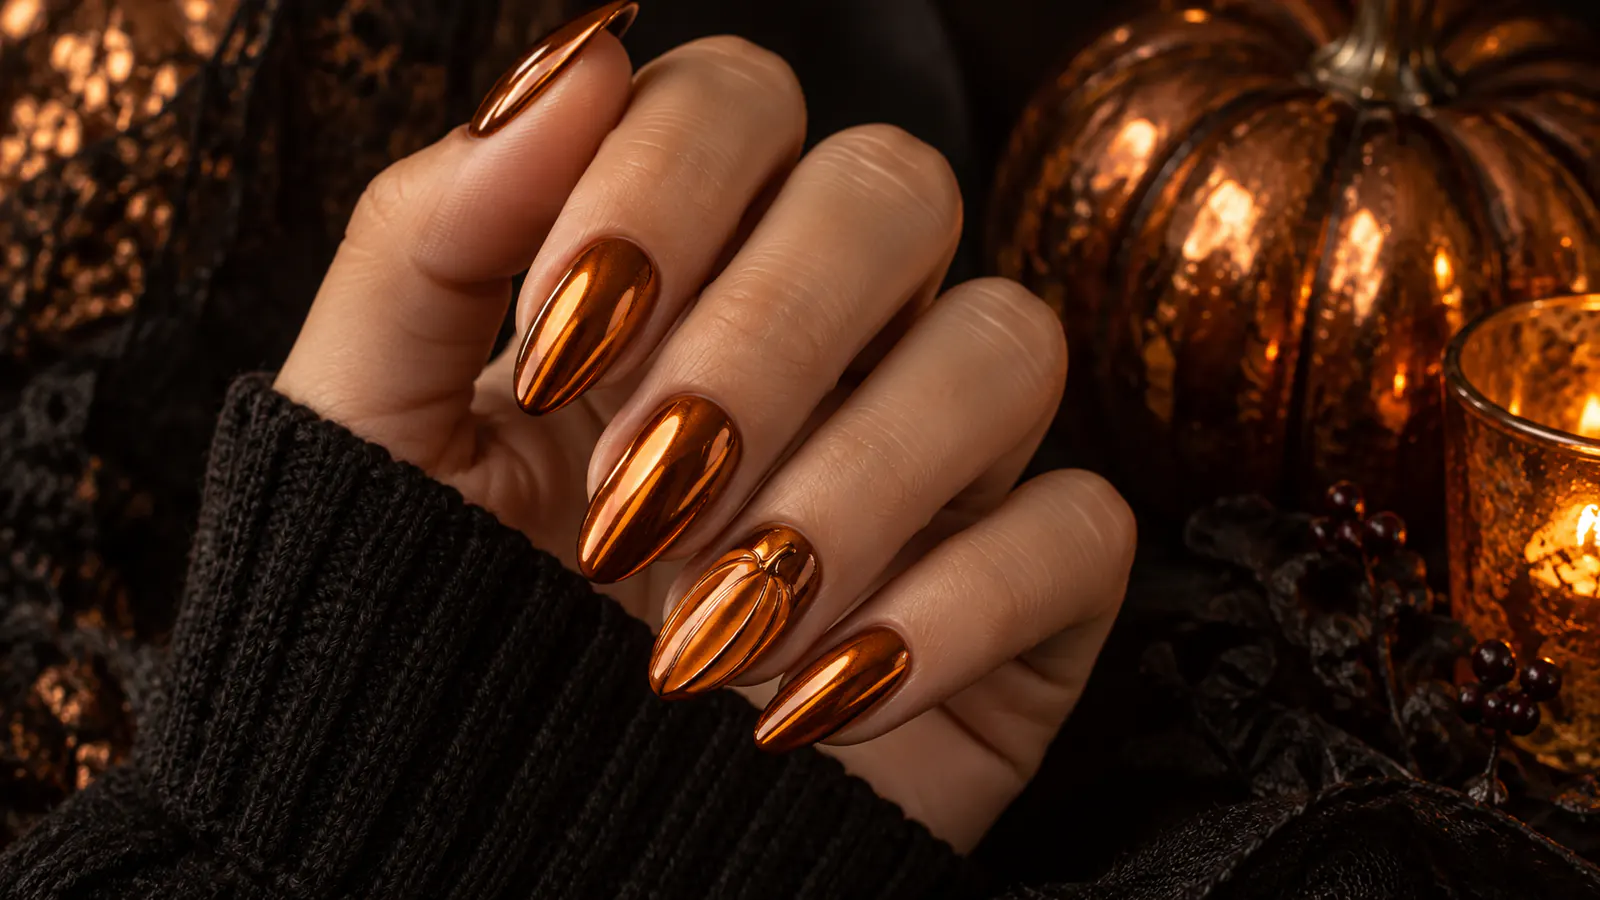
48. Copper pumpkin chrome
Copper chrome naturally resembles candlelit pumpkin orange. Fine curved segments suggest the fruit without adding a face, so the result stays abstract and fashion-focused.
Use deep brown for the narrow lines and keep most nails as uninterrupted chrome. The reflective base supplies enough detail on its own.
How to get the look
- Apply a warm brown base and copper chrome.
- Draw curved pumpkin segments on two nails.
- Add a tiny stem and protect the chrome edges.
Best for: Autumn-to-Halloween crossover manicures.
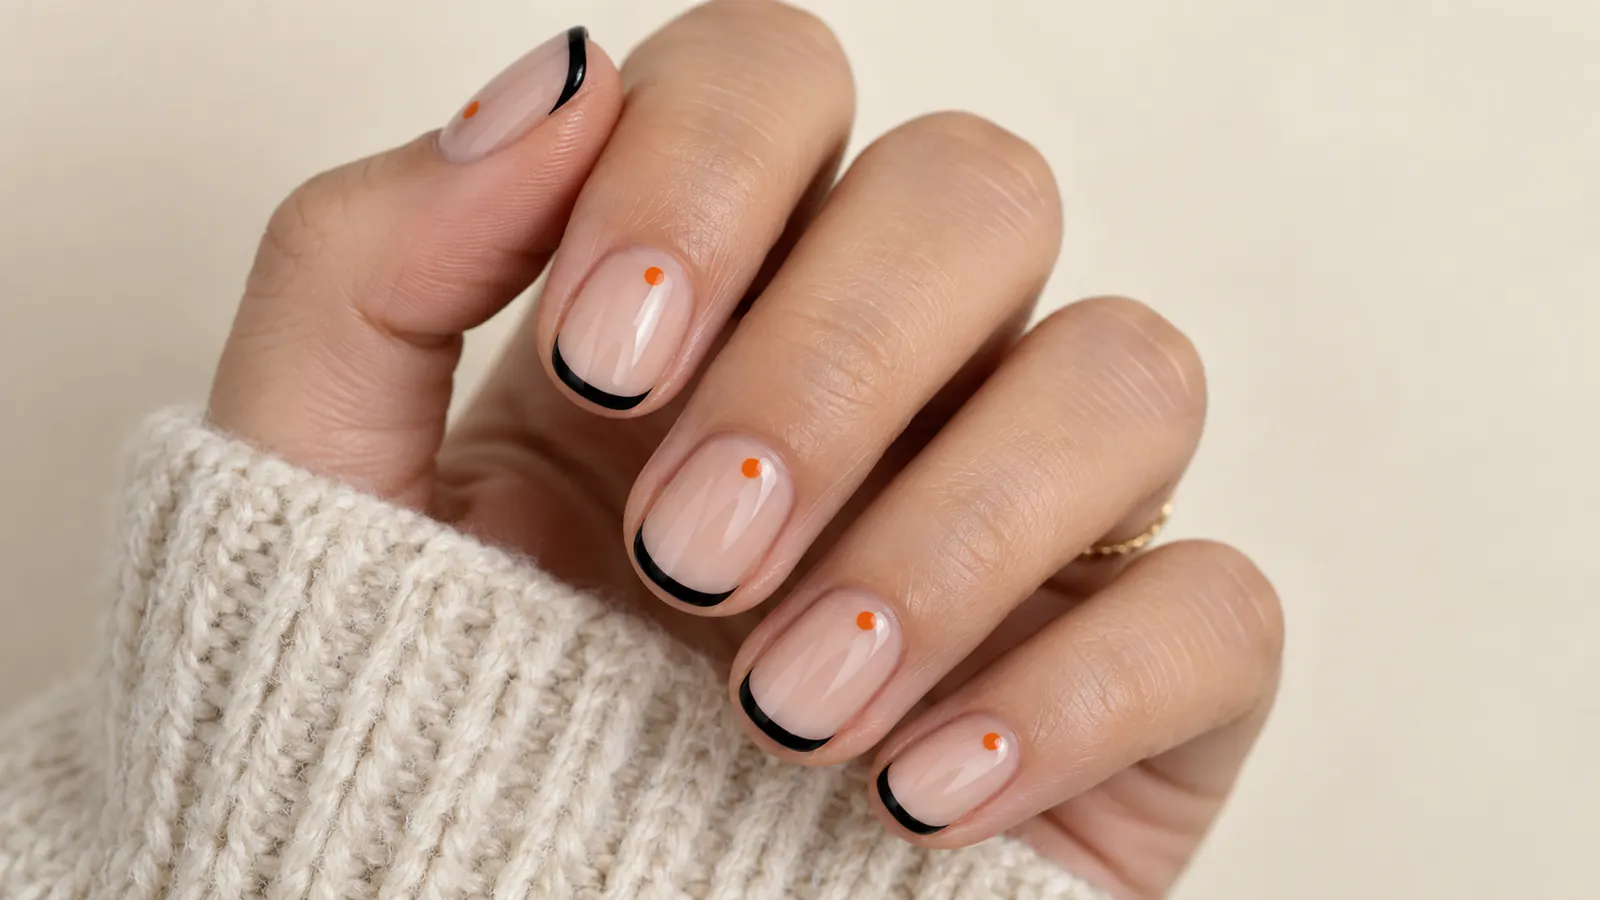
49. Orange-dot micro French
For very short Halloween nails, a black micro tip and one orange dot near each cuticle deliver maximum clarity with minimal space. The design is neat enough for work and simple enough to recreate.
Keep every line ultra-thin and make the dots uniform. A warm beige base softens the black-and-orange contrast.
How to get the look
- Apply a sheer warm-beige base.
- Paint an ultra-thin black tip.
- Place one tiny orange dot near each cuticle.
Best for: Very short nails, beginners and work-friendly manicures.
50. Short midnight star nails
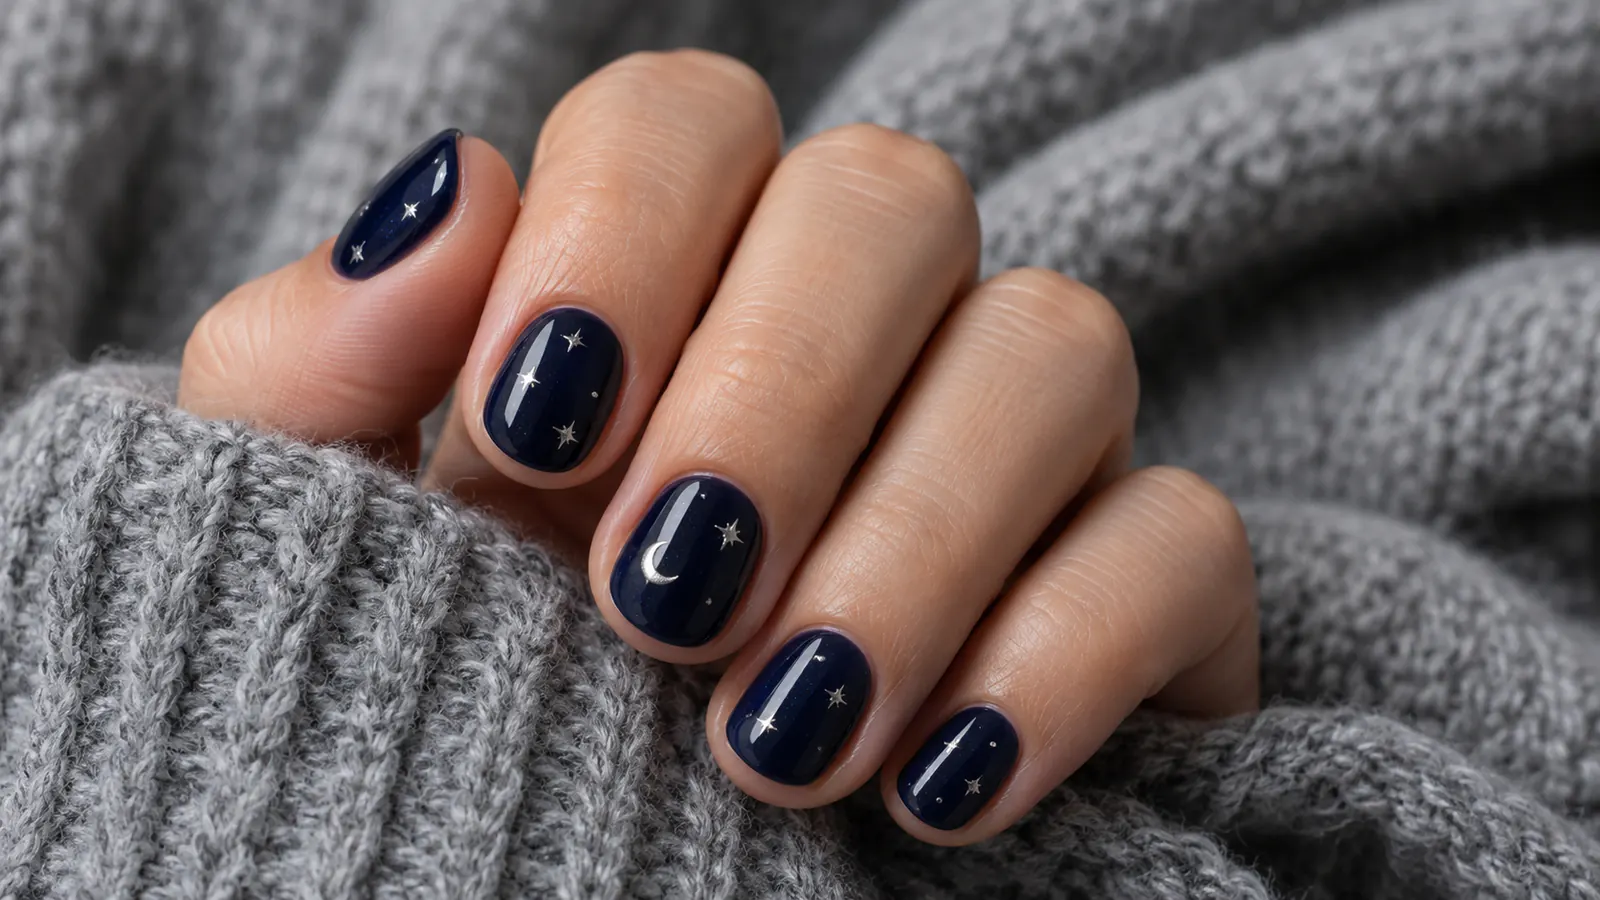
Very short nails can still carry detailed seasonal art when the elements are reduced to dots, stars and one crescent. Navy offers strong contrast while feeling softer than black.
Place the largest symbol off center and use dots to fill the remaining space. The irregular sky pattern is forgiving for DIY application.
How to get the look
- Paint short nails deep navy.
- Add tiny silver stars and one crescent.
- Balance empty areas with fine dots.
Best for: Very short natural nails and easy celestial art.
51. Burgundy velvet cat-eye
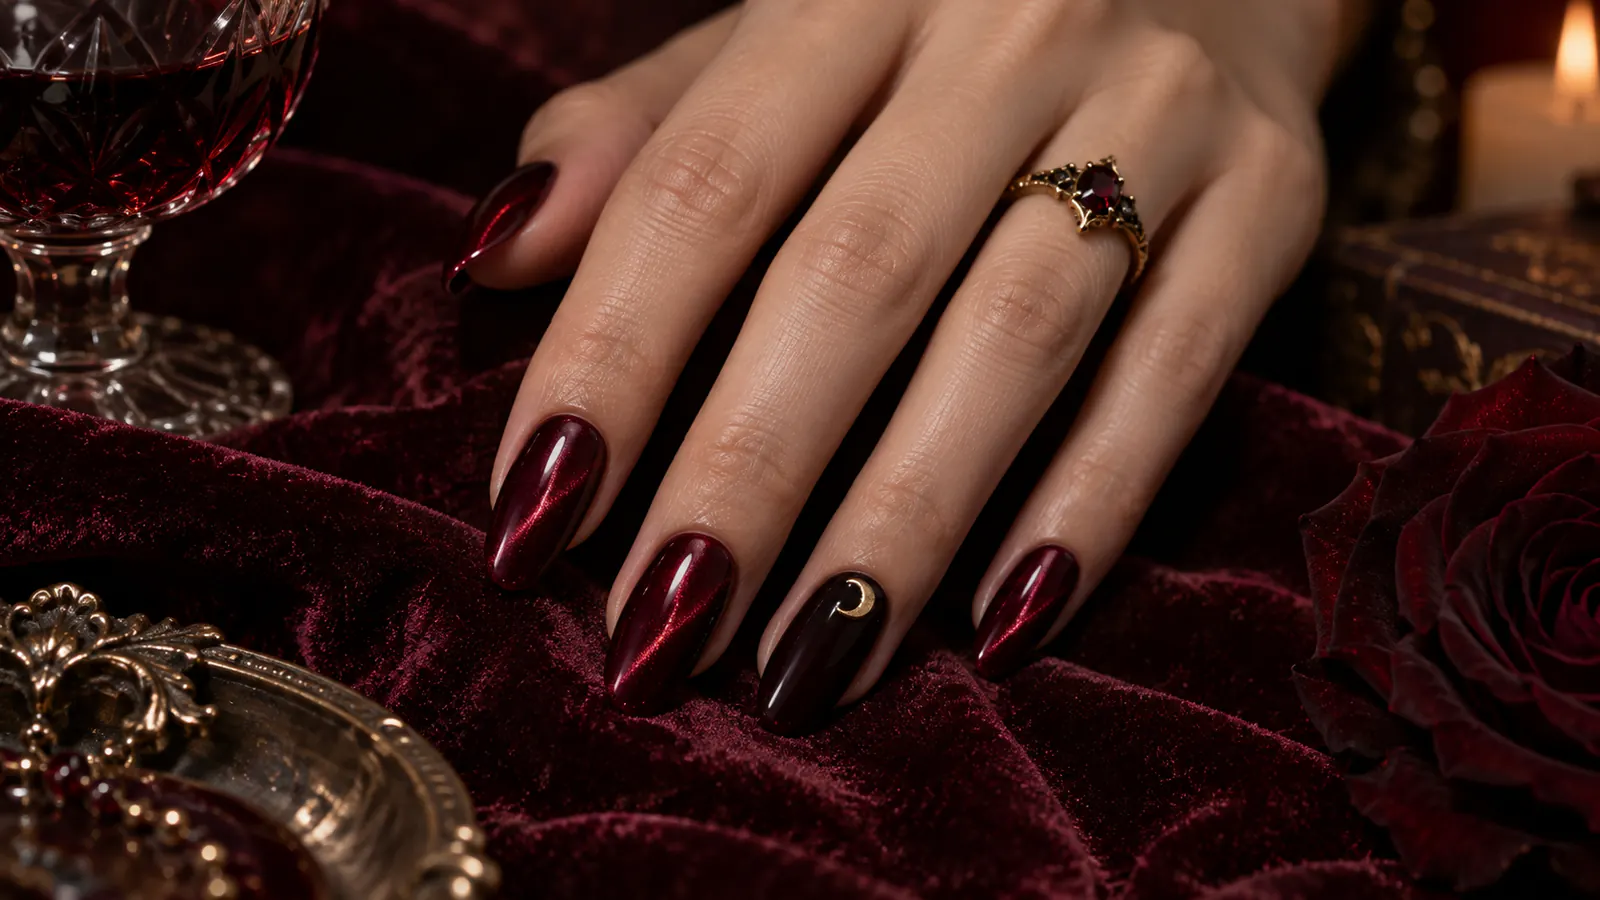
Burgundy velvet nails combine black-cherry color with a soft magnetic glow. The finish shifts in the light, making a single-color manicure feel dimensional enough for Halloween.
A tiny gold crescent on one nail is optional but helps tie the set to the season. Keep the remaining nails free of art so the velvet effect stays central.
How to get the look
- Apply a deep black-cherry base.
- Shape burgundy magnetic polish into a soft velvet glow.
- Add one tiny gold crescent and seal.
Best for: Elegant Halloween nails and wear into November.
Frequently asked questions
What Halloween nail designs work best on short nails?
Black micro-French tips, tiny ghosts, bats, checkerboard accents and pumpkin outlines work well because their shapes remain clear at a small scale. Use one or two accent nails rather than shrinking a detailed pattern across every nail.
What Halloween nail colors are popular besides orange and black?
Deep oxblood, smoky purple, midnight blue, chocolate brown, amber tortoiseshell and silver all create a Halloween mood and remain easy to wear after October 31.
How can I make Halloween nails look classy?
Limit the palette, repeat one finish and choose a single focal detail. A sheer base with two accent nails, or one rich color with a dimensional finish, usually looks more polished than a different motif on every nail.
Can I do simple Halloween nail art at home?
Yes. Tiny ghosts can be made with a dotting tool, black French tips with a fine brush and pumpkin outlines with a liner brush. Work in thin layers and let each layer dry.
When should I get a Halloween manicure?
A gel manicure booked one to two weeks before Halloween can carry you through the holiday, while regular polish is best applied closer to your plans. Choose tortoiseshell, oxblood or celestial designs if you want to keep wearing it afterward.
What Halloween nail designs are trending in 2026?
Ghost nails, short simple Halloween manicures, black French tips, tiny bats and webs, magnetic cat-eye finishes and reflective chrome are strong directions. The most current sets use a consistent palette and one focal motif instead of a different character on every nail.
Anna reviewed the article for clarity, image relevance, realistic expectations and alignment with the Lively Edit editorial policy. Safety and health claims are checked against appropriate authoritative sources; the updated date changes only after a meaningful review.
Read our editorial process →The images in this story were created with AI as original editorial visuals and reviewed to ensure that each image is relevant to the accompanying guidance.