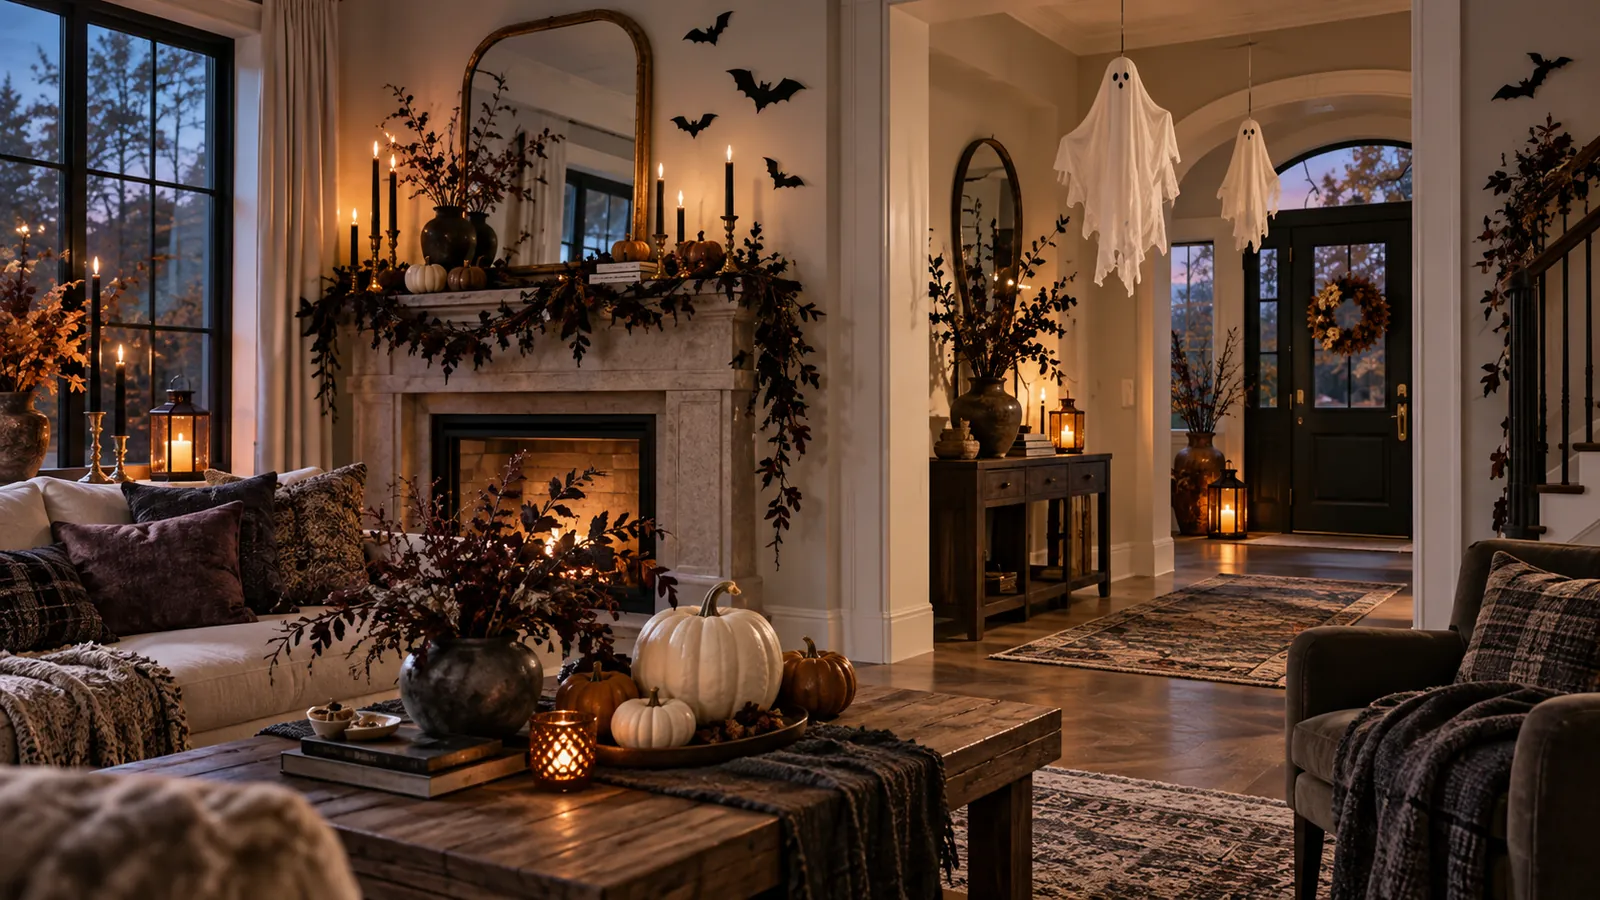
Halloween home decor can be playful, atmospheric or genuinely elegant, but the strongest rooms share the same principle: they tell one visual story. A few large shapes, a controlled palette and thoughtful lighting usually create more impact than dozens of unrelated novelty objects. That approach also makes decorating faster, easier to store and more personal.
This 2026 collection moves through the home from the porch and hallway to the mantel, dining table, bedroom and garden. Every idea uses an original scene rather than a licensed character, and each can be adjusted to suit a rental, small apartment, family home or outdoor gathering. The styling notes explain where to begin, what to gather and how to avoid the practical problems that can make seasonal decor inconvenient.
Treat safety as part of the design. Use flameless lights around paper, fabric and dried plants; preserve handrails, exits and clear walking routes; secure outdoor pieces for wind; and keep cords, small ornaments and breakable objects away from children and pets. A display looks more polished when it belongs comfortably in the room rather than competing with how the room needs to function.
The easiest way to make Halloween decor look intentional is to choose one focal area, limit the palette to three or four colors and repeat a few materials. Start with a large anchor such as a branch arrangement, pumpkin group or paper installation, then add lighting and smaller details. Keep exits, stairs, heaters, candles and outdoor walkways clear.
1. Layered porch lanterns
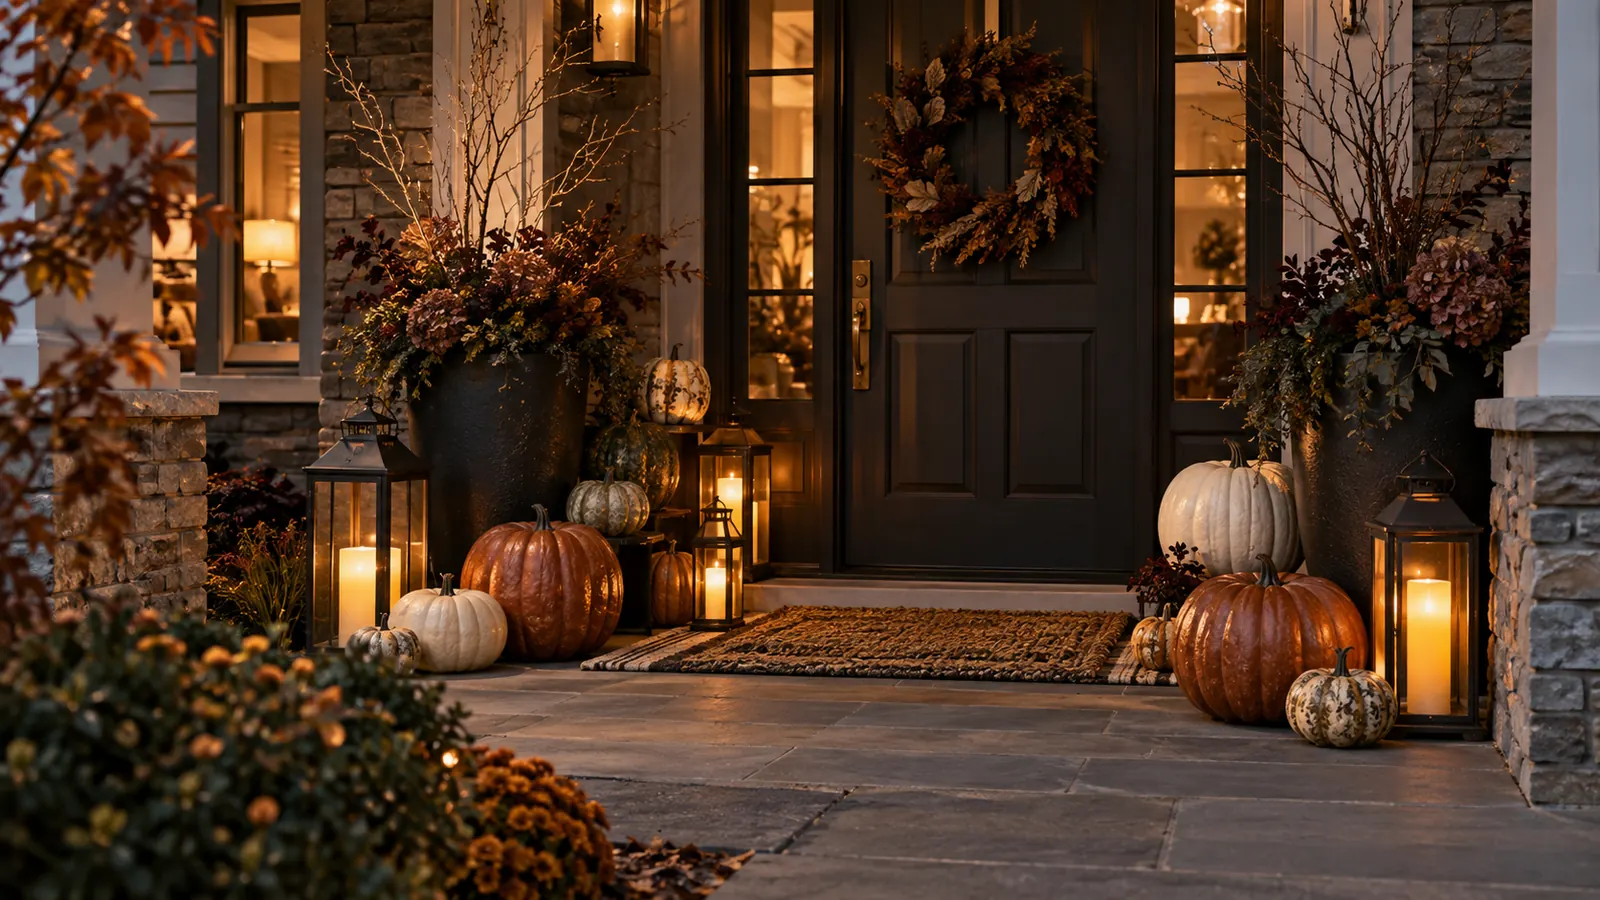
In the front porch, group amber lanterns at three heights among ivory, rust and green pumpkins. The idea works because it starts with a defined area rather than scattering small Halloween objects throughout the room. It can be simplified for a small space or expanded when the architecture gives the display more room.
Gather battery lanterns, mixed pumpkins, two black planters, dried branches and a textured outdoor mat. Begin with the largest anchor, check the composition from the normal entrance to the room, and add smaller pieces only where they strengthen the shape. Keep the walking line and door swing completely clear, and place the tallest pieces against the wall.
For a polished result, repeat two or three materials and leave some surrounding space undecorated. Photograph the setup in daylight and after dark: if important details disappear at night, add one diffused battery light rather than more objects.
How to create the look
- Clear and clean the chosen area in the front porch.
- Place the largest element first, then build the main silhouette with battery lanterns, mixed pumpkins, two black planters, dried branches and a textured outdoor mat.
- Repeat one color or material at least three times to connect the arrangement.
- Check doors, walkways, heat sources, pets and children's reach before finishing.
Best for: A welcoming entrance that works from late September through Halloween
2. Friendly ghost entryway
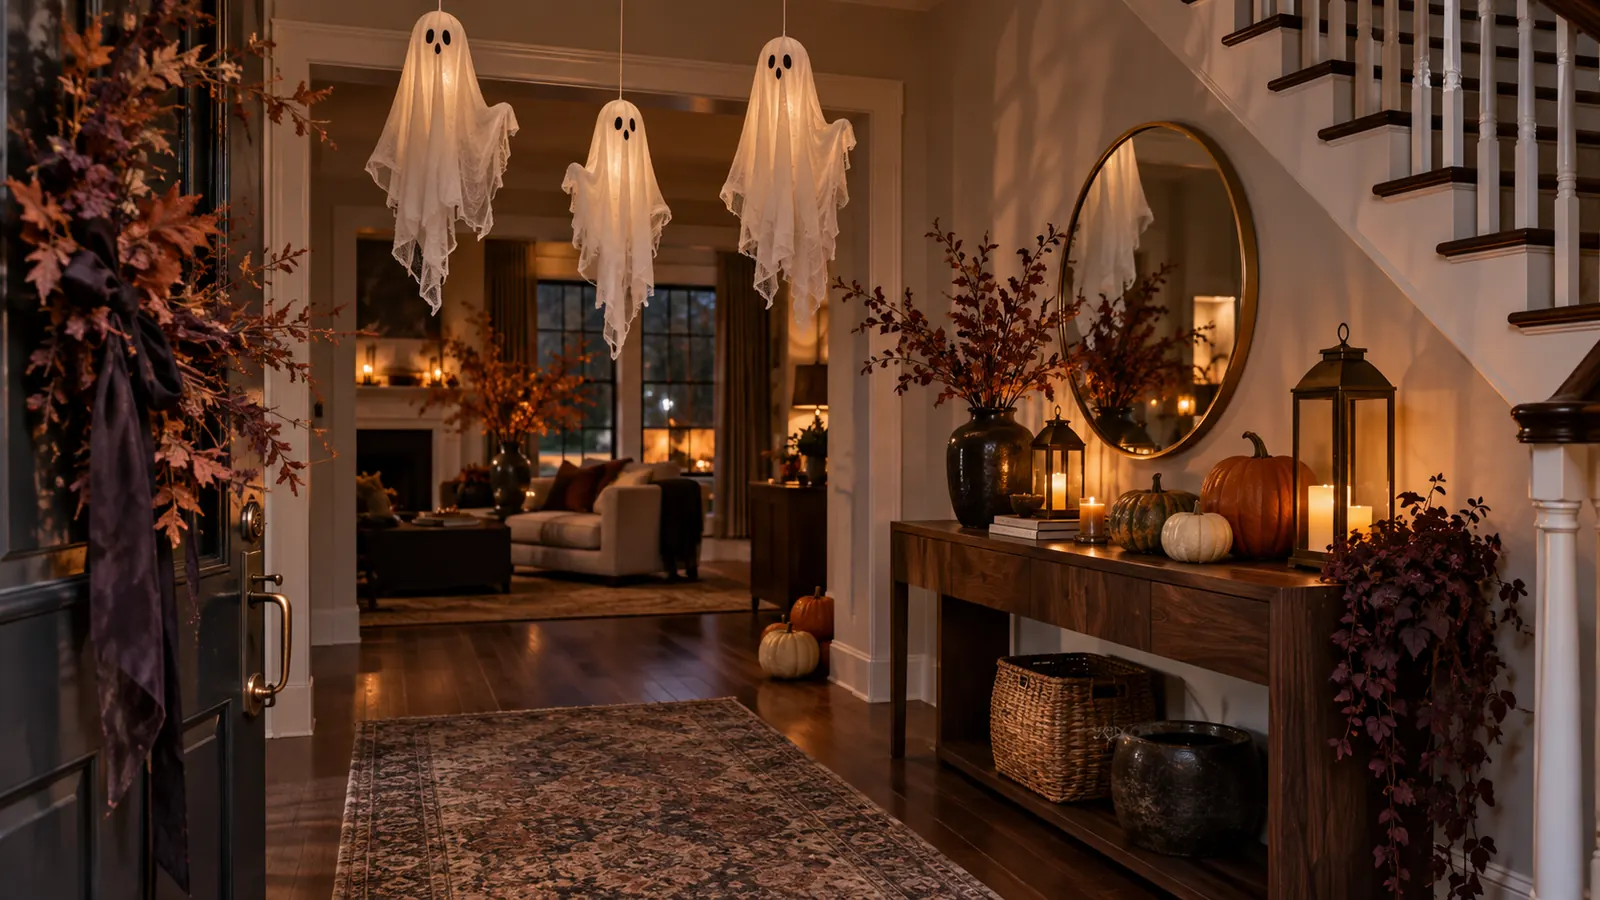
In the entry hall, hang a trio of lightweight fabric ghosts above a simple console display. The idea works because it starts with a defined area rather than scattering small Halloween objects throughout the room. It can be simplified for a small space or expanded when the architecture gives the display more room.
Gather white cotton, paper spheres, clear thread, removable hooks, pumpkins and battery lights. Begin with the largest anchor, check the composition from the normal entrance to the room, and add smaller pieces only where they strengthen the shape. Vary the hanging height but keep every ghost well above the tallest visitor's head.
For a polished result, repeat two or three materials and leave some surrounding space undecorated. Photograph the setup in daylight and after dark: if important details disappear at night, add one diffused battery light rather than more objects.
How to create the look
- Clear and clean the chosen area in the entry hall.
- Place the largest element first, then build the main silhouette with white cotton, paper spheres, clear thread, removable hooks, pumpkins and battery lights.
- Repeat one color or material at least three times to connect the arrangement.
- Check doors, walkways, heat sources, pets and children's reach before finishing.
Best for: Families who want playful Halloween decor without a frightening theme
3. Paper bat gallery wall
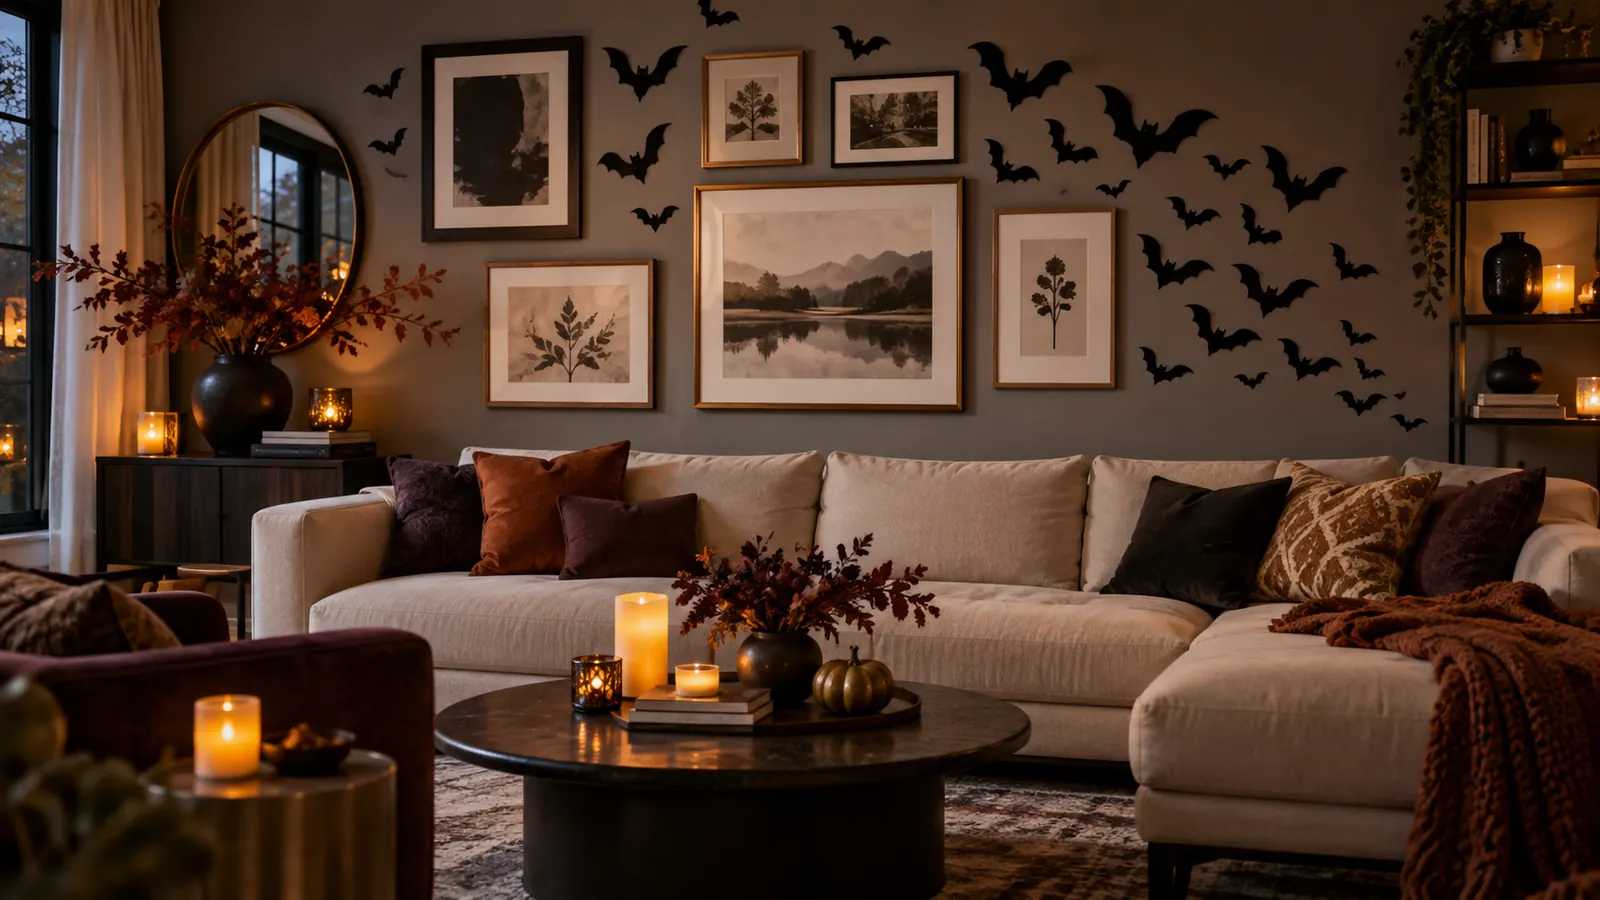
In the living room, send a loose sweep of matte-black bats around artwork you already own. The idea works because it starts with a defined area rather than scattering small Halloween objects throughout the room. It can be simplified for a small space or expanded when the architecture gives the display more room.
Gather black cardstock, removable adhesive dots, a pencil template and existing frames. Begin with the largest anchor, check the composition from the normal entrance to the room, and add smaller pieces only where they strengthen the shape. Cluster smaller bats near the starting point and open the spacing as the shape travels upward.
For a polished result, repeat two or three materials and leave some surrounding space undecorated. Photograph the setup in daylight and after dark: if important details disappear at night, add one diffused battery light rather than more objects.
How to create the look
- Clear and clean the chosen area in the living room.
- Place the largest element first, then build the main silhouette with black cardstock, removable adhesive dots, a pencil template and existing frames.
- Repeat one color or material at least three times to connect the arrangement.
- Check doors, walkways, heat sources, pets and children's reach before finishing.
Best for: Renters and anyone needing a high-impact one-evening project
4. Black botanical mantel
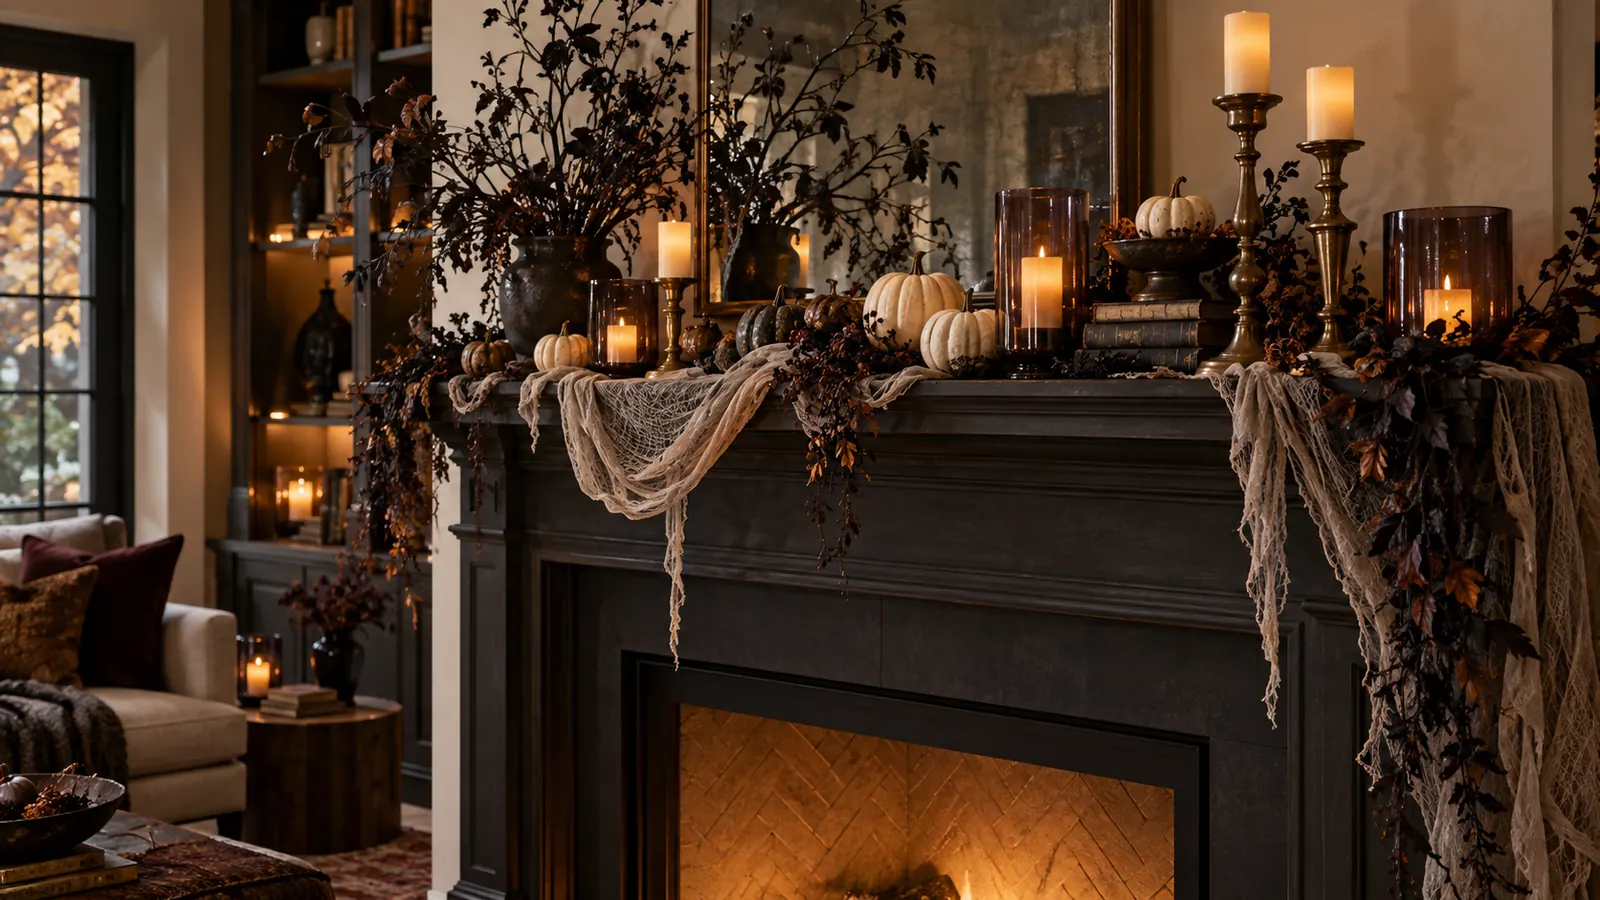
In the living room, combine dark branches, smoky glass and pale pumpkins into one asymmetrical mantel composition. The idea works because it starts with a defined area rather than scattering small Halloween objects throughout the room. It can be simplified for a small space or expanded when the architecture gives the display more room.
Gather foraged branches, matte-black floral spray for artificial stems, vessels, pumpkins and flameless tapers. Begin with the largest anchor, check the composition from the normal entrance to the room, and add smaller pieces only where they strengthen the shape. Leave visual space around the center instead of filling every inch of the mantel.
For a polished result, repeat two or three materials and leave some surrounding space undecorated. Photograph the setup in daylight and after dark: if important details disappear at night, add one diffused battery light rather than more objects.
How to create the look
- Clear and clean the chosen area in the living room.
- Place the largest element first, then build the main silhouette with foraged branches, matte-black floral spray for artificial stems, vessels, pumpkins and flameless tapers.
- Repeat one color or material at least three times to connect the arrangement.
- Check doors, walkways, heat sources, pets and children's reach before finishing.
Best for: A sophisticated focal point in neutral interiors
5. Pumpkin staircase
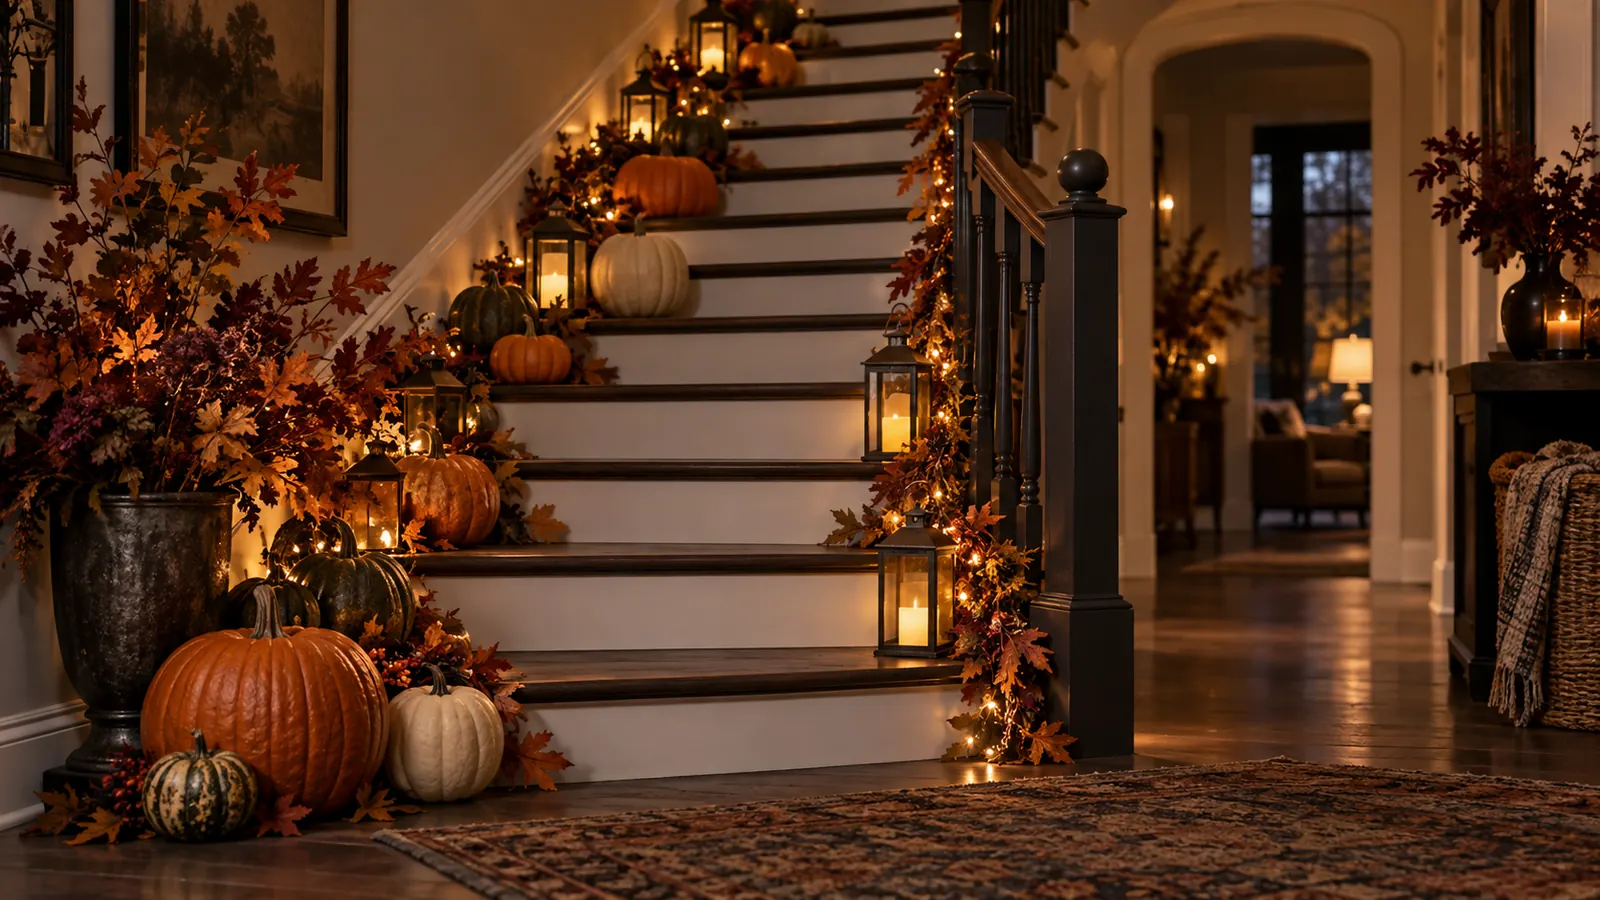
In the stair hall, repeat small pumpkins and leaves along the outer edge of several steps. The idea works because it starts with a defined area rather than scattering small Halloween objects throughout the room. It can be simplified for a small space or expanded when the architecture gives the display more room.
Gather small stable pumpkins, removable museum putty, faux leaves and cool micro lights. Begin with the largest anchor, check the composition from the normal entrance to the room, and add smaller pieces only where they strengthen the shape. Use only the wall-side edge and preserve the full handrail and walking path.
For a polished result, repeat two or three materials and leave some surrounding space undecorated. Photograph the setup in daylight and after dark: if important details disappear at night, add one diffused battery light rather than more objects.
How to create the look
- Clear and clean the chosen area in the stair hall.
- Place the largest element first, then build the main silhouette with small stable pumpkins, removable museum putty, faux leaves and cool micro lights.
- Repeat one color or material at least three times to connect the arrangement.
- Check doors, walkways, heat sources, pets and children's reach before finishing.
Best for: Homes with a staircase visible from the entrance
6. Moon-phase console
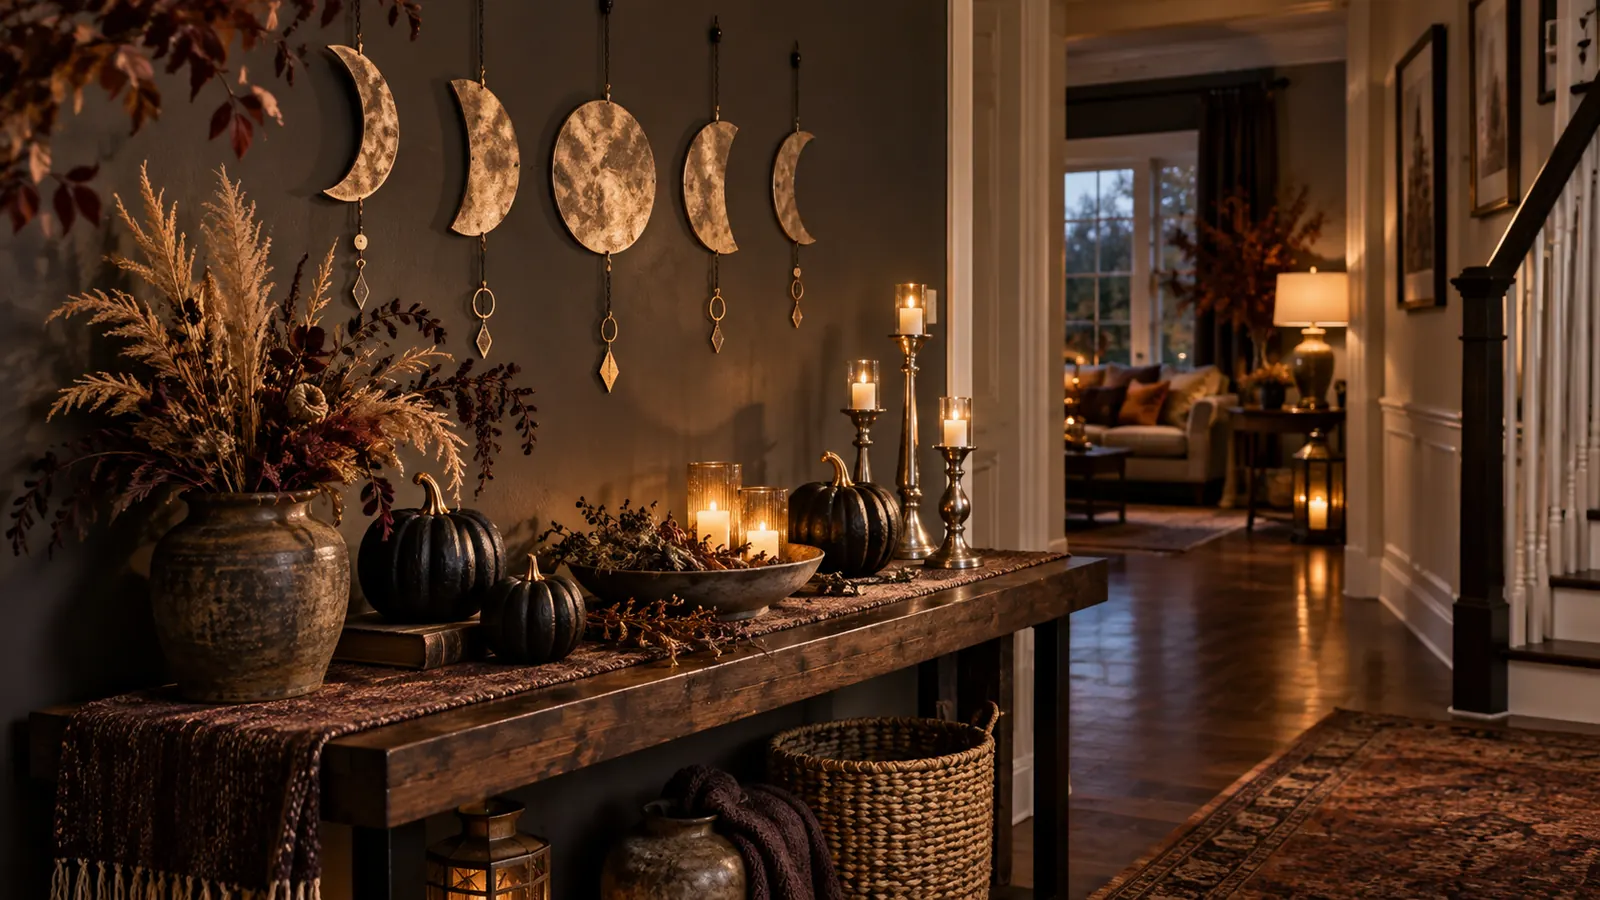
In the hallway, build a calm celestial vignette around a handmade sequence of moon phases. The idea works because it starts with a defined area rather than scattering small Halloween objects throughout the room. It can be simplified for a small space or expanded when the architecture gives the display more room.
Gather painted wood or cardstock moons, black ceramics, dried grass, silver accents and putty. Begin with the largest anchor, check the composition from the normal entrance to the room, and add smaller pieces only where they strengthen the shape. Center the moon sequence at eye level, then keep the objects below low and restrained.
For a polished result, repeat two or three materials and leave some surrounding space undecorated. Photograph the setup in daylight and after dark: if important details disappear at night, add one diffused battery light rather than more objects.
How to create the look
- Clear and clean the chosen area in the hallway.
- Place the largest element first, then build the main silhouette with painted wood or cardstock moons, black ceramics, dried grass, silver accents and putty.
- Repeat one color or material at least three times to connect the arrangement.
- Check doors, walkways, heat sources, pets and children's reach before finishing.
Best for: Minimalist Halloween decorating that can remain through autumn
7. Haunted reading nook
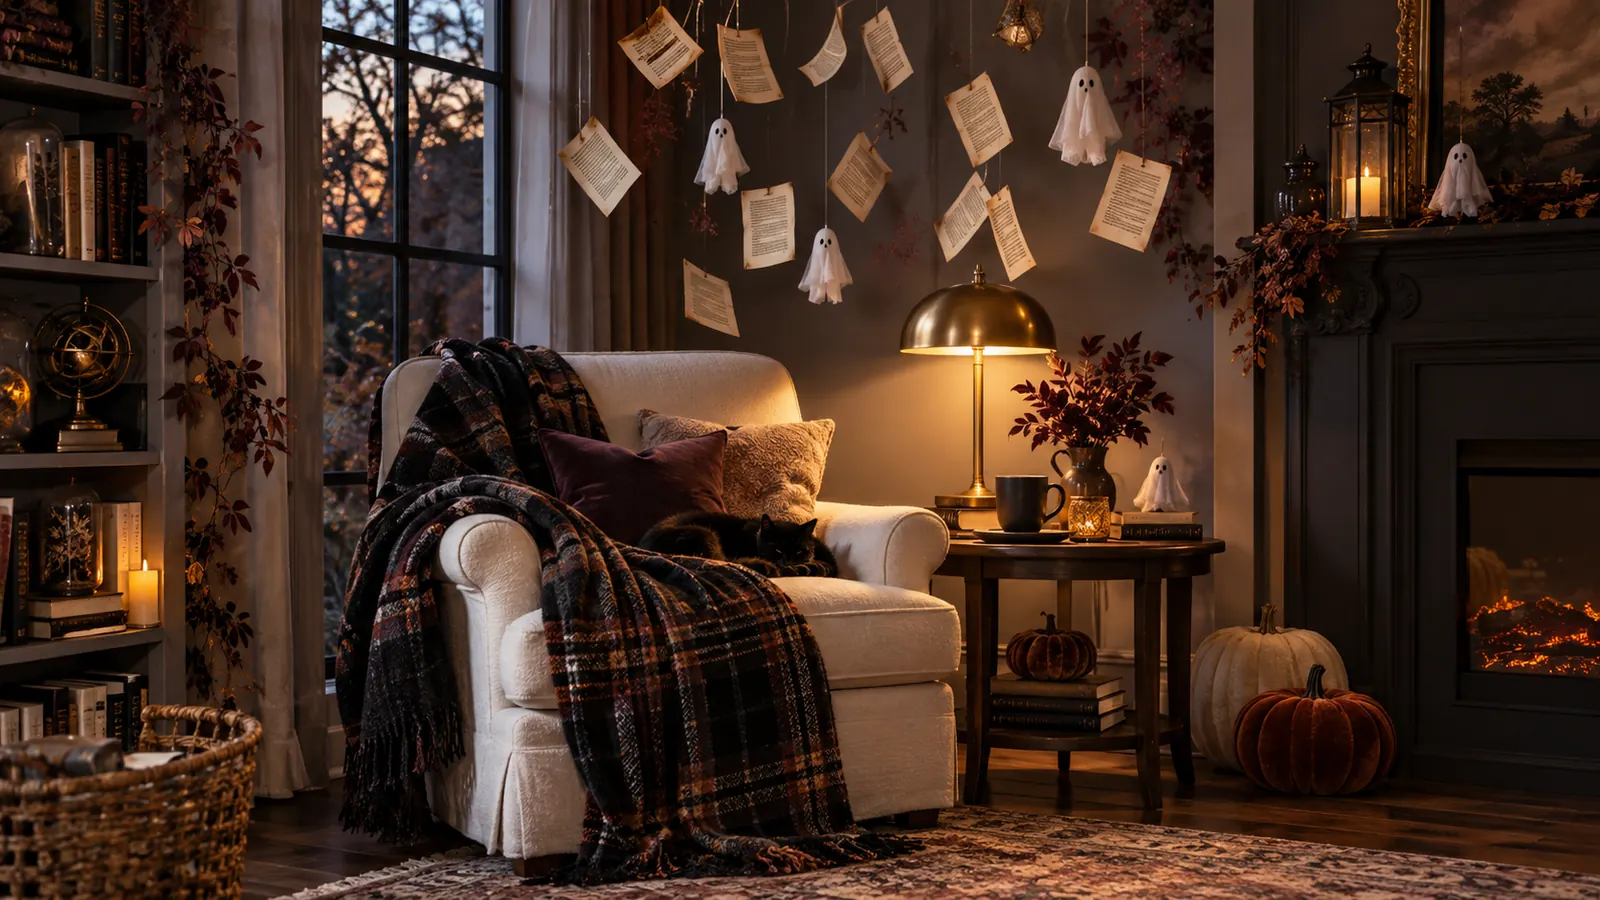
In the reading corner, make a favorite chair feel storybook-spooky with drifting pages and tiny ghosts. The idea works because it starts with a defined area rather than scattering small Halloween objects throughout the room. It can be simplified for a small space or expanded when the architecture gives the display more room.
Gather photocopied blank-looking pages, transparent thread, paper ghosts, a plaid throw and amber lamp. Begin with the largest anchor, check the composition from the normal entrance to the room, and add smaller pieces only where they strengthen the shape. Suspend paper away from lamps and use invented or illegible page layouts rather than recognizable book text.
For a polished result, repeat two or three materials and leave some surrounding space undecorated. Photograph the setup in daylight and after dark: if important details disappear at night, add one diffused battery light rather than more objects.
How to create the look
- Clear and clean the chosen area in the reading corner.
- Place the largest element first, then build the main silhouette with photocopied blank-looking pages, transparent thread, paper ghosts, a plaid throw and amber lamp.
- Repeat one color or material at least three times to connect the arrangement.
- Check doors, walkways, heat sources, pets and children's reach before finishing.
Best for: Book lovers and small unused corners
8. Candlelit Halloween table
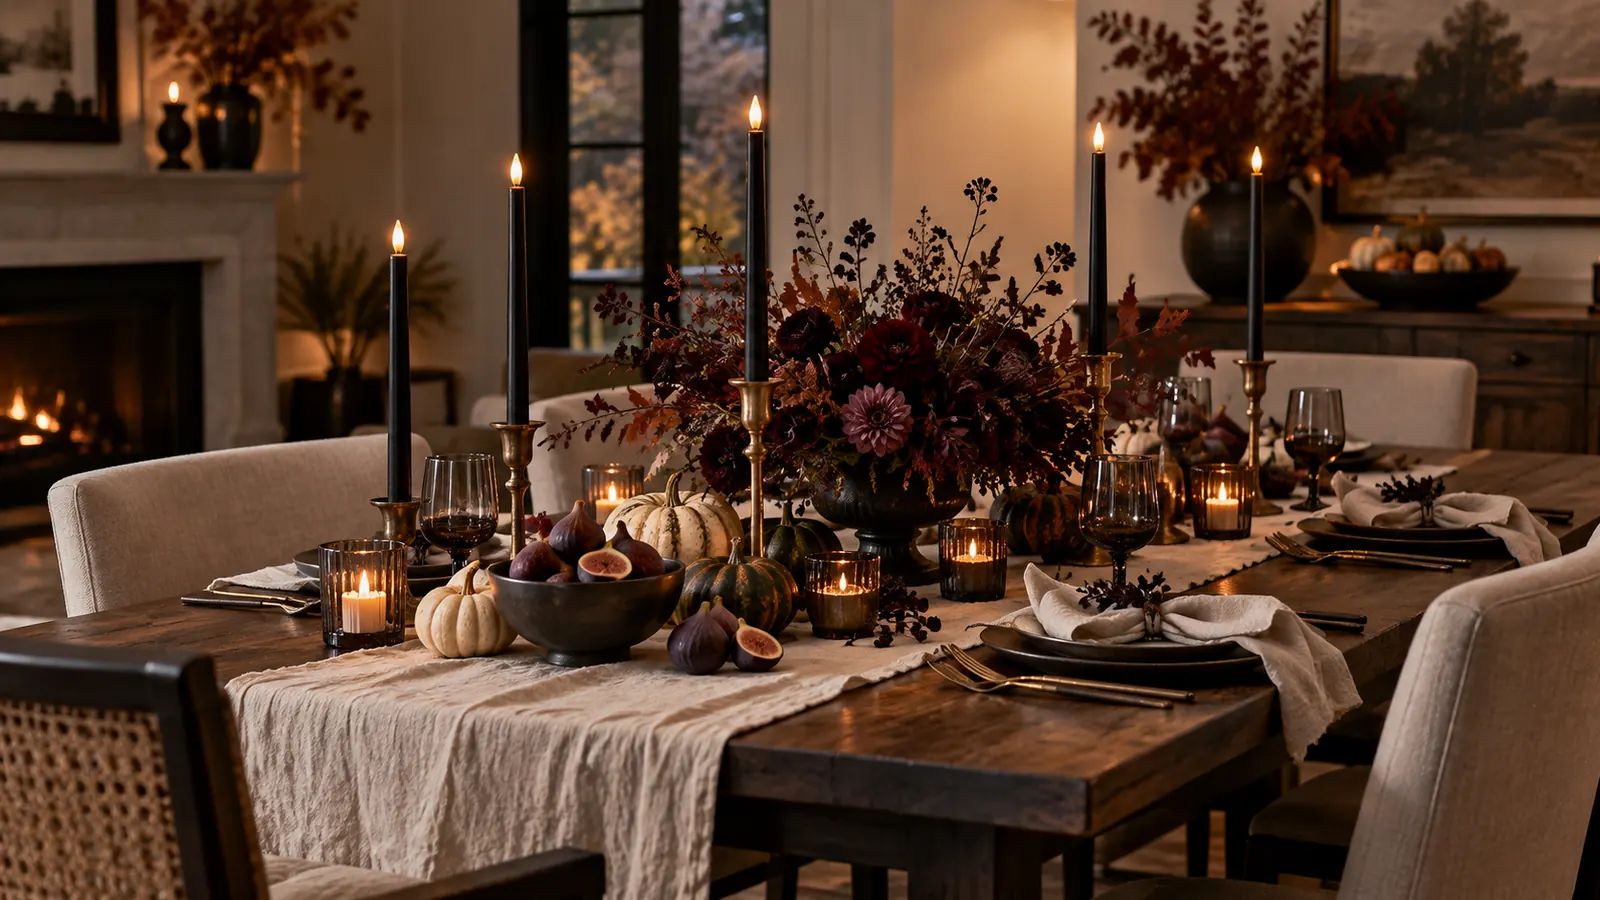
In the dining room, layer black tapers, ivory linen, dark fruit and miniature pumpkins for an elegant dinner setting. The idea works because it starts with a defined area rather than scattering small Halloween objects throughout the room. It can be simplified for a small space or expanded when the architecture gives the display more room.
Gather secure candleholders, flameless tapers, linen napkins, figs or plums, foliage and pumpkins. Begin with the largest anchor, check the composition from the normal entrance to the room, and add smaller pieces only where they strengthen the shape. Keep the centerpiece below seated eye level and leave room for serving dishes.
For a polished result, repeat two or three materials and leave some surrounding space undecorated. Photograph the setup in daylight and after dark: if important details disappear at night, add one diffused battery light rather than more objects.
How to create the look
- Clear and clean the chosen area in the dining room.
- Place the largest element first, then build the main silhouette with secure candleholders, flameless tapers, linen napkins, figs or plums, foliage and pumpkins.
- Repeat one color or material at least three times to connect the arrangement.
- Check doors, walkways, heat sources, pets and children's reach before finishing.
Best for: An adult dinner party or dramatic seasonal tablescape
9. Moonlit garden shelves
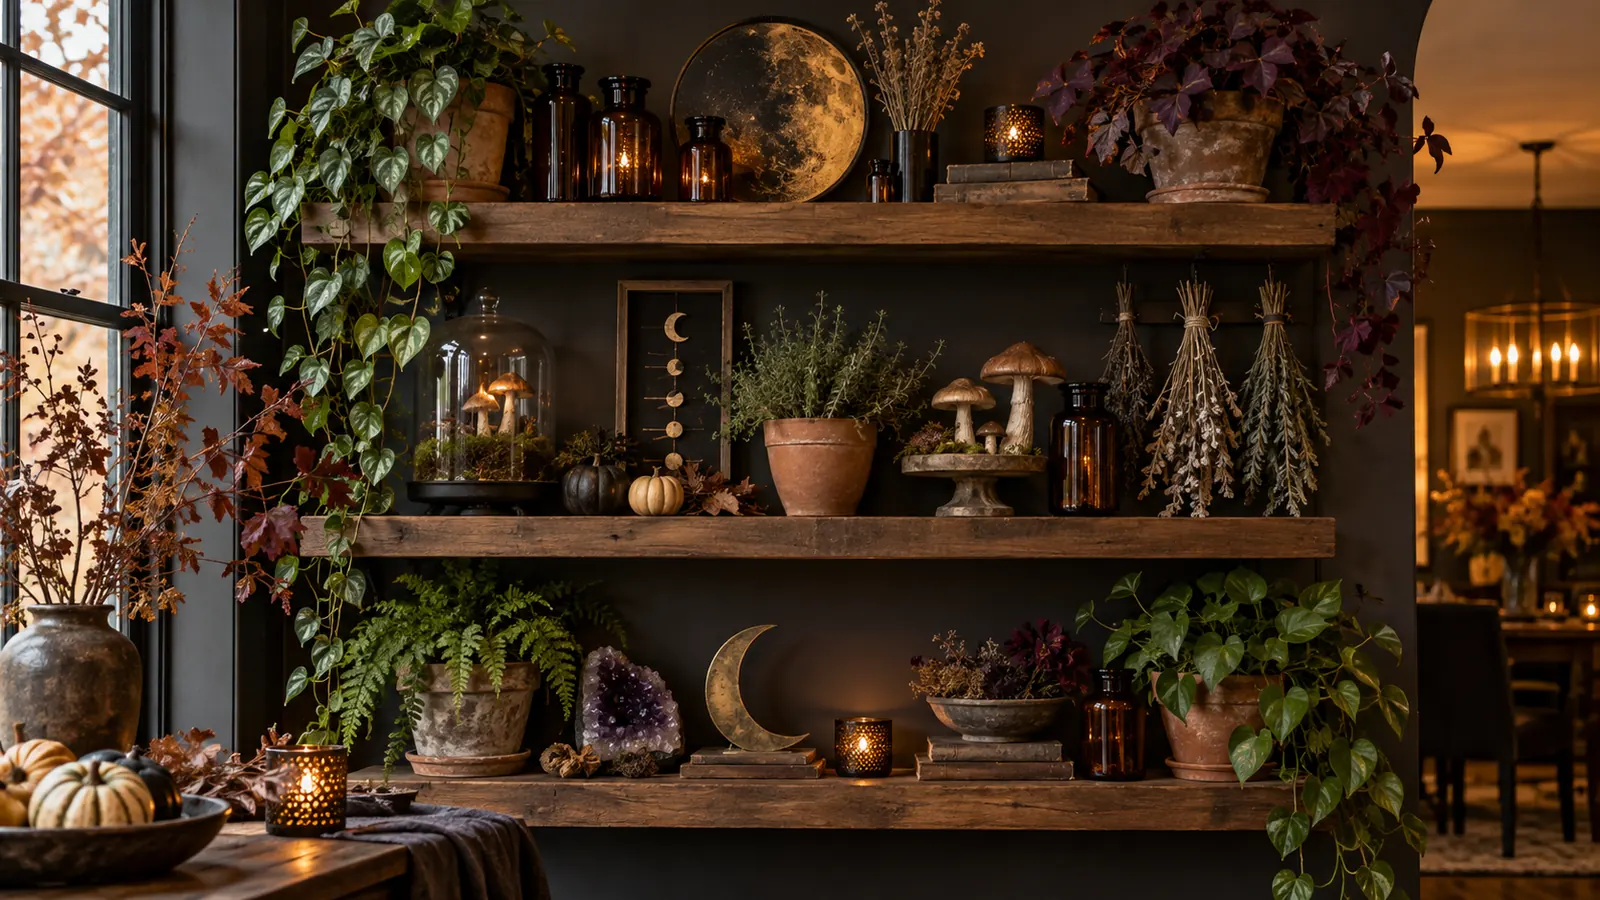
In the kitchen or living room shelves, turn open shelves into a shadowy botanical display of herbs, mushrooms and moon details. The idea works because it starts with a defined area rather than scattering small Halloween objects throughout the room. It can be simplified for a small space or expanded when the architecture gives the display more room.
Gather terracotta pots, dried herbs, faux mushrooms, amber jars without labels and moon ornaments. Begin with the largest anchor, check the composition from the normal entrance to the room, and add smaller pieces only where they strengthen the shape. Repeat one terracotta color on every shelf so the display feels collected rather than cluttered.
For a polished result, repeat two or three materials and leave some surrounding space undecorated. Photograph the setup in daylight and after dark: if important details disappear at night, add one diffused battery light rather than more objects.
How to create the look
- Clear and clean the chosen area in the kitchen or living room shelves.
- Place the largest element first, then build the main silhouette with terracotta pots, dried herbs, faux mushrooms, amber jars without labels and moon ornaments.
- Repeat one color or material at least three times to connect the arrangement.
- Check doors, walkways, heat sources, pets and children's reach before finishing.
Best for: Plant lovers and cottage-inspired homes
10. Gothic floral centerpiece
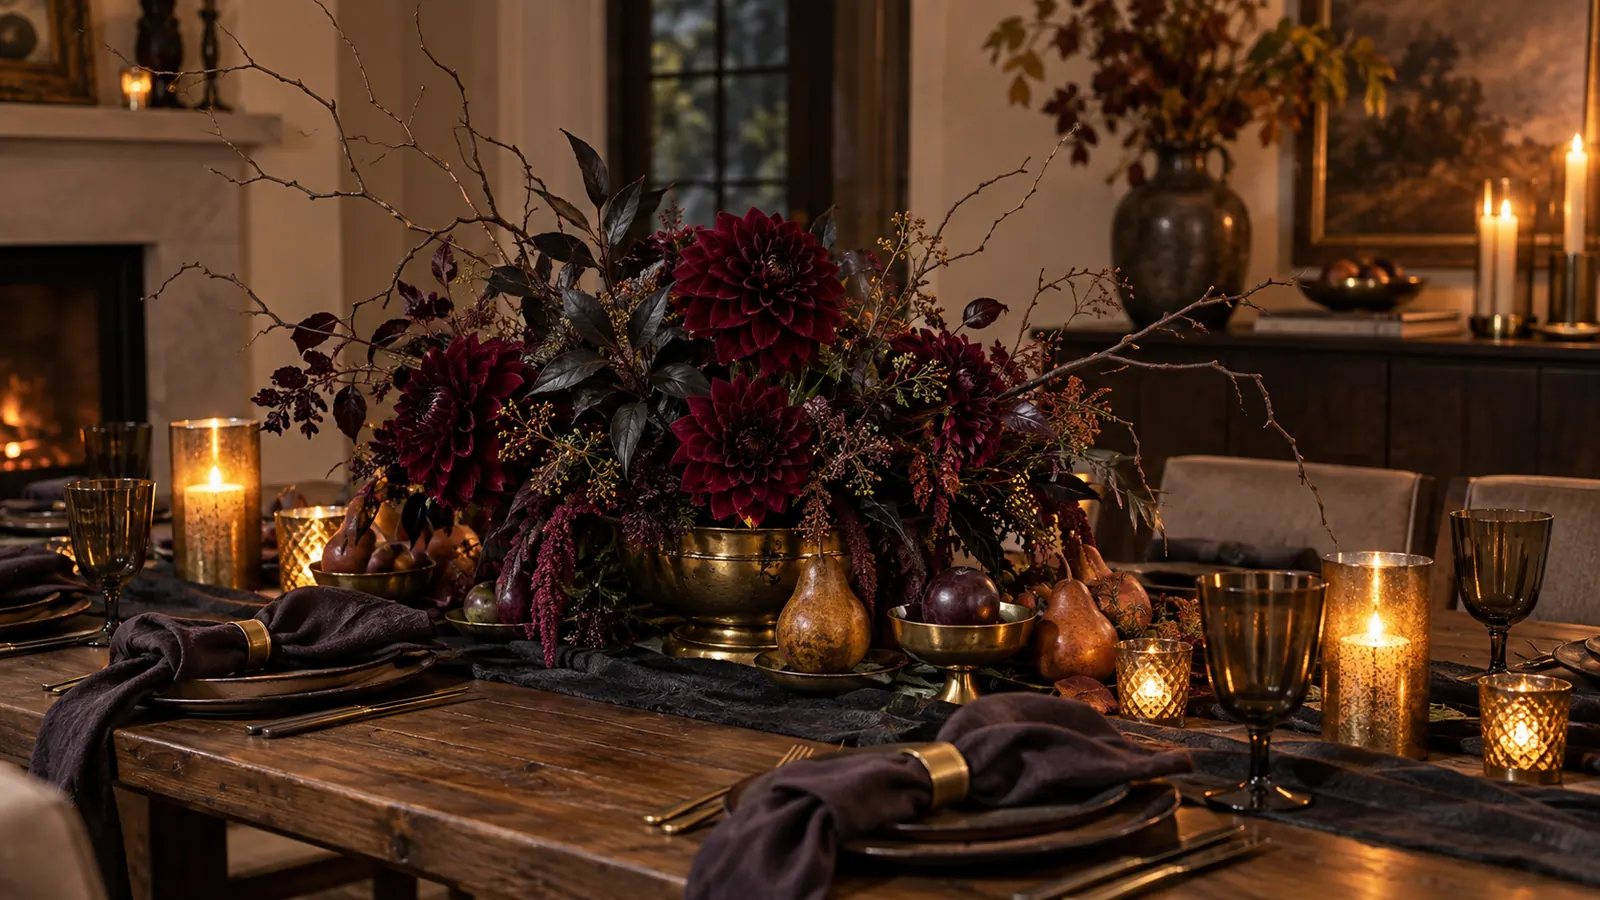
In the dining room, mix burgundy flowers, dark leaves, branches and autumn fruit in a low dramatic arrangement. The idea works because it starts with a defined area rather than scattering small Halloween objects throughout the room. It can be simplified for a small space or expanded when the architecture gives the display more room.
Gather burgundy dahlias, plum foliage, branches, pears, plums, floral tape and a heavy bowl. Begin with the largest anchor, check the composition from the normal entrance to the room, and add smaller pieces only where they strengthen the shape. Build the silhouette outward rather than upward so guests can see across the table.
For a polished result, repeat two or three materials and leave some surrounding space undecorated. Photograph the setup in daylight and after dark: if important details disappear at night, add one diffused battery light rather than more objects.
How to create the look
- Clear and clean the chosen area in the dining room.
- Place the largest element first, then build the main silhouette with burgundy dahlias, plum foliage, branches, pears, plums, floral tape and a heavy bowl.
- Repeat one color or material at least three times to connect the arrangement.
- Check doors, walkways, heat sources, pets and children's reach before finishing.
Best for: Hosts who want Halloween atmosphere without novelty decorations
11. Floating hat hallway
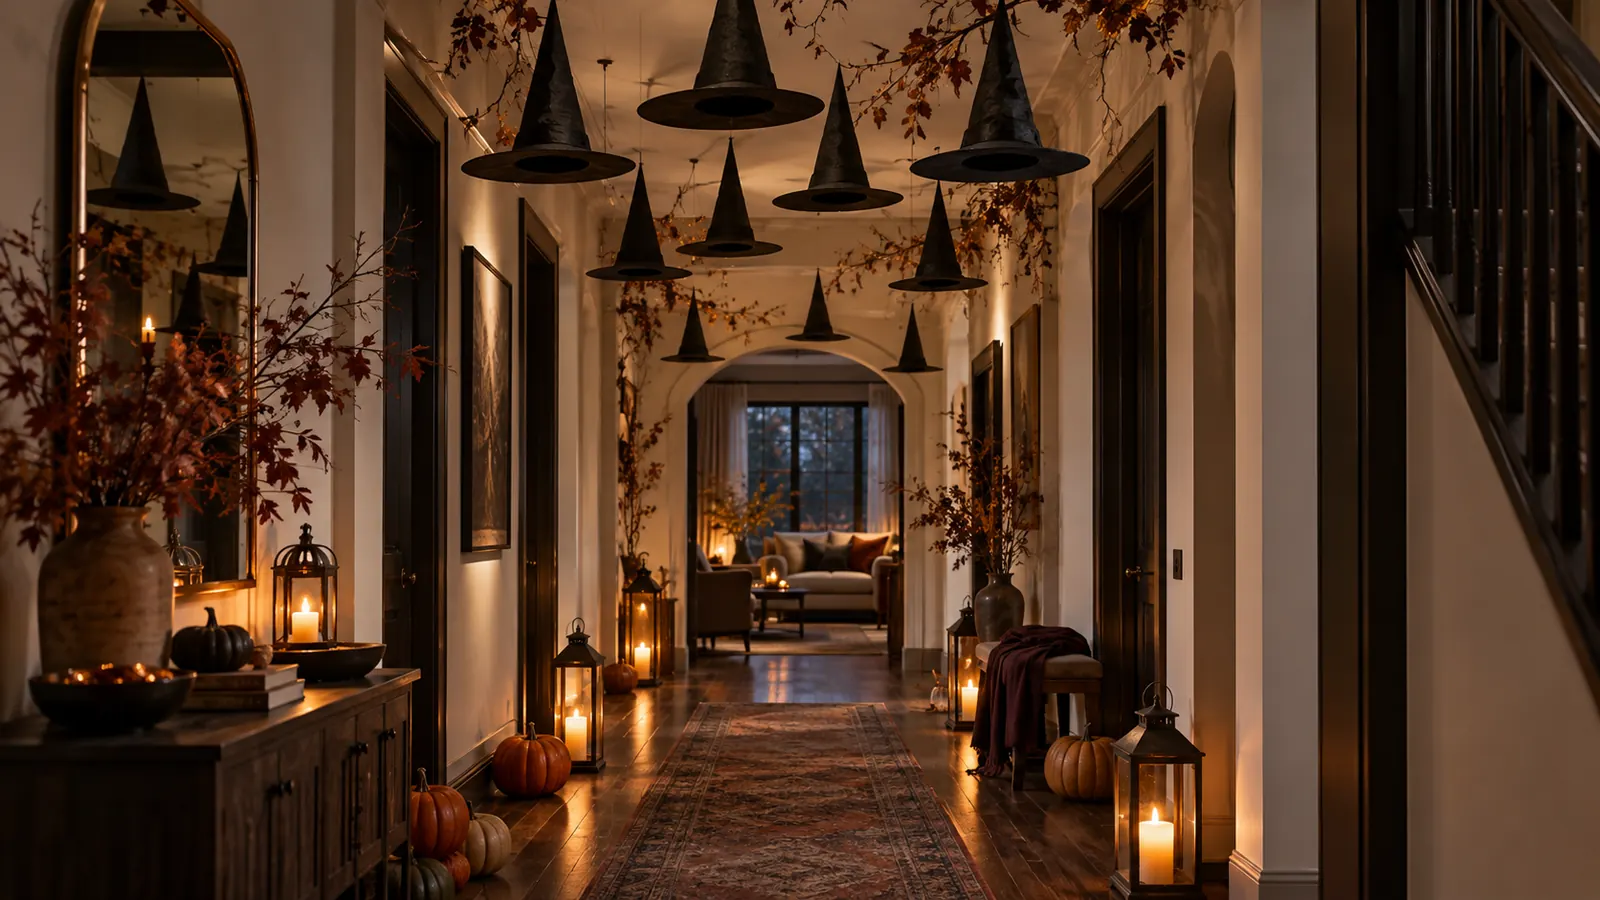
In the hallway, suspend a staggered group of original pointed paper hats so they appear to drift overhead. The idea works because it starts with a defined area rather than scattering small Halloween objects throughout the room. It can be simplified for a small space or expanded when the architecture gives the display more room.
Gather black cardstock, staples, clear thread and secure removable ceiling hooks. Begin with the largest anchor, check the composition from the normal entrance to the room, and add smaller pieces only where they strengthen the shape. Use an odd number and turn each brim in a slightly different direction for natural movement.
For a polished result, repeat two or three materials and leave some surrounding space undecorated. Photograph the setup in daylight and after dark: if important details disappear at night, add one diffused battery light rather than more objects.
How to create the look
- Clear and clean the chosen area in the hallway.
- Place the largest element first, then build the main silhouette with black cardstock, staples, clear thread and secure removable ceiling hooks.
- Repeat one color or material at least three times to connect the arrangement.
- Check doors, walkways, heat sources, pets and children's reach before finishing.
Best for: A narrow passage that needs decoration without using floor space
12. Paper silhouette windows
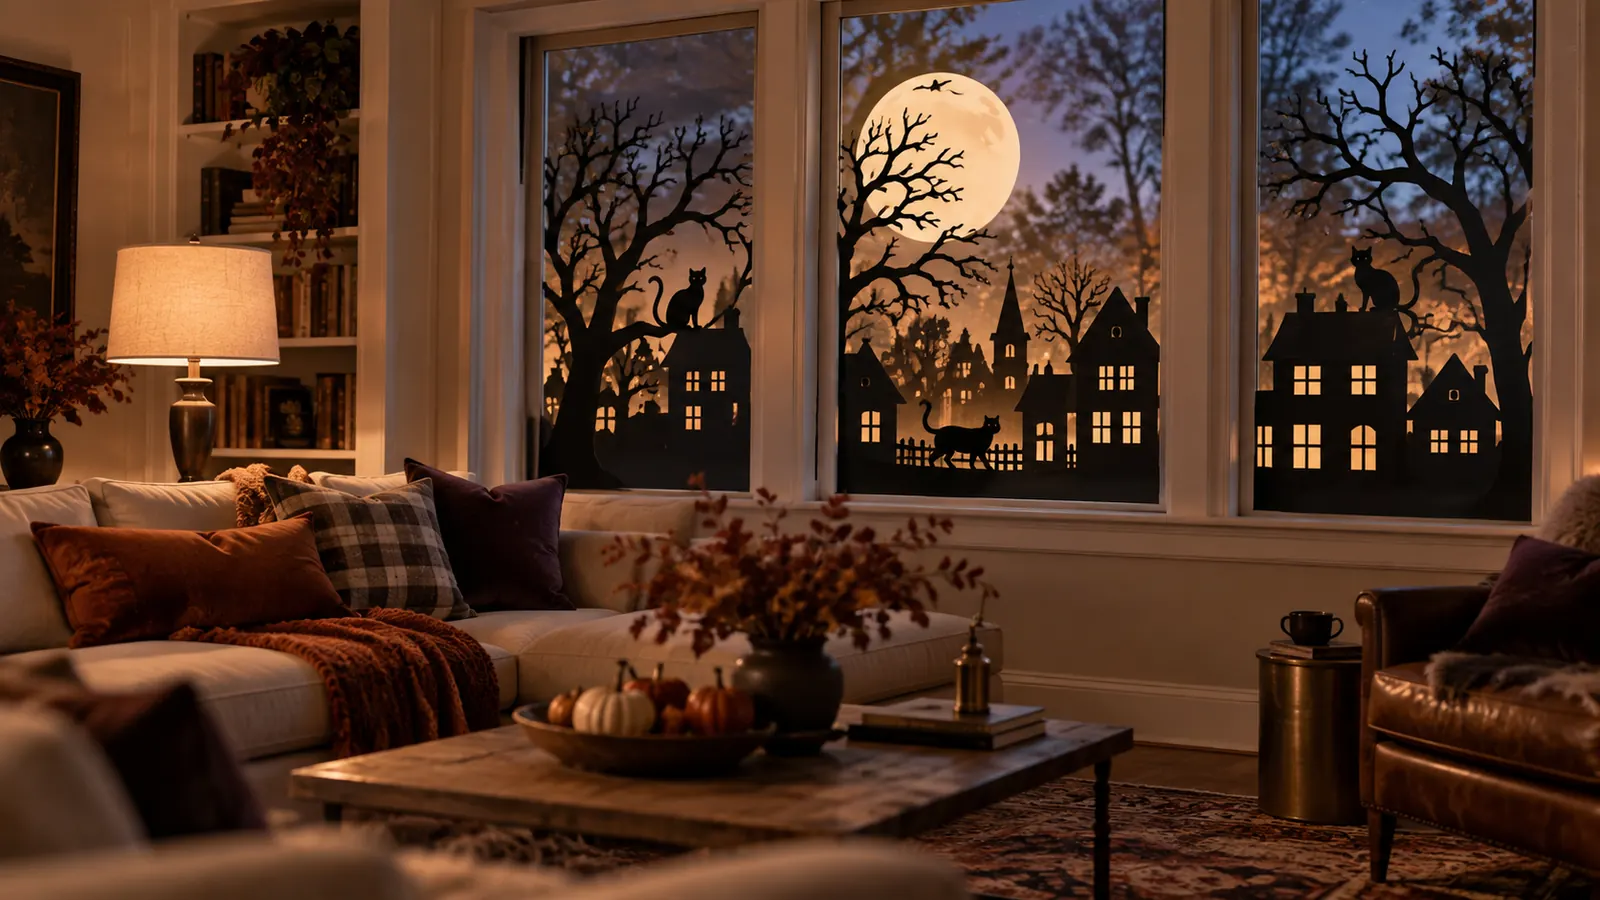
In the front windows, create a moonlit village of trees, cats and rooftops visible from outside. The idea works because it starts with a defined area rather than scattering small Halloween objects throughout the room. It can be simplified for a small space or expanded when the architecture gives the display more room.
Gather black paper, tracing paper, removable tape and existing interior lamps. Begin with the largest anchor, check the composition from the normal entrance to the room, and add smaller pieces only where they strengthen the shape. Design broad simple shapes; fine cuts disappear once the window is viewed from the street.
For a polished result, repeat two or three materials and leave some surrounding space undecorated. Photograph the setup in daylight and after dark: if important details disappear at night, add one diffused battery light rather than more objects.
How to create the look
- Clear and clean the chosen area in the front windows.
- Place the largest element first, then build the main silhouette with black paper, tracing paper, removable tape and existing interior lamps.
- Repeat one color or material at least three times to connect the arrangement.
- Check doors, walkways, heat sources, pets and children's reach before finishing.
Best for: Curb appeal without placing decorations outdoors
13. Spiderweb mirror
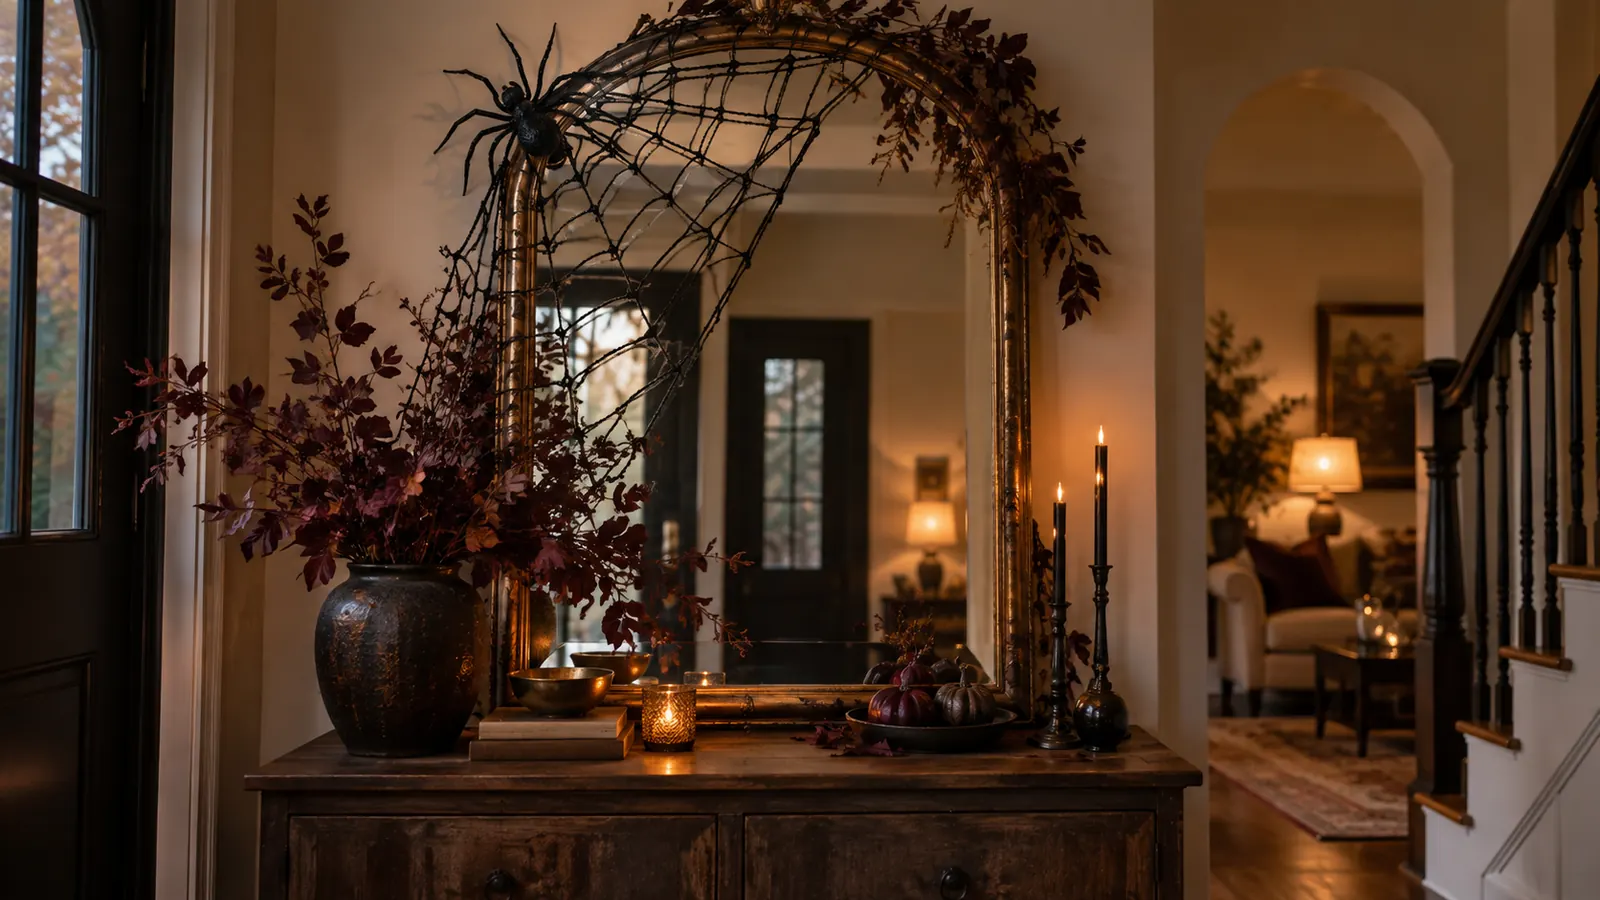
In the entryway, stretch an irregular handmade web across one corner of a mirror and surround it with dark foliage. The idea works because it starts with a defined area rather than scattering small Halloween objects throughout the room. It can be simplified for a small space or expanded when the architecture gives the display more room.
Gather black cotton cord, removable clips, one sculptural spider and burgundy branches. Begin with the largest anchor, check the composition from the normal entrance to the room, and add smaller pieces only where they strengthen the shape. Cover no more than one third of the mirror so the reflection remains useful and visually striking.
For a polished result, repeat two or three materials and leave some surrounding space undecorated. Photograph the setup in daylight and after dark: if important details disappear at night, add one diffused battery light rather than more objects.
How to create the look
- Clear and clean the chosen area in the entryway.
- Place the largest element first, then build the main silhouette with black cotton cord, removable clips, one sculptural spider and burgundy branches.
- Repeat one color or material at least three times to connect the arrangement.
- Check doors, walkways, heat sources, pets and children's reach before finishing.
Best for: A five-minute accent for an entry console or powder room
14. Botanical apothecary bar cart
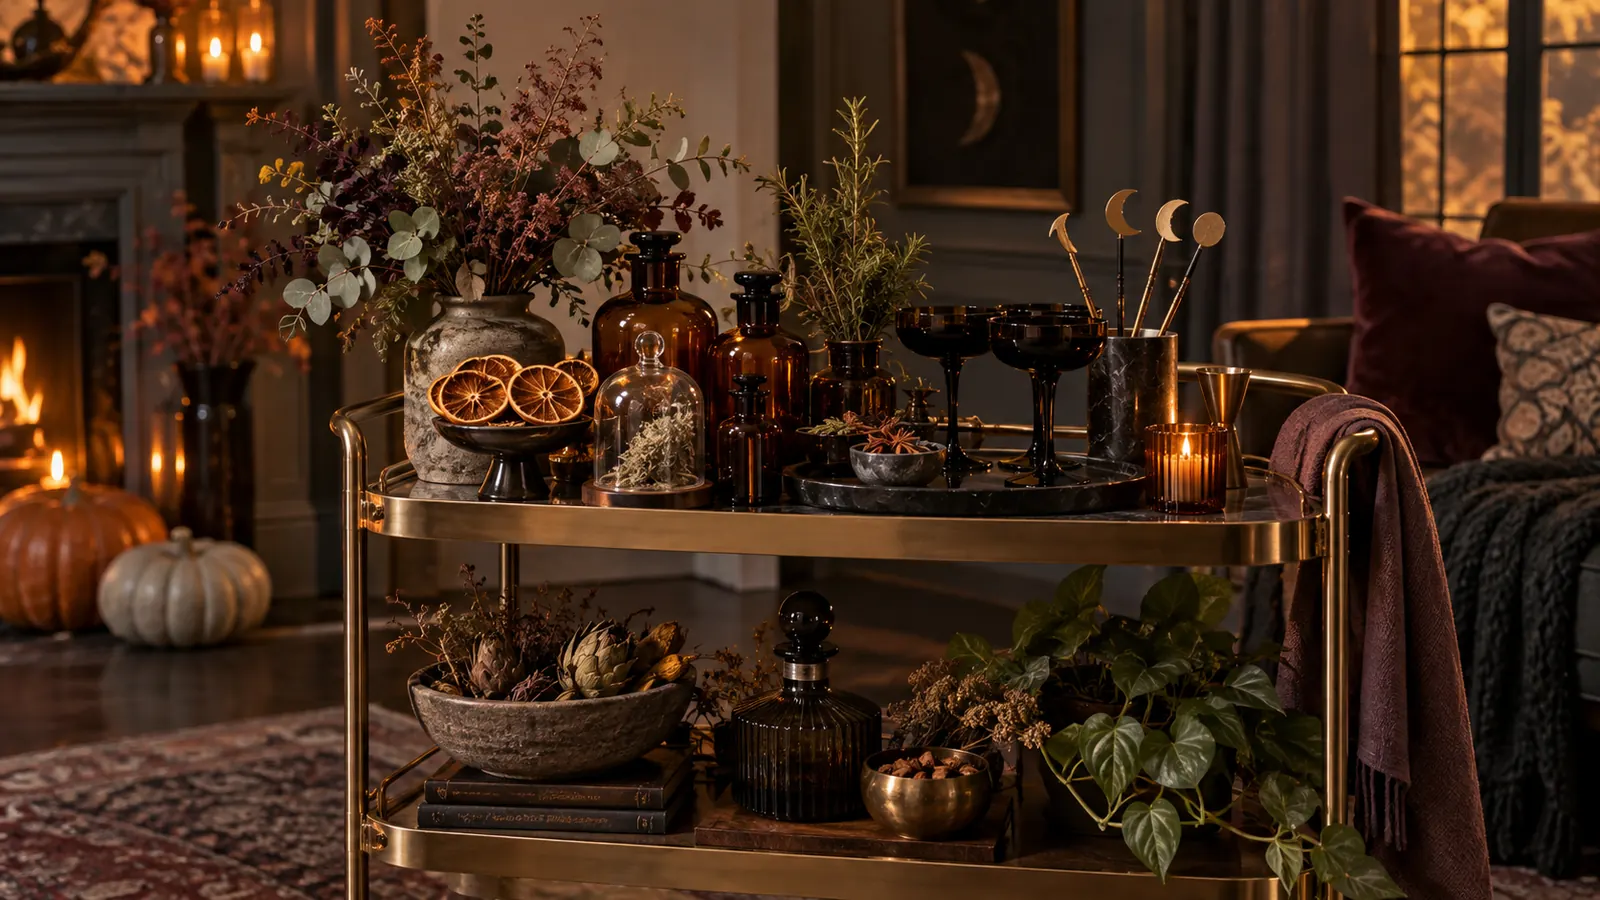
In the dining room, style a bar cart with amber glass, herbs, dried citrus and mysterious moon-shaped tools. The idea works because it starts with a defined area rather than scattering small Halloween objects throughout the room. It can be simplified for a small space or expanded when the architecture gives the display more room.
Gather clean bottles without labels, dried rosemary, citrus wheels, black glasses and metal stirrers. Begin with the largest anchor, check the composition from the normal entrance to the room, and add smaller pieces only where they strengthen the shape. Keep drink ingredients on the top level and decorative empty vessels below to avoid confusion.
For a polished result, repeat two or three materials and leave some surrounding space undecorated. Photograph the setup in daylight and after dark: if important details disappear at night, add one diffused battery light rather than more objects.
How to create the look
- Clear and clean the chosen area in the dining room.
- Place the largest element first, then build the main silhouette with clean bottles without labels, dried rosemary, citrus wheels, black glasses and metal stirrers.
- Repeat one color or material at least three times to connect the arrangement.
- Check doors, walkways, heat sources, pets and children's reach before finishing.
Best for: Halloween parties and adults-only entertaining areas
15. Ghost pillow sofa
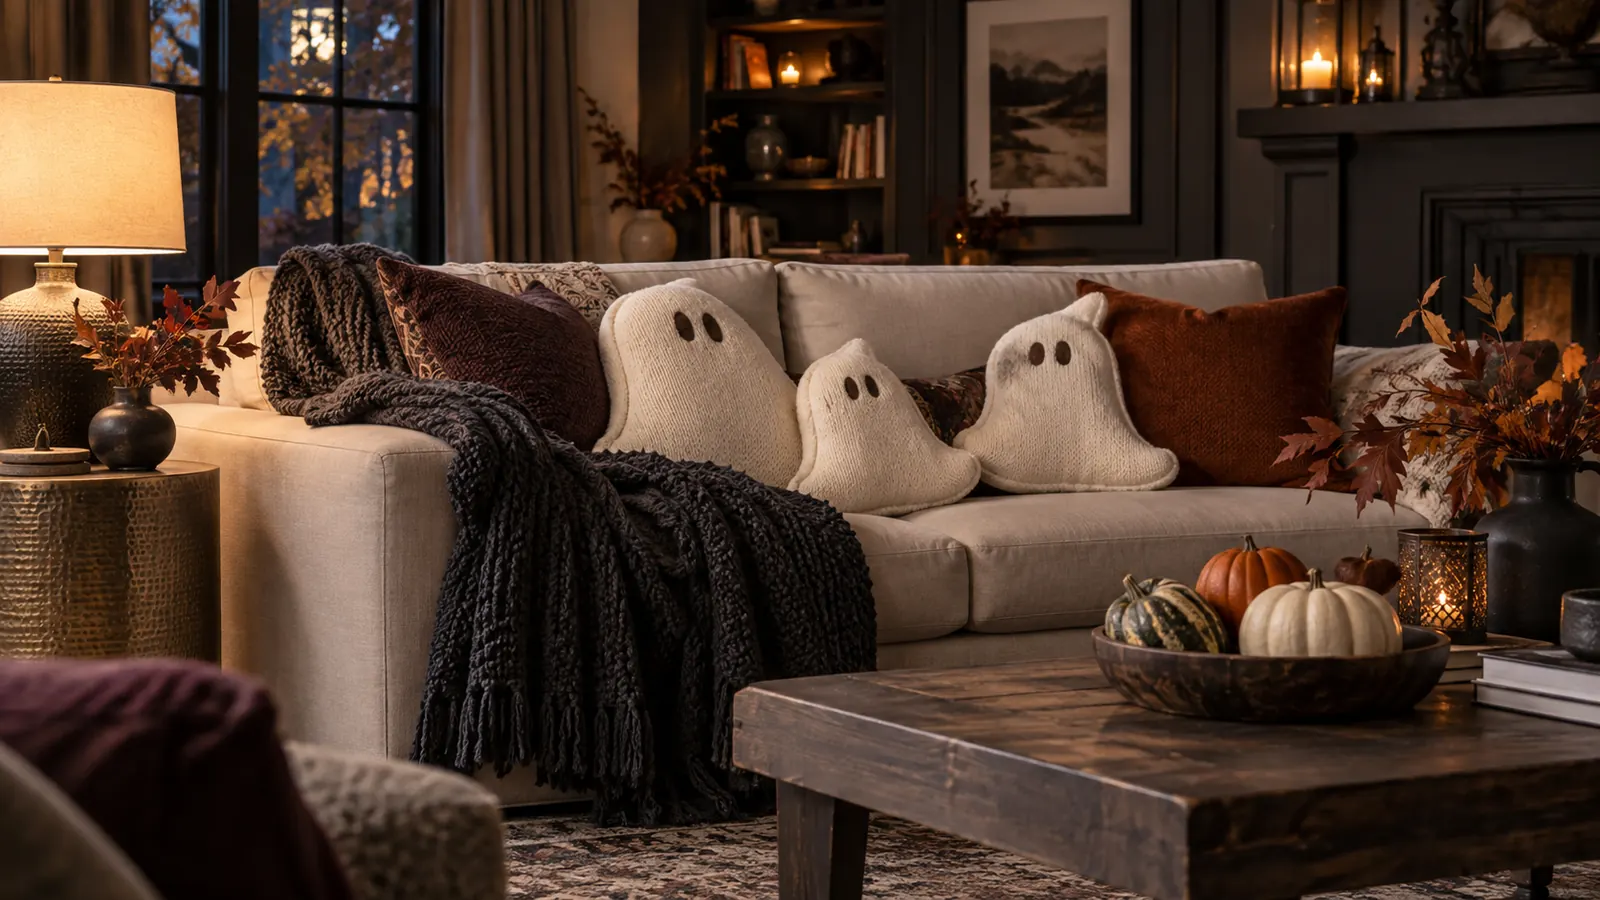
In the living room, add two or three softly shaped ivory ghosts to a neutral sofa. The idea works because it starts with a defined area rather than scattering small Halloween objects throughout the room. It can be simplified for a small space or expanded when the architecture gives the display more room.
Gather ivory fabric, washable stuffing, black felt details, charcoal throws and small pumpkins. Begin with the largest anchor, check the composition from the normal entrance to the room, and add smaller pieces only where they strengthen the shape. Use different ghost silhouettes but repeat the same fabric so the cushions look like a deliberate set.
For a polished result, repeat two or three materials and leave some surrounding space undecorated. Photograph the setup in daylight and after dark: if important details disappear at night, add one diffused battery light rather than more objects.
How to create the look
- Clear and clean the chosen area in the living room.
- Place the largest element first, then build the main silhouette with ivory fabric, washable stuffing, black felt details, charcoal throws and small pumpkins.
- Repeat one color or material at least three times to connect the arrangement.
- Check doors, walkways, heat sources, pets and children's reach before finishing.
Best for: Cute, comfortable decor that is easy to store
16. Autumn curiosity cabinet
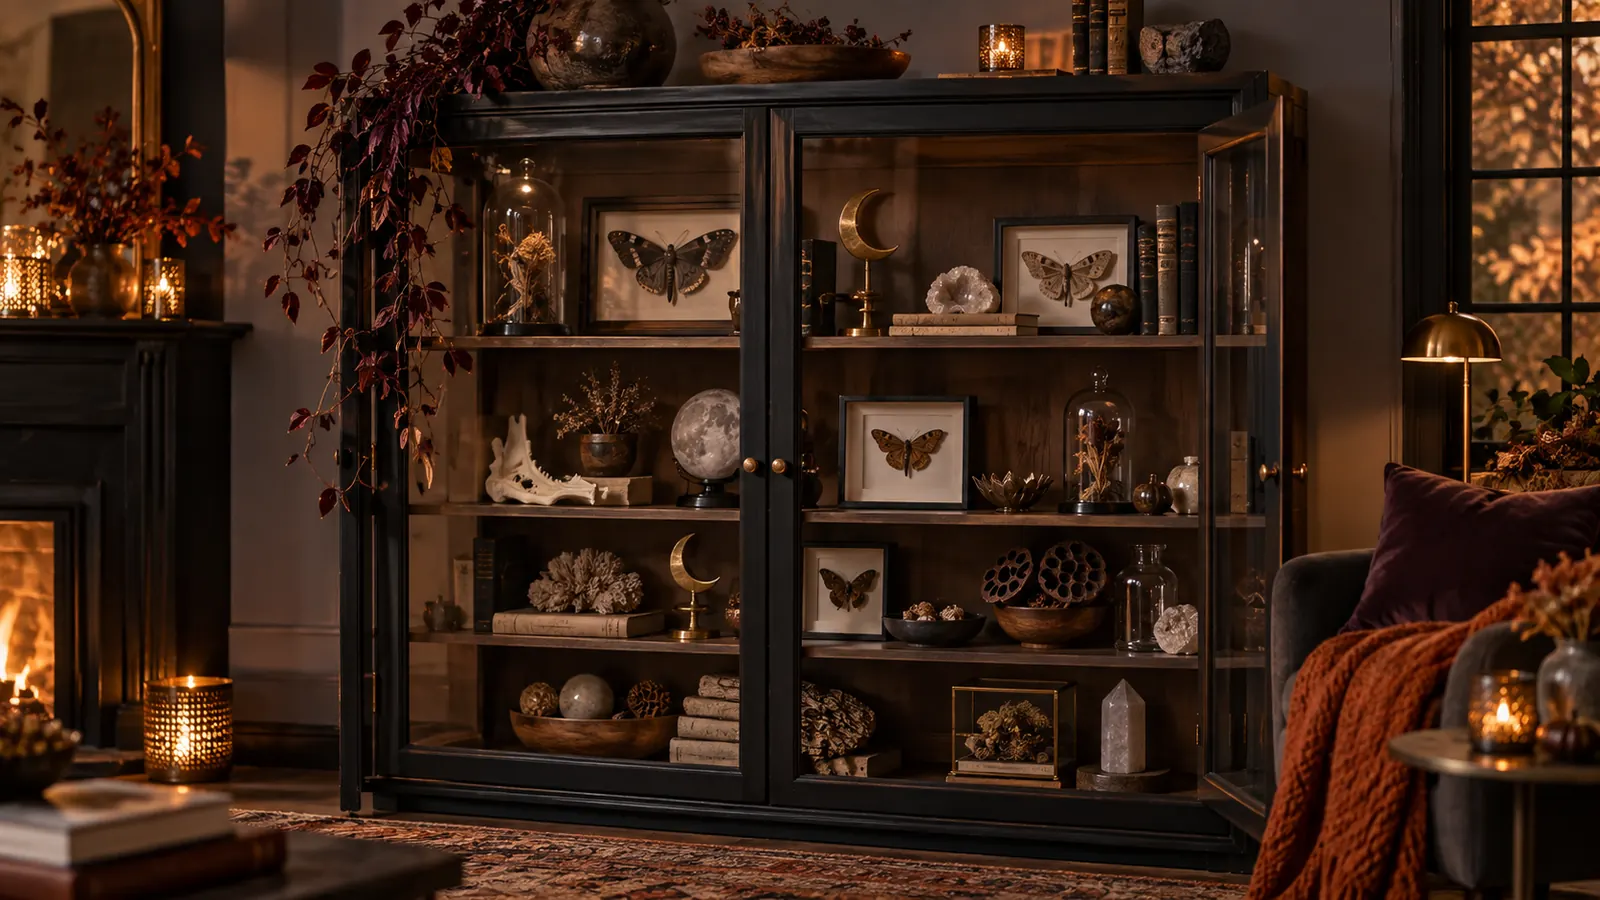
In the living room, arrange natural objects and faux specimens like a cabinet discovered after dark. The idea works because it starts with a defined area rather than scattering small Halloween objects throughout the room. It can be simplified for a small space or expanded when the architecture gives the display more room.
Gather stones, seedpods, ethically sourced shed feathers, faux moths, glass domes and tiny moon ornaments. Begin with the largest anchor, check the composition from the normal entrance to the room, and add smaller pieces only where they strengthen the shape. Group objects by color and scale, and never collect protected plants, nests or wildlife materials.
For a polished result, repeat two or three materials and leave some surrounding space undecorated. Photograph the setup in daylight and after dark: if important details disappear at night, add one diffused battery light rather than more objects.
How to create the look
- Clear and clean the chosen area in the living room.
- Place the largest element first, then build the main silhouette with stones, seedpods, ethically sourced shed feathers, faux moths, glass domes and tiny moon ornaments.
- Repeat one color or material at least three times to connect the arrangement.
- Check doors, walkways, heat sources, pets and children's reach before finishing.
Best for: Collectors and nature-inspired interiors
17. Pumpkin bookshelf
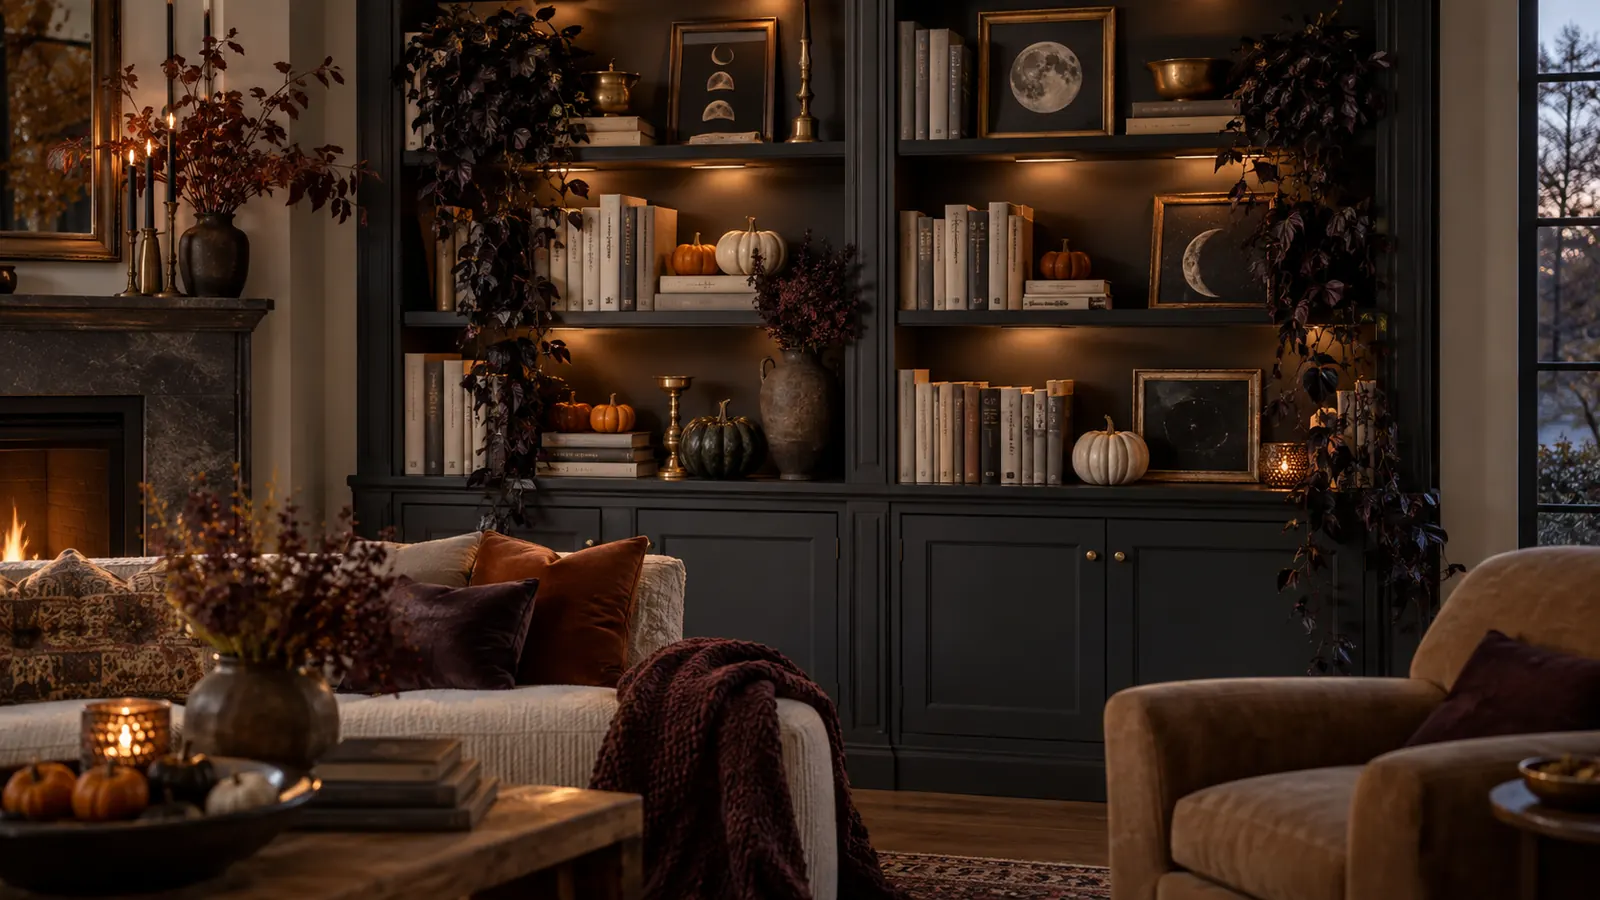
In the library or living room, tuck small pumpkins, trailing dark foliage and framed moons between existing books. The idea works because it starts with a defined area rather than scattering small Halloween objects throughout the room. It can be simplified for a small space or expanded when the architecture gives the display more room.
Gather mini pumpkins, removable shelf lights, faux vines and small celestial art. Begin with the largest anchor, check the composition from the normal entrance to the room, and add smaller pieces only where they strengthen the shape. Decorate one area on each shelf and leave the rest of the book spines visible for breathing room.
For a polished result, repeat two or three materials and leave some surrounding space undecorated. Photograph the setup in daylight and after dark: if important details disappear at night, add one diffused battery light rather than more objects.
How to create the look
- Clear and clean the chosen area in the library or living room.
- Place the largest element first, then build the main silhouette with mini pumpkins, removable shelf lights, faux vines and small celestial art.
- Repeat one color or material at least three times to connect the arrangement.
- Check doors, walkways, heat sources, pets and children's reach before finishing.
Best for: Using items you already own as the foundation of the display
18. Celestial moth wall
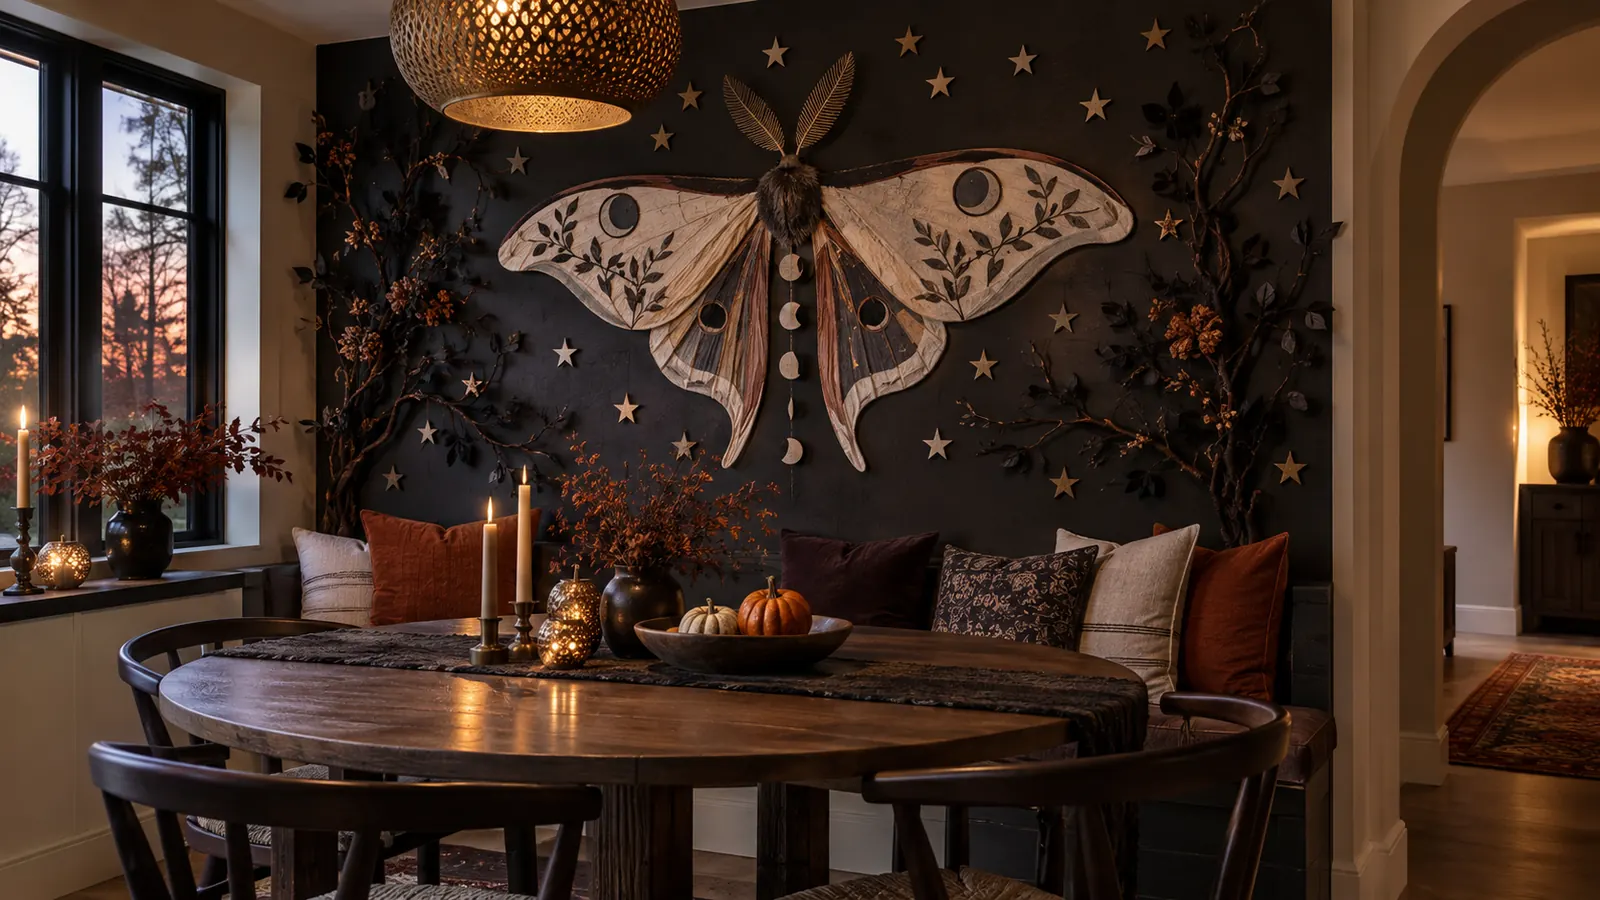
In the dining nook, make one oversized moth with moon markings the center of a scattered star installation. The idea works because it starts with a defined area rather than scattering small Halloween objects throughout the room. It can be simplified for a small space or expanded when the architecture gives the display more room.
Gather black and bronze cardstock, thin wooden dowels, paper stars and removable adhesive. Begin with the largest anchor, check the composition from the normal entrance to the room, and add smaller pieces only where they strengthen the shape. Keep the large moth simple and place smaller stars unevenly to avoid a nursery-like pattern.
For a polished result, repeat two or three materials and leave some surrounding space undecorated. Photograph the setup in daylight and after dark: if important details disappear at night, add one diffused battery light rather than more objects.
How to create the look
- Clear and clean the chosen area in the dining nook.
- Place the largest element first, then build the main silhouette with black and bronze cardstock, thin wooden dowels, paper stars and removable adhesive.
- Repeat one color or material at least three times to connect the arrangement.
- Check doors, walkways, heat sources, pets and children's reach before finishing.
Best for: A contemporary alternative to bats and ghosts
19. Moonlit Halloween bedroom
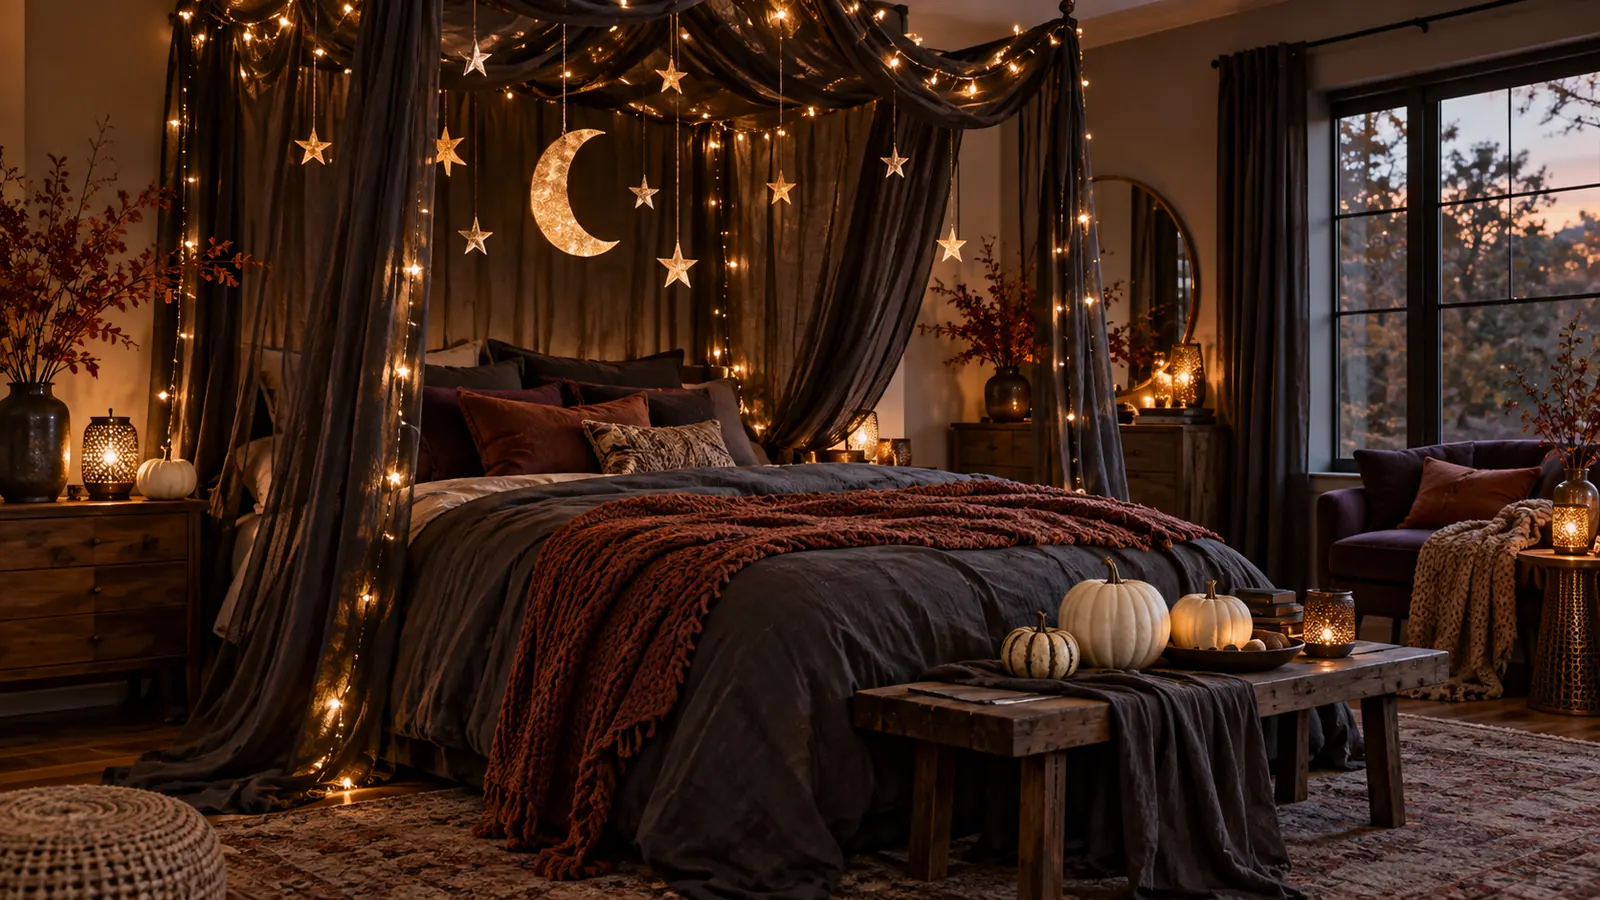
In the bedroom, introduce charcoal linen, a moon garland and soft stars without disturbing the room's calm. The idea works because it starts with a defined area rather than scattering small Halloween objects throughout the room. It can be simplified for a small space or expanded when the architecture gives the display more room.
Gather dark bedding, felt moons, warm battery lights, ivory pumpkins and removable hooks. Begin with the largest anchor, check the composition from the normal entrance to the room, and add smaller pieces only where they strengthen the shape. Limit the palette to three colors and keep all hanging pieces away from the bed and ceiling fan.
For a polished result, repeat two or three materials and leave some surrounding space undecorated. Photograph the setup in daylight and after dark: if important details disappear at night, add one diffused battery light rather than more objects.
How to create the look
- Clear and clean the chosen area in the bedroom.
- Place the largest element first, then build the main silhouette with dark bedding, felt moons, warm battery lights, ivory pumpkins and removable hooks.
- Repeat one color or material at least three times to connect the arrangement.
- Check doors, walkways, heat sources, pets and children's reach before finishing.
Best for: A subtle seasonal bedroom that still feels restful
20. Black lace tablescape
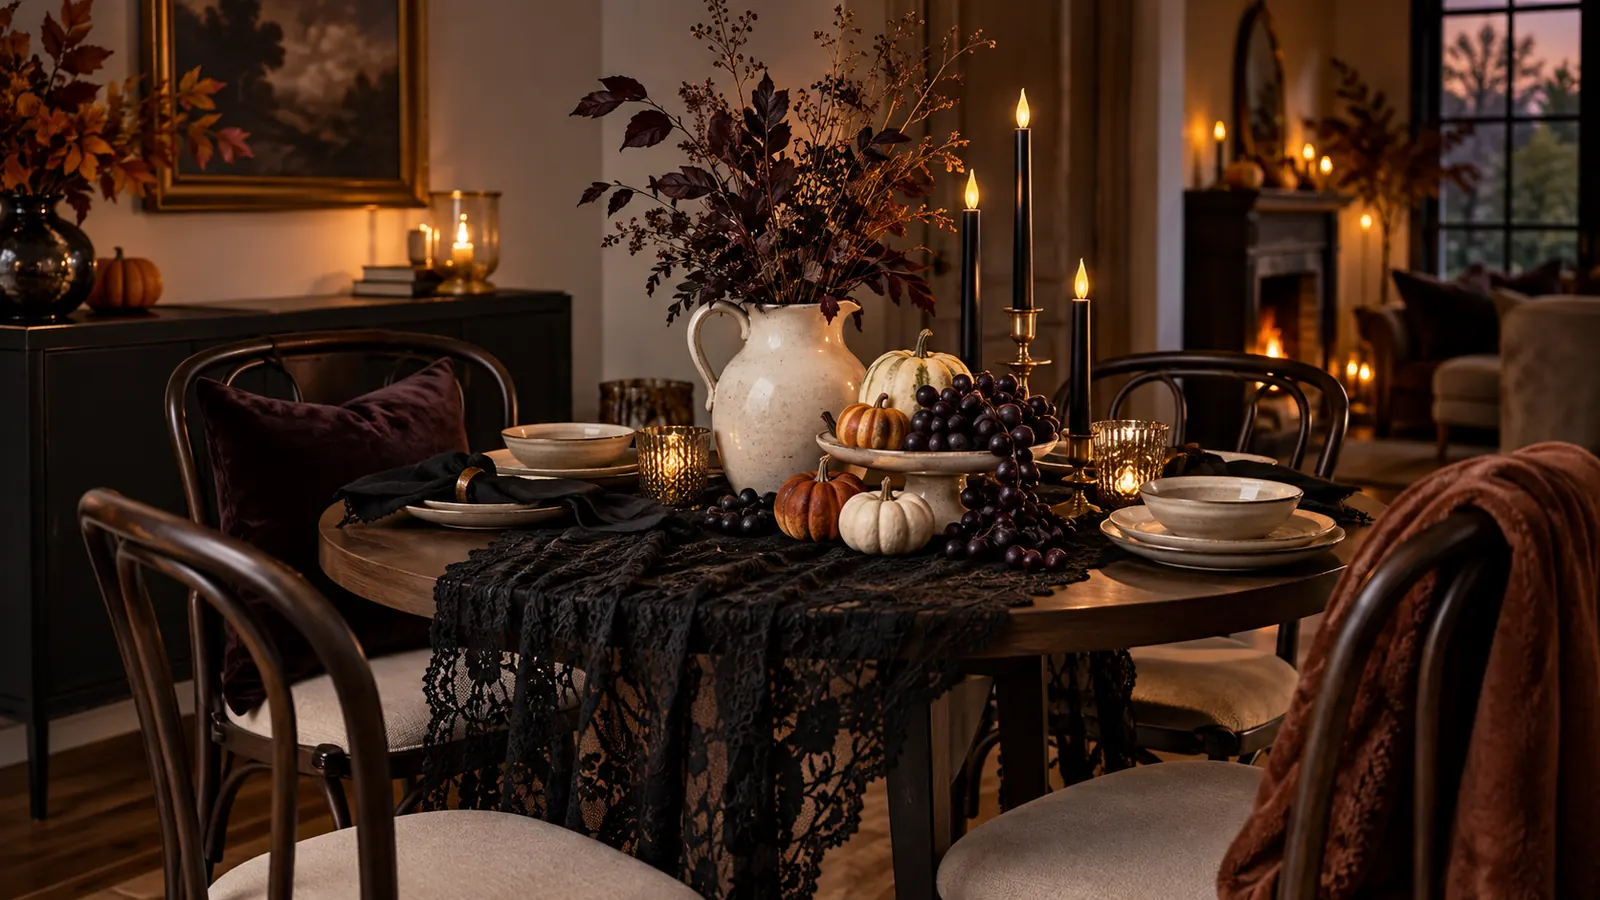
In the small dining area, layer lace over pale linen and add cream ceramics, dark grapes and tiny pumpkins. The idea works because it starts with a defined area rather than scattering small Halloween objects throughout the room. It can be simplified for a small space or expanded when the architecture gives the display more room.
Gather lace runner, plain dishes, fruit, pumpkins, low holders and flameless tapers. Begin with the largest anchor, check the composition from the normal entrance to the room, and add smaller pieces only where they strengthen the shape. Use lace as one translucent layer rather than covering the entire table in solid black.
For a polished result, repeat two or three materials and leave some surrounding space undecorated. Photograph the setup in daylight and after dark: if important details disappear at night, add one diffused battery light rather than more objects.
How to create the look
- Clear and clean the chosen area in the small dining area.
- Place the largest element first, then build the main silhouette with lace runner, plain dishes, fruit, pumpkins, low holders and flameless tapers.
- Repeat one color or material at least three times to connect the arrangement.
- Check doors, walkways, heat sources, pets and children's reach before finishing.
Best for: Small tables where every detail is seen up close
21. Moonlit yard graveyard
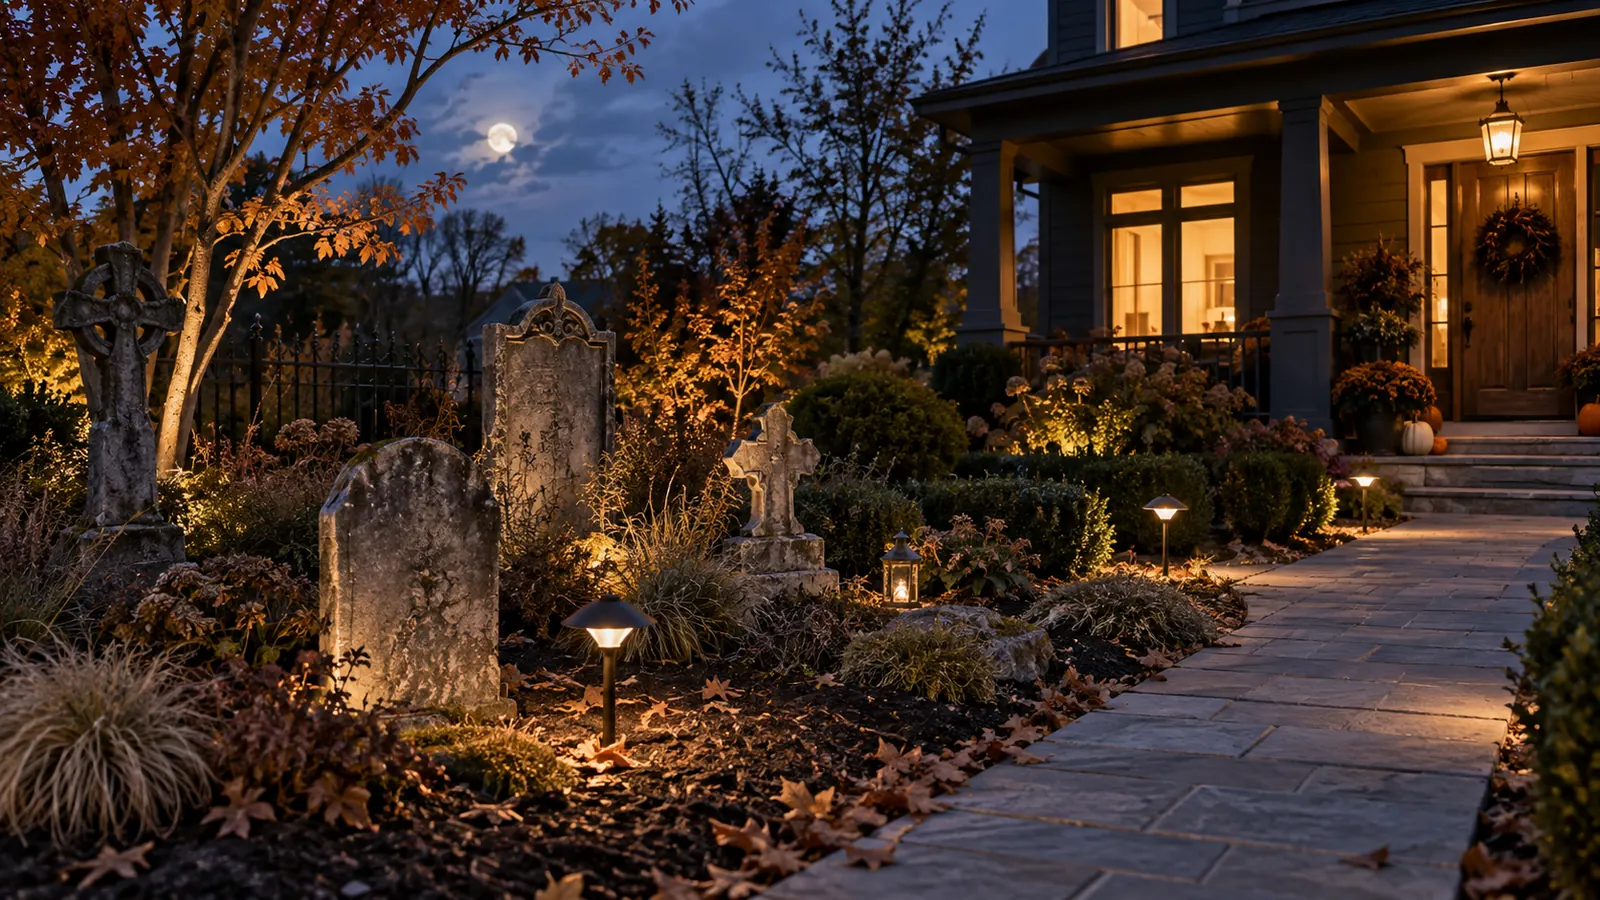
In the front yard, arrange a small atmospheric graveyard with original weathered markers and low misty grasses. The idea works because it starts with a defined area rather than scattering small Halloween objects throughout the room. It can be simplified for a small space or expanded when the architecture gives the display more room.
Gather carved foam markers with invented symbols, dark mulch, ornamental grasses and solar lights. Begin with the largest anchor, check the composition from the normal entrance to the room, and add smaller pieces only where they strengthen the shape. Anchor every lightweight object and keep markers away from sidewalks, utilities and sightlines.
For a polished result, repeat two or three materials and leave some surrounding space undecorated. Photograph the setup in daylight and after dark: if important details disappear at night, add one diffused battery light rather than more objects.
How to create the look
- Clear and clean the chosen area in the front yard.
- Place the largest element first, then build the main silhouette with carved foam markers with invented symbols, dark mulch, ornamental grasses and solar lights.
- Repeat one color or material at least three times to connect the arrangement.
- Check doors, walkways, heat sources, pets and children's reach before finishing.
Best for: A spooky outdoor scene without gore
22. Pumpkin porch arch
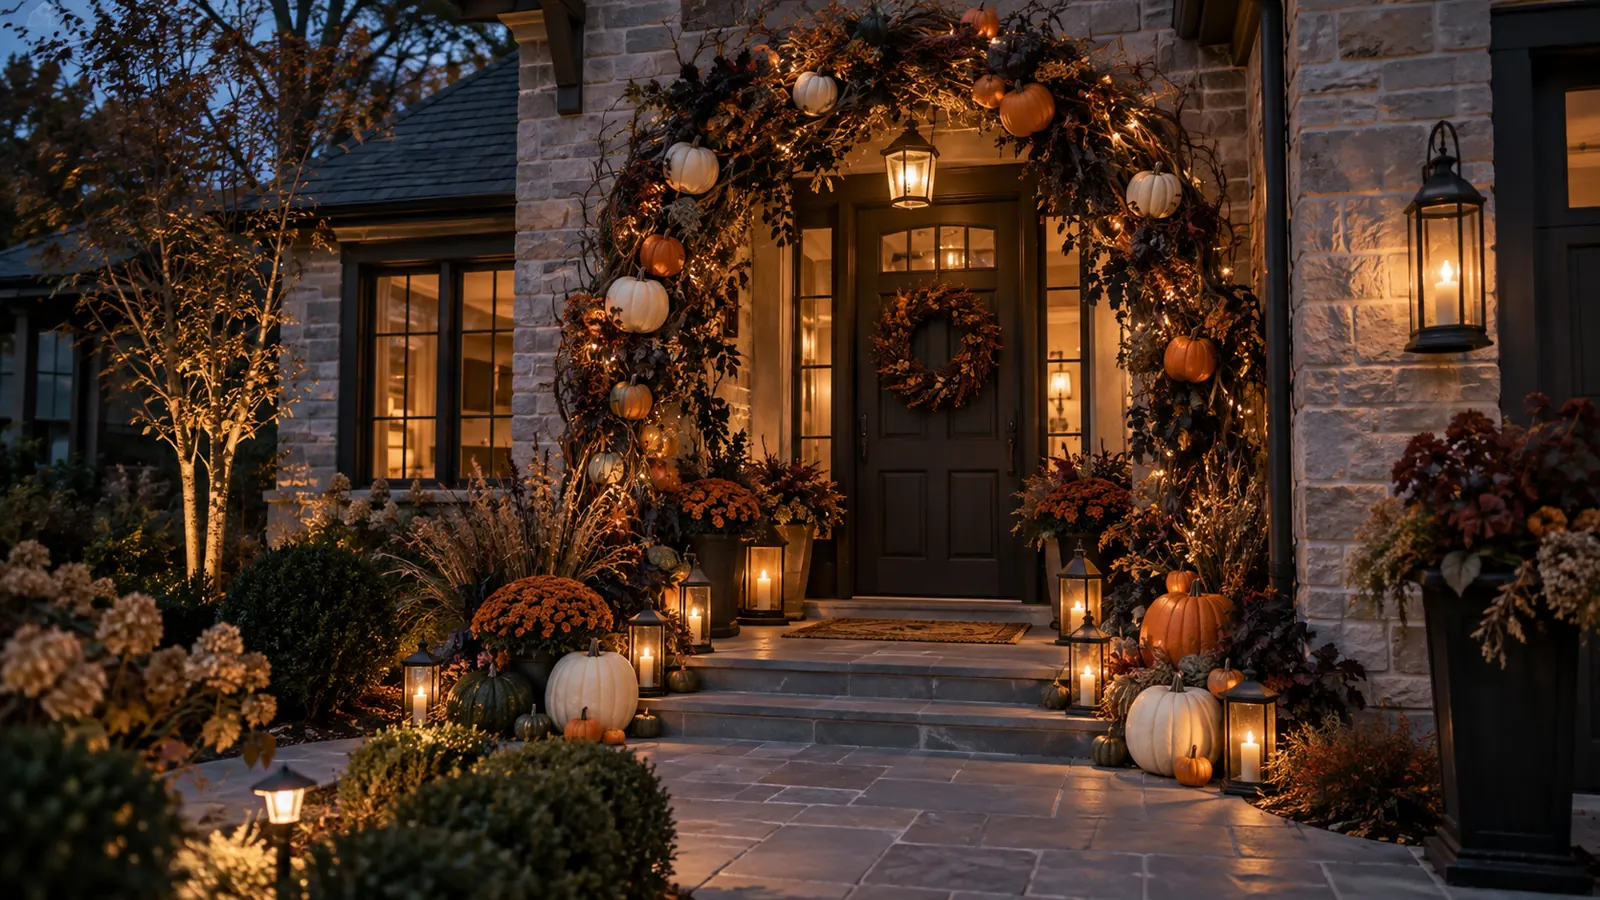
In the front door, frame the doorway with an abundant but balanced arch of pumpkins, leaves and vines. The idea works because it starts with a defined area rather than scattering small Halloween objects throughout the room. It can be simplified for a small space or expanded when the architecture gives the display more room.
Gather a reusable arch frame, faux and real pumpkins, zip ties, foliage and removable anchors. Begin with the largest anchor, check the composition from the normal entrance to the room, and add smaller pieces only where they strengthen the shape. Place heavy pumpkins on the ground and attach only lightweight pieces above shoulder height.
For a polished result, repeat two or three materials and leave some surrounding space undecorated. Photograph the setup in daylight and after dark: if important details disappear at night, add one diffused battery light rather than more objects.
How to create the look
- Clear and clean the chosen area in the front door.
- Place the largest element first, then build the main silhouette with a reusable arch frame, faux and real pumpkins, zip ties, foliage and removable anchors.
- Repeat one color or material at least three times to connect the arrangement.
- Check doors, walkways, heat sources, pets and children's reach before finishing.
Best for: A statement entrance designed for photographs
23. Oversized porch spider
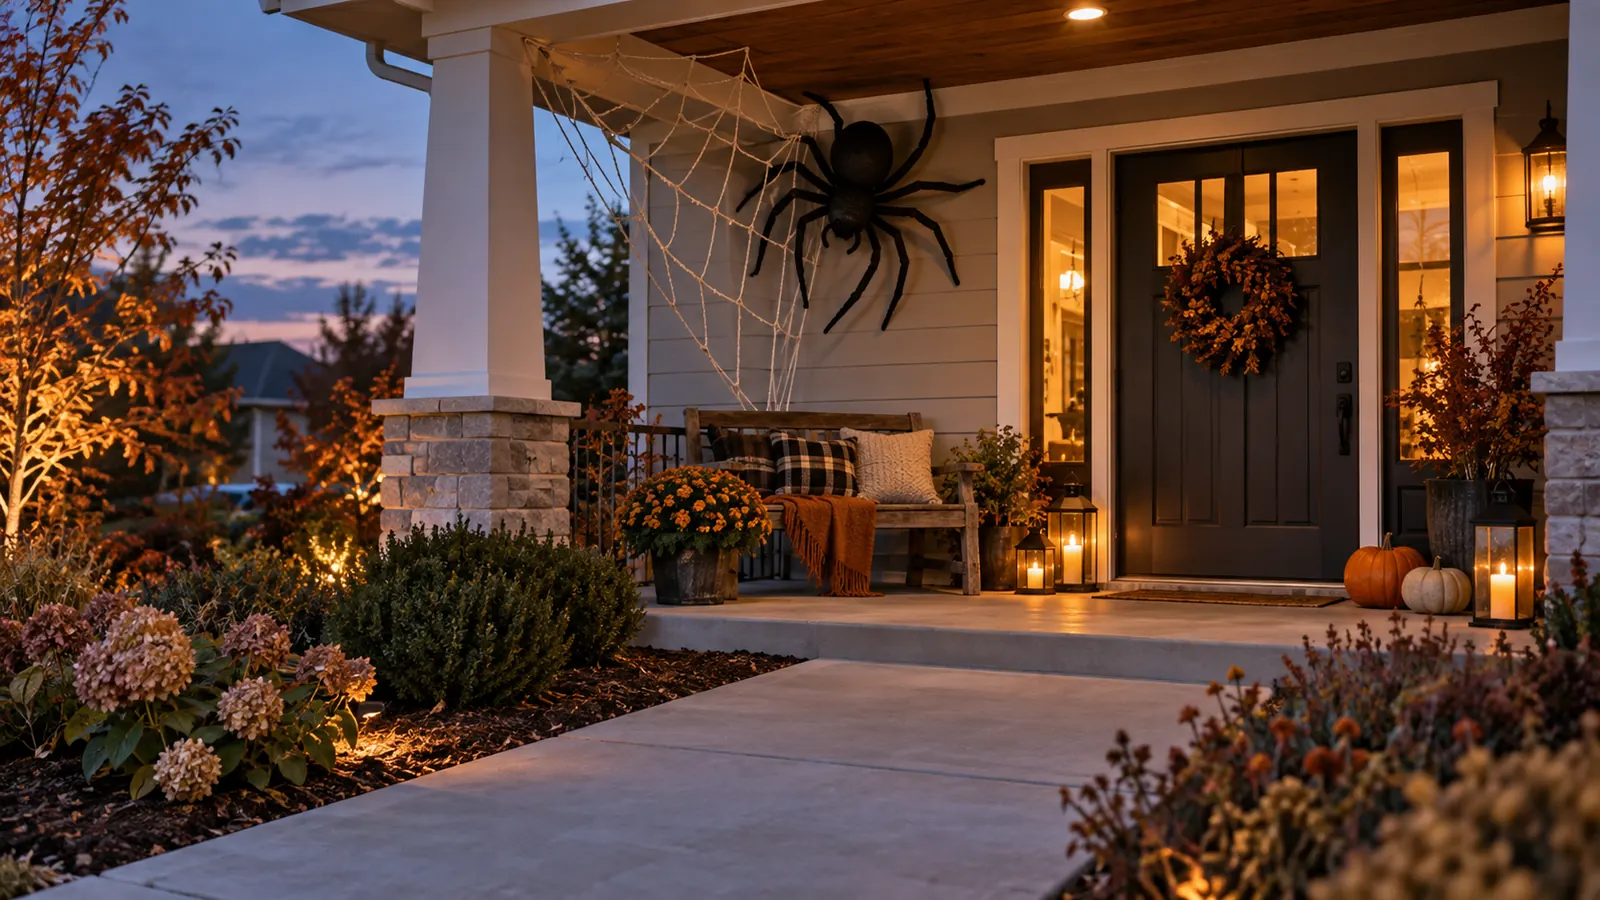
In the covered porch, place one sculptural fabric spider across a corner where the architecture becomes part of the web. The idea works because it starts with a defined area rather than scattering small Halloween objects throughout the room. It can be simplified for a small space or expanded when the architecture gives the display more room.
Gather black outdoor fabric, light stuffing, flexible tubing, cord web and secure ties. Begin with the largest anchor, check the composition from the normal entrance to the room, and add smaller pieces only where they strengthen the shape. Keep legs away from railings and the entry route, and add multiple attachment points for wind.
For a polished result, repeat two or three materials and leave some surrounding space undecorated. Photograph the setup in daylight and after dark: if important details disappear at night, add one diffused battery light rather than more objects.
How to create the look
- Clear and clean the chosen area in the covered porch.
- Place the largest element first, then build the main silhouette with black outdoor fabric, light stuffing, flexible tubing, cord web and secure ties.
- Repeat one color or material at least three times to connect the arrangement.
- Check doors, walkways, heat sources, pets and children's reach before finishing.
Best for: A dramatic single-prop porch treatment
24. Ghost window silhouettes
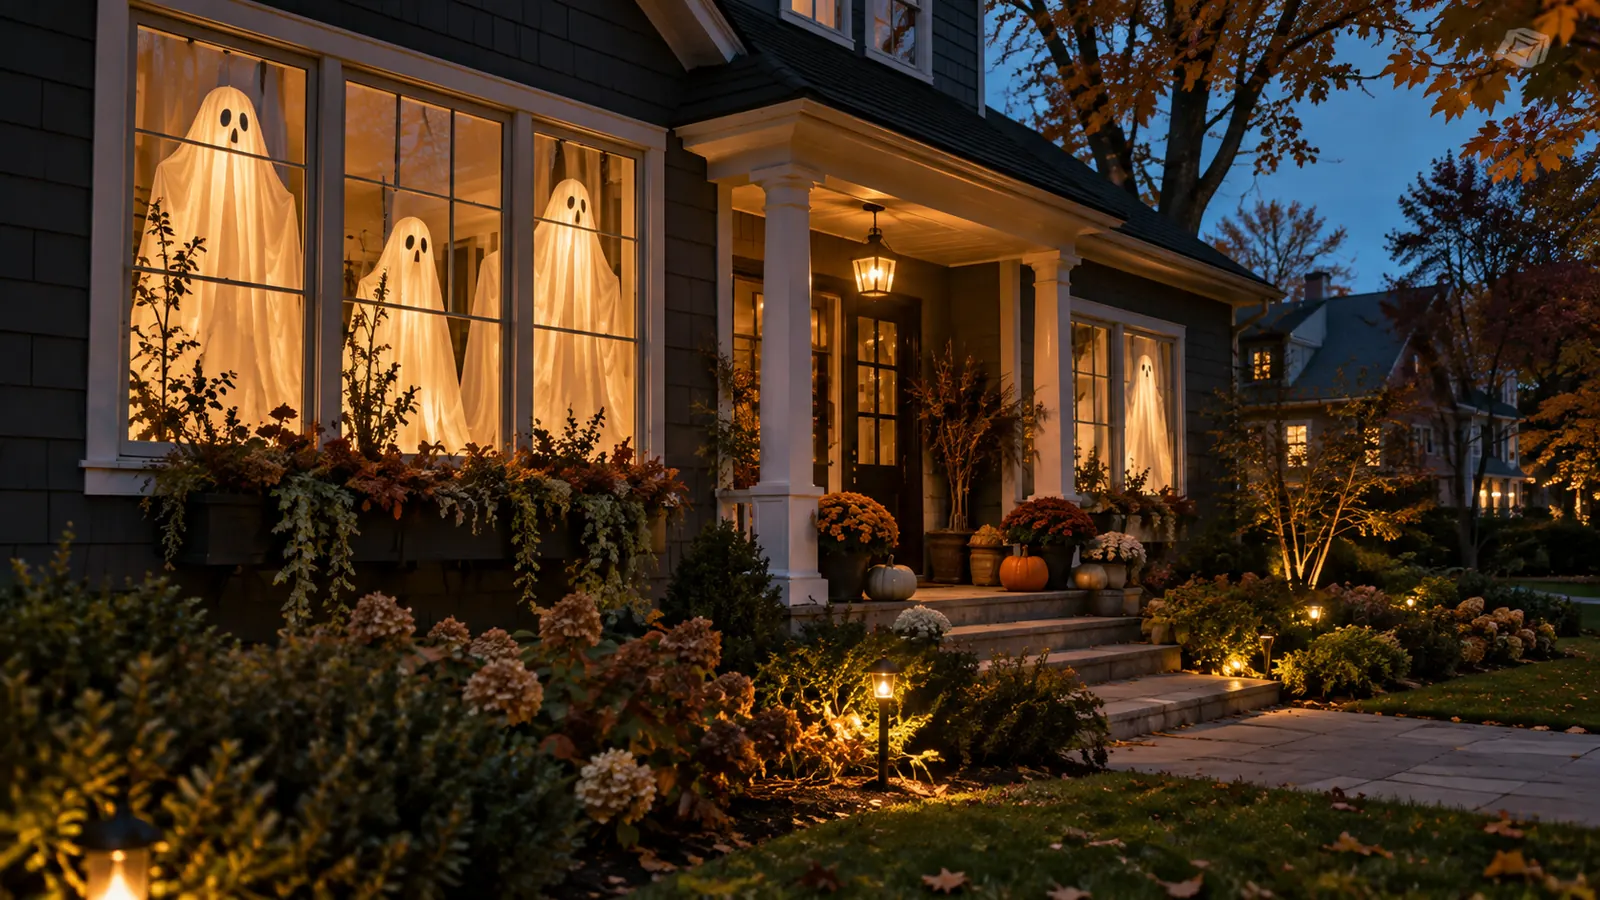
In the street-facing windows, fill several panes with large translucent ghost shapes that glow after dark. The idea works because it starts with a defined area rather than scattering small Halloween objects throughout the room. It can be simplified for a small space or expanded when the architecture gives the display more room.
Gather white tracing fabric, removable tape, black paper faces and diffused interior lamps. Begin with the largest anchor, check the composition from the normal entrance to the room, and add smaller pieces only where they strengthen the shape. Create one clear silhouette per pane instead of crowding many small shapes together.
For a polished result, repeat two or three materials and leave some surrounding space undecorated. Photograph the setup in daylight and after dark: if important details disappear at night, add one diffused battery light rather than more objects.
How to create the look
- Clear and clean the chosen area in the street-facing windows.
- Place the largest element first, then build the main silhouette with white tracing fabric, removable tape, black paper faces and diffused interior lamps.
- Repeat one color or material at least three times to connect the arrangement.
- Check doors, walkways, heat sources, pets and children's reach before finishing.
Best for: Second-floor windows and weatherproof decorating
25. Amber lantern path
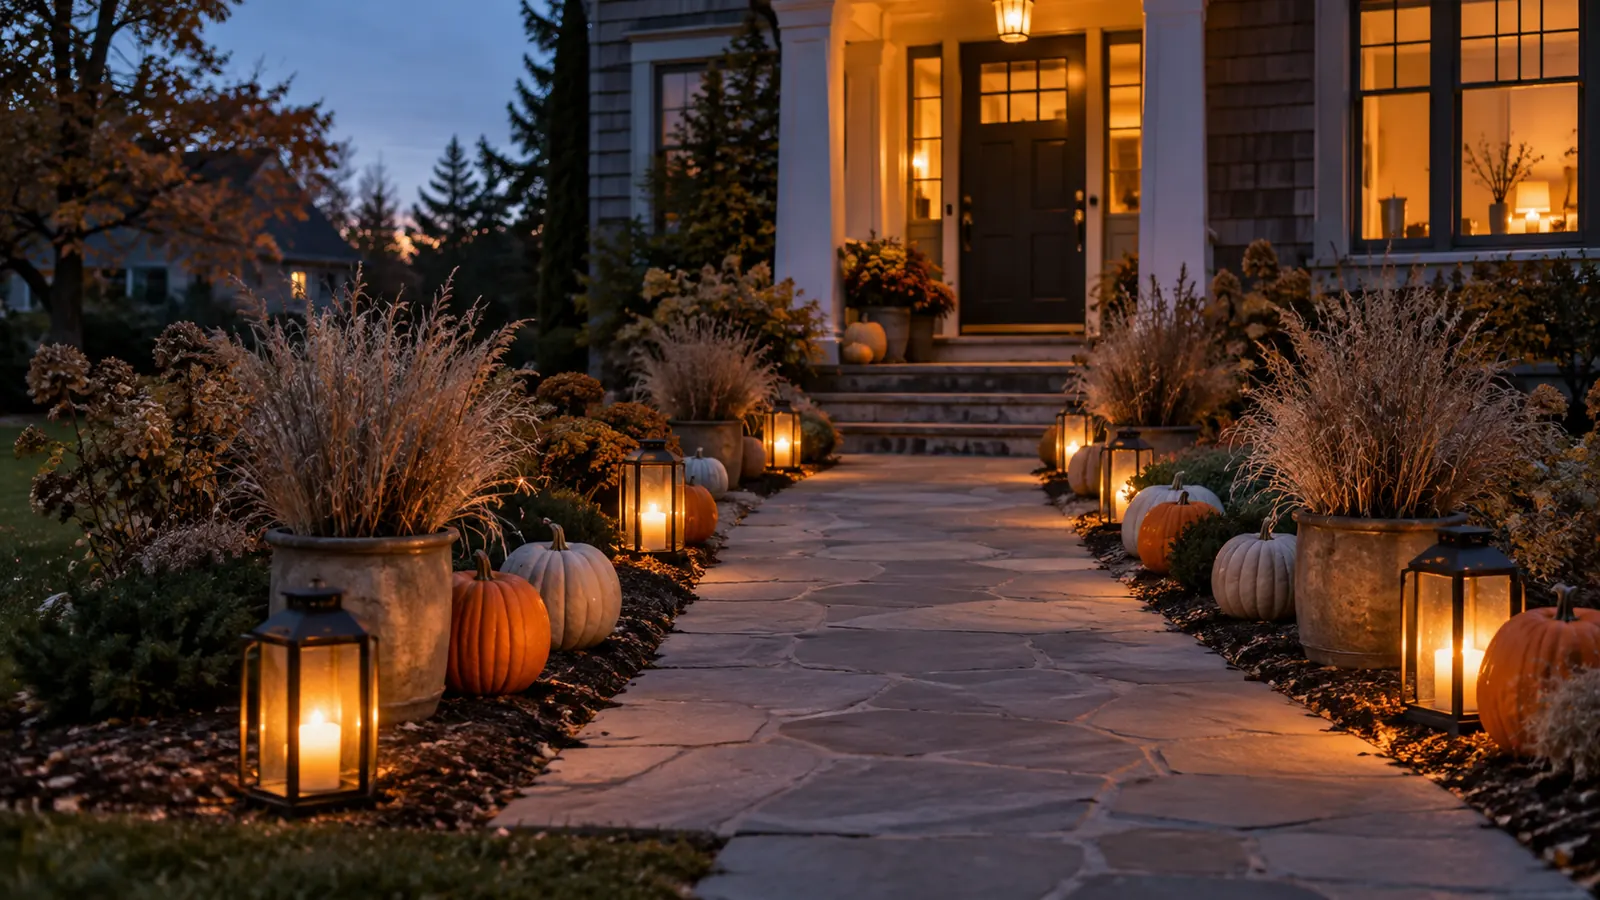
In the front walk, guide visitors with pools of warm light alternating with pumpkins and dried grass. The idea works because it starts with a defined area rather than scattering small Halloween objects throughout the room. It can be simplified for a small space or expanded when the architecture gives the display more room.
Gather weather-rated battery lanterns, stable pumpkins, weighted pots and reflective accents. Begin with the largest anchor, check the composition from the normal entrance to the room, and add smaller pieces only where they strengthen the shape. Set every object outside the walking surface and test the route from a child's eye level.
For a polished result, repeat two or three materials and leave some surrounding space undecorated. Photograph the setup in daylight and after dark: if important details disappear at night, add one diffused battery light rather than more objects.
How to create the look
- Clear and clean the chosen area in the front walk.
- Place the largest element first, then build the main silhouette with weather-rated battery lanterns, stable pumpkins, weighted pots and reflective accents.
- Repeat one color or material at least three times to connect the arrangement.
- Check doors, walkways, heat sources, pets and children's reach before finishing.
Best for: Safer evening visibility with seasonal atmosphere
26. Haunted mailbox vines
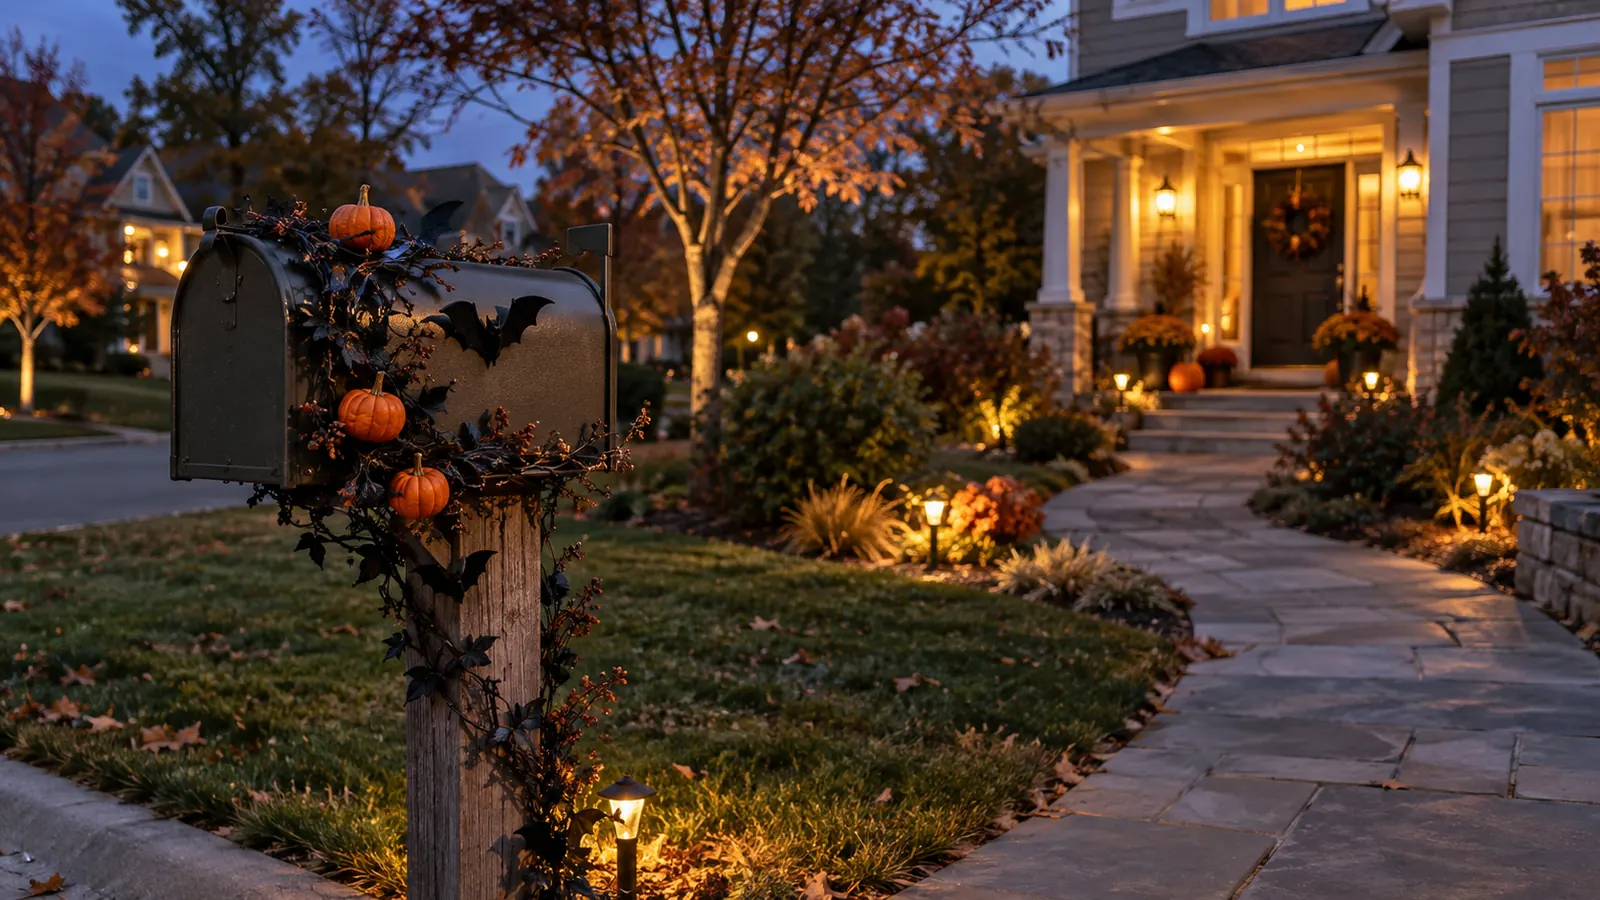
In the mailbox or gate, wrap one side with black vines, tiny pumpkins and a restrained flock of paper-like outdoor bats. The idea works because it starts with a defined area rather than scattering small Halloween objects throughout the room. It can be simplified for a small space or expanded when the architecture gives the display more room.
Gather outdoor faux vines, weatherproof ornaments, reusable ties and removable silhouettes. Begin with the largest anchor, check the composition from the normal entrance to the room, and add smaller pieces only where they strengthen the shape. Keep the door, flag, address and carrier access completely unobstructed.
For a polished result, repeat two or three materials and leave some surrounding space undecorated. Photograph the setup in daylight and after dark: if important details disappear at night, add one diffused battery light rather than more objects.
How to create the look
- Clear and clean the chosen area in the mailbox or gate.
- Place the largest element first, then build the main silhouette with outdoor faux vines, weatherproof ornaments, reusable ties and removable silhouettes.
- Repeat one color or material at least three times to connect the arrangement.
- Check doors, walkways, heat sources, pets and children's reach before finishing.
Best for: Extending the theme to the edge of the property
27. Dried orange Halloween wreath
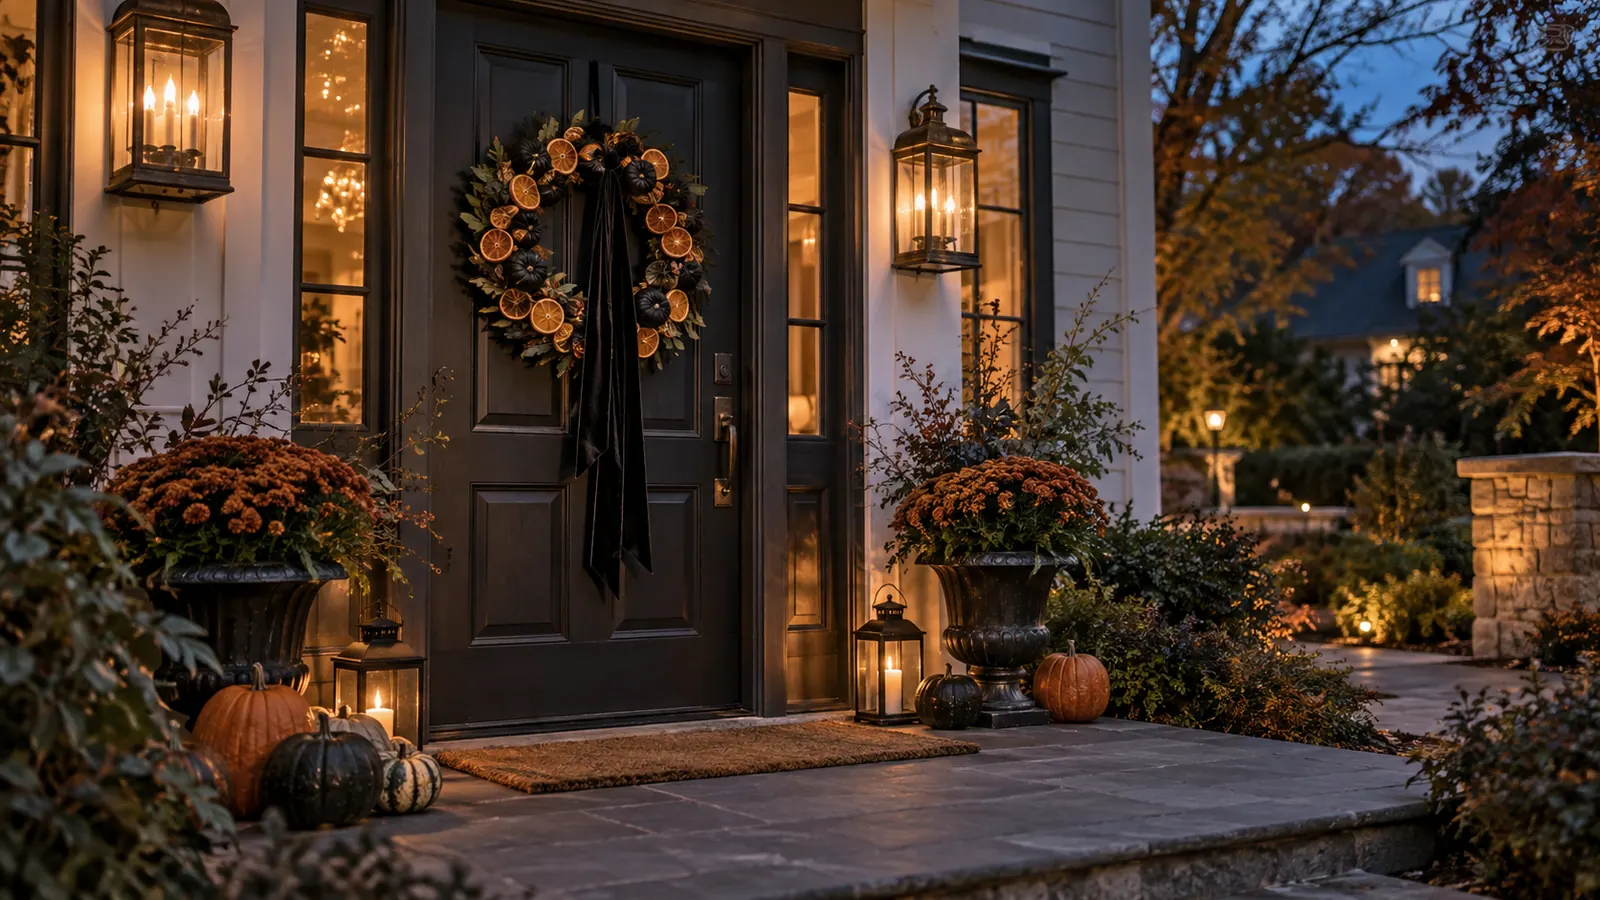
In the front door, combine dried citrus, black ribbon, bay leaves and tiny dark pumpkins into a fragrant-looking wreath. The idea works because it starts with a defined area rather than scattering small Halloween objects throughout the room. It can be simplified for a small space or expanded when the architecture gives the display more room.
Gather grapevine base, dried orange slices, faux leaves, ribbon and floral wire. Begin with the largest anchor, check the composition from the normal entrance to the room, and add smaller pieces only where they strengthen the shape. Use a covered porch or faux citrus in wet climates, and protect the door with felt pads.
For a polished result, repeat two or three materials and leave some surrounding space undecorated. Photograph the setup in daylight and after dark: if important details disappear at night, add one diffused battery light rather than more objects.
How to create the look
- Clear and clean the chosen area in the front door.
- Place the largest element first, then build the main silhouette with grapevine base, dried orange slices, faux leaves, ribbon and floral wire.
- Repeat one color or material at least three times to connect the arrangement.
- Check doors, walkways, heat sources, pets and children's reach before finishing.
Best for: A natural wreath that bridges early fall and Halloween
28. Garage shadow scene
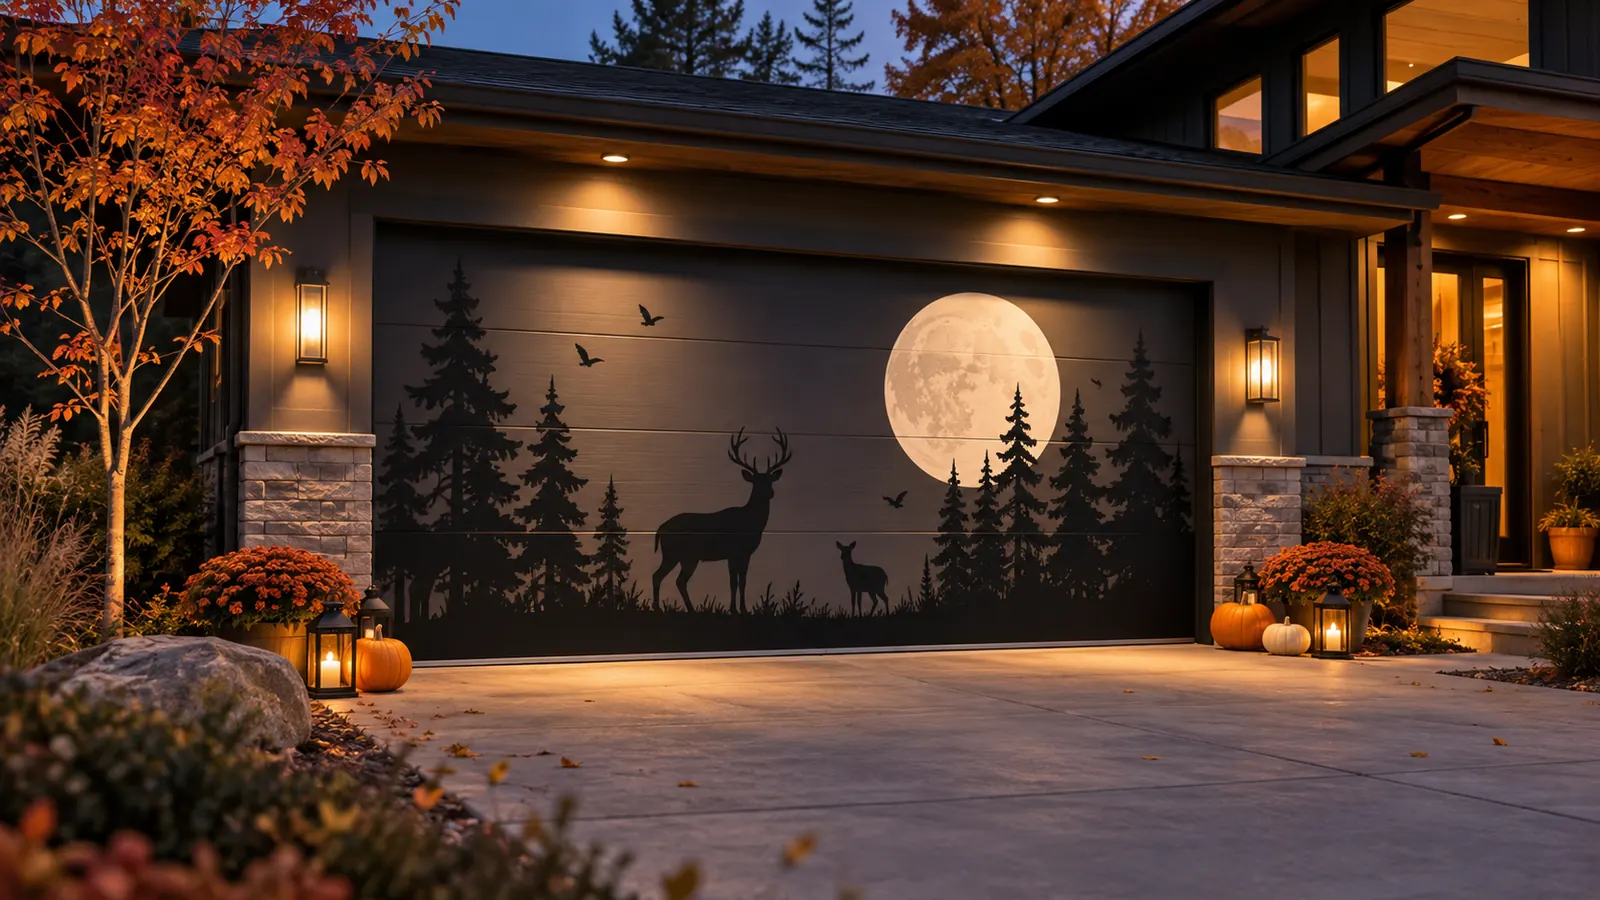
In the garage door, create a removable procession of oversized moonlit woodland silhouettes across the lower panels. The idea works because it starts with a defined area rather than scattering small Halloween objects throughout the room. It can be simplified for a small space or expanded when the architecture gives the display more room.
Gather weatherproof removable vinyl or lightweight magnetic shapes sized for the door. Begin with the largest anchor, check the composition from the normal entrance to the room, and add smaller pieces only where they strengthen the shape. Test one hidden corner first and remove every decoration before operating the door.
For a polished result, repeat two or three materials and leave some surrounding space undecorated. Photograph the setup in daylight and after dark: if important details disappear at night, add one diffused battery light rather than more objects.
How to create the look
- Clear and clean the chosen area in the garage door.
- Place the largest element first, then build the main silhouette with weatherproof removable vinyl or lightweight magnetic shapes sized for the door.
- Repeat one color or material at least three times to connect the arrangement.
- Check doors, walkways, heat sources, pets and children's reach before finishing.
Best for: Modern houses with little porch space
29. Balcony ghost gathering
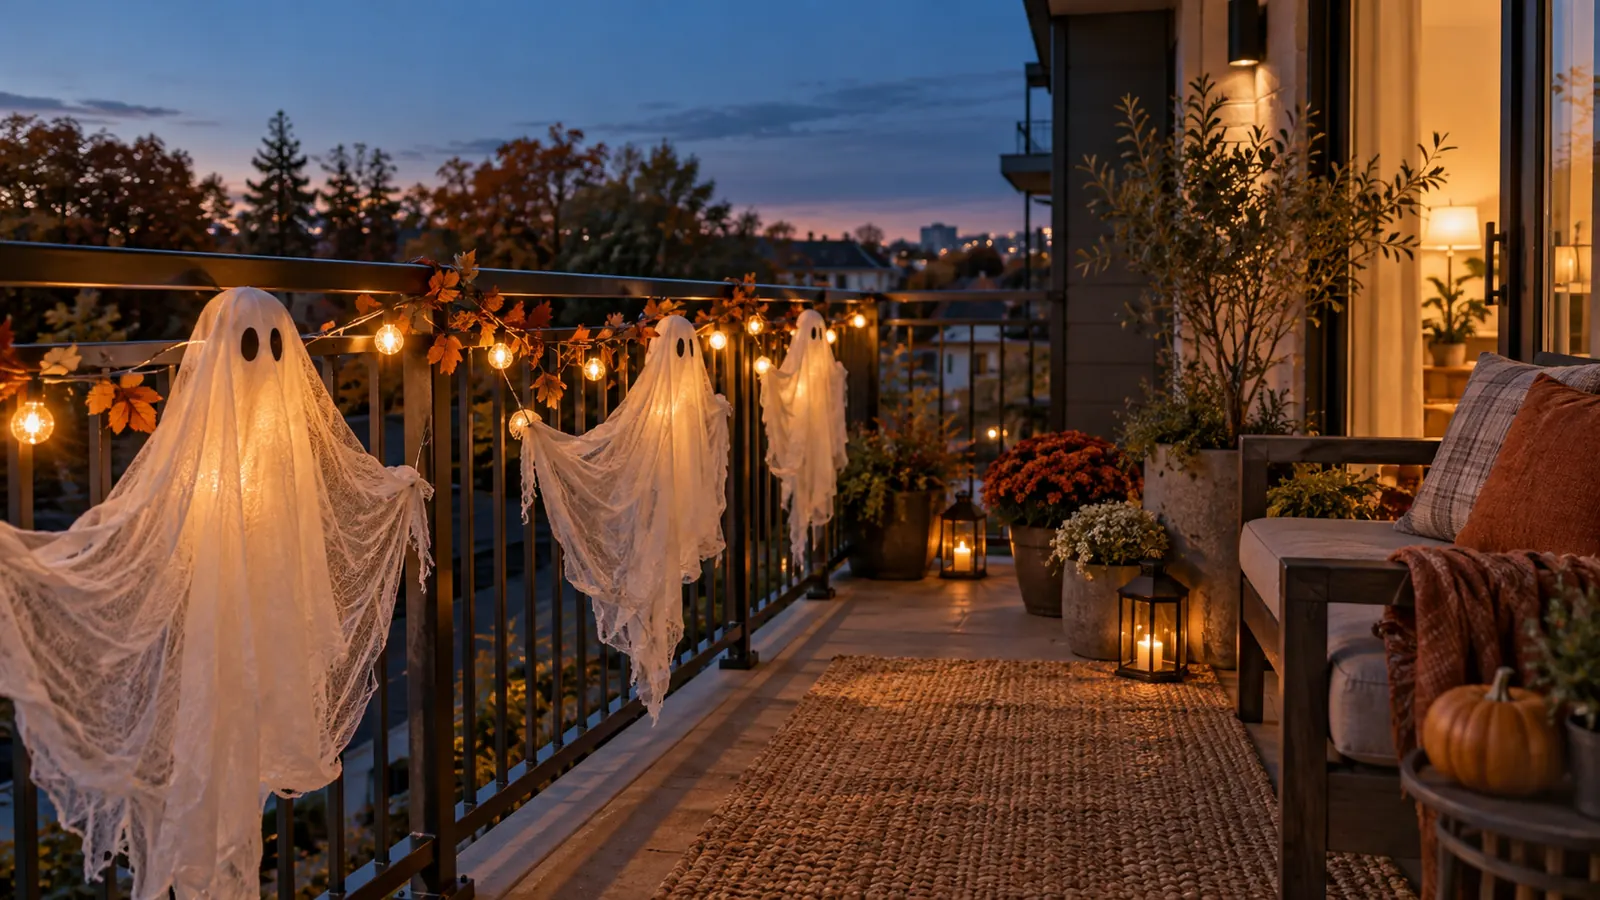
In the balcony, line the inside of the railing with wind-secure fabric ghosts and small amber lights. The idea works because it starts with a defined area rather than scattering small Halloween objects throughout the room. It can be simplified for a small space or expanded when the architecture gives the display more room.
Gather outdoor fabric, foam heads, internal ties, weather-rated battery lights and clips. Begin with the largest anchor, check the composition from the normal entrance to the room, and add smaller pieces only where they strengthen the shape. Attach everything inside the railing, use redundant ties and remove the display in strong wind.
For a polished result, repeat two or three materials and leave some surrounding space undecorated. Photograph the setup in daylight and after dark: if important details disappear at night, add one diffused battery light rather than more objects.
How to create the look
- Clear and clean the chosen area in the balcony.
- Place the largest element first, then build the main silhouette with outdoor fabric, foam heads, internal ties, weather-rated battery lights and clips.
- Repeat one color or material at least three times to connect the arrangement.
- Check doors, walkways, heat sources, pets and children's reach before finishing.
Best for: Apartments where exterior rules permit temporary decor
30. Modern garden scarecrow

In the garden, dress a simple wooden form in layered neutral workwear with a moon-shaped face. The idea works because it starts with a defined area rather than scattering small Halloween objects throughout the room. It can be simplified for a small space or expanded when the architecture gives the display more room.
Gather a secure frame, old shirt, overalls, straw-colored raffia, painted wood moon and boots. Begin with the largest anchor, check the composition from the normal entrance to the room, and add smaller pieces only where they strengthen the shape. Keep the design graphic and securely anchor the frame below the soil line.
For a polished result, repeat two or three materials and leave some surrounding space undecorated. Photograph the setup in daylight and after dark: if important details disappear at night, add one diffused battery light rather than more objects.
How to create the look
- Clear and clean the chosen area in the garden.
- Place the largest element first, then build the main silhouette with a secure frame, old shirt, overalls, straw-colored raffia, painted wood moon and boots.
- Repeat one color or material at least three times to connect the arrangement.
- Check doors, walkways, heat sources, pets and children's reach before finishing.
Best for: Large gardens and rustic landscapes
31. Monochrome pumpkin collection
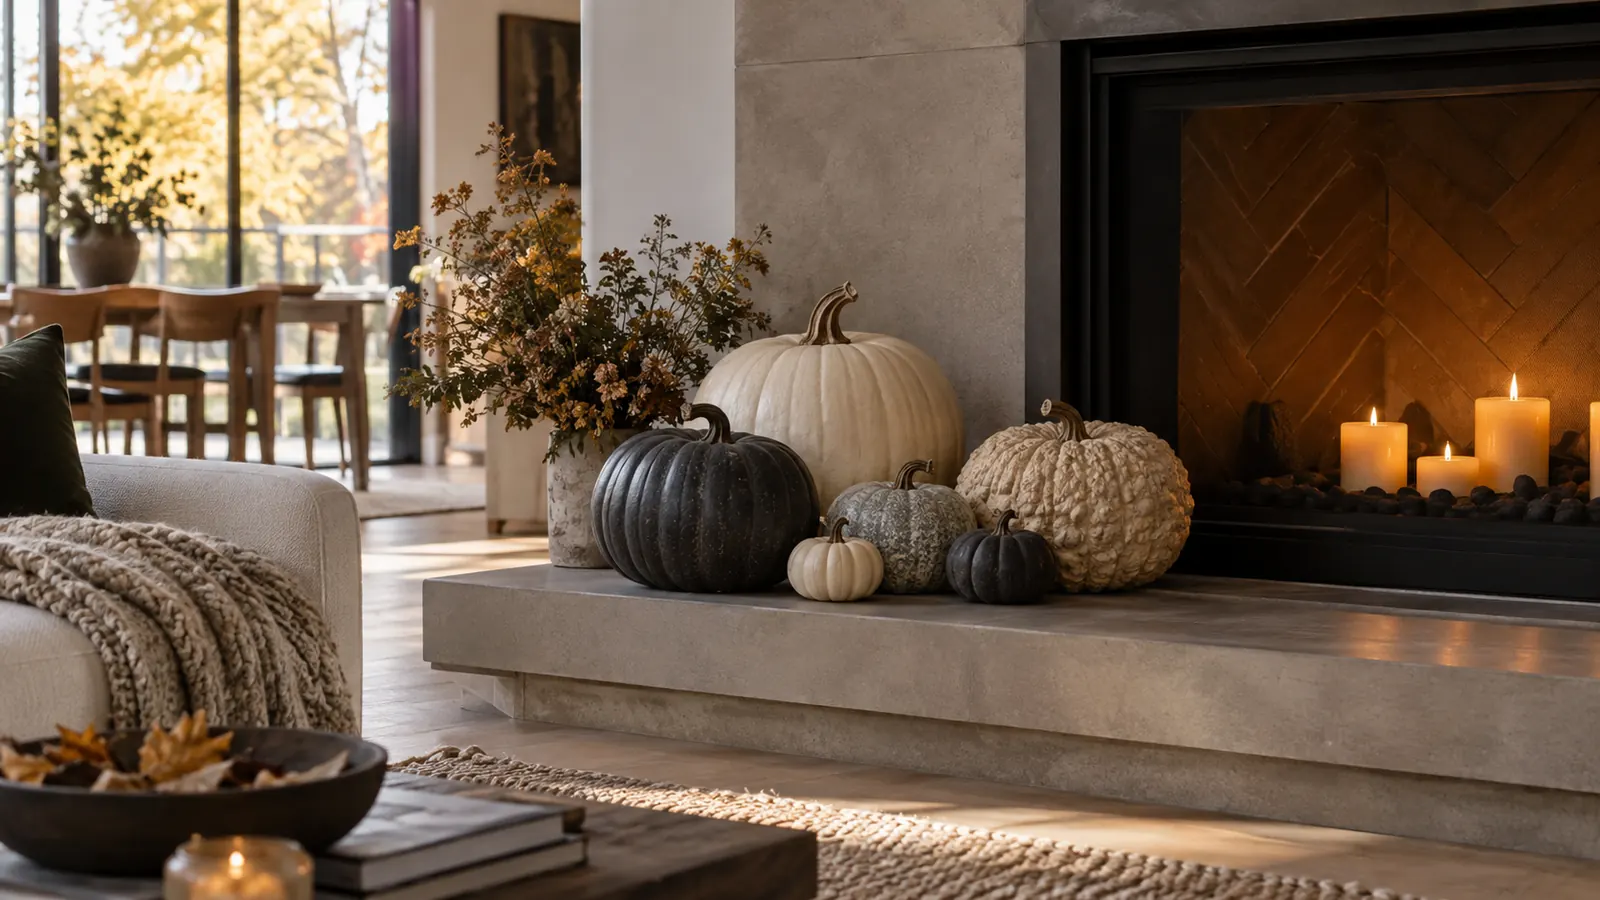
In the living room or porch, gather pumpkins in shades of cream, charcoal and stone for a restrained modern display. The idea works because it starts with a defined area rather than scattering small Halloween objects throughout the room. It can be simplified for a small space or expanded when the architecture gives the display more room.
Gather natural pumpkins, removable mineral-style paint on faux pumpkins, low bowls and branches. Begin with the largest anchor, check the composition from the normal entrance to the room, and add smaller pieces only where they strengthen the shape. Mix matte, rough and glossy textures so the limited palette still has depth.
For a polished result, repeat two or three materials and leave some surrounding space undecorated. Photograph the setup in daylight and after dark: if important details disappear at night, add one diffused battery light rather than more objects.
How to create the look
- Clear and clean the chosen area in the living room or porch.
- Place the largest element first, then build the main silhouette with natural pumpkins, removable mineral-style paint on faux pumpkins, low bowls and branches.
- Repeat one color or material at least three times to connect the arrangement.
- Check doors, walkways, heat sources, pets and children's reach before finishing.
Best for: Minimalist homes and decor that lasts beyond Halloween
32. Pastel ghost village
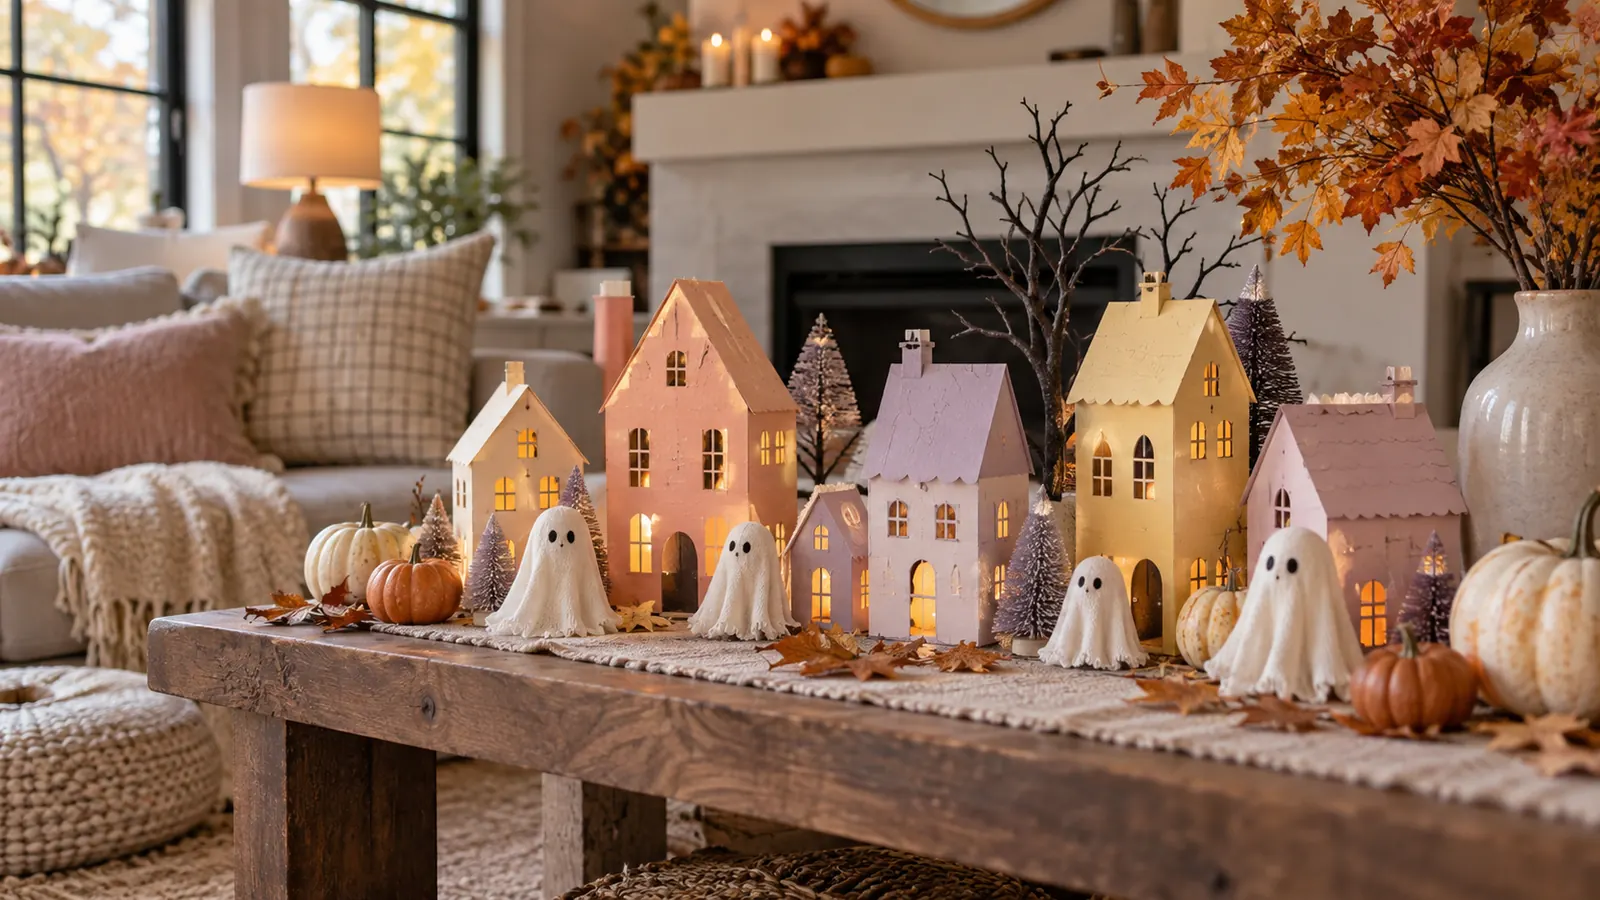
In the family room, build a cheerful collection of tiny fabric ghosts among peach, lavender and butter-yellow houses. The idea works because it starts with a defined area rather than scattering small Halloween objects throughout the room. It can be simplified for a small space or expanded when the architecture gives the display more room.
Gather scrap fabric, stuffing, painted cardboard houses and cool micro lights. Begin with the largest anchor, check the composition from the normal entrance to the room, and add smaller pieces only where they strengthen the shape. Choose muted pastels and repeat white between them to keep the display cohesive.
For a polished result, repeat two or three materials and leave some surrounding space undecorated. Photograph the setup in daylight and after dark: if important details disappear at night, add one diffused battery light rather than more objects.
How to create the look
- Clear and clean the chosen area in the family room.
- Place the largest element first, then build the main silhouette with scrap fabric, stuffing, painted cardboard houses and cool micro lights.
- Repeat one color or material at least three times to connect the arrangement.
- Check doors, walkways, heat sources, pets and children's reach before finishing.
Best for: Cute Halloween decorating and homes with young children
33. Vintage orange kitchen
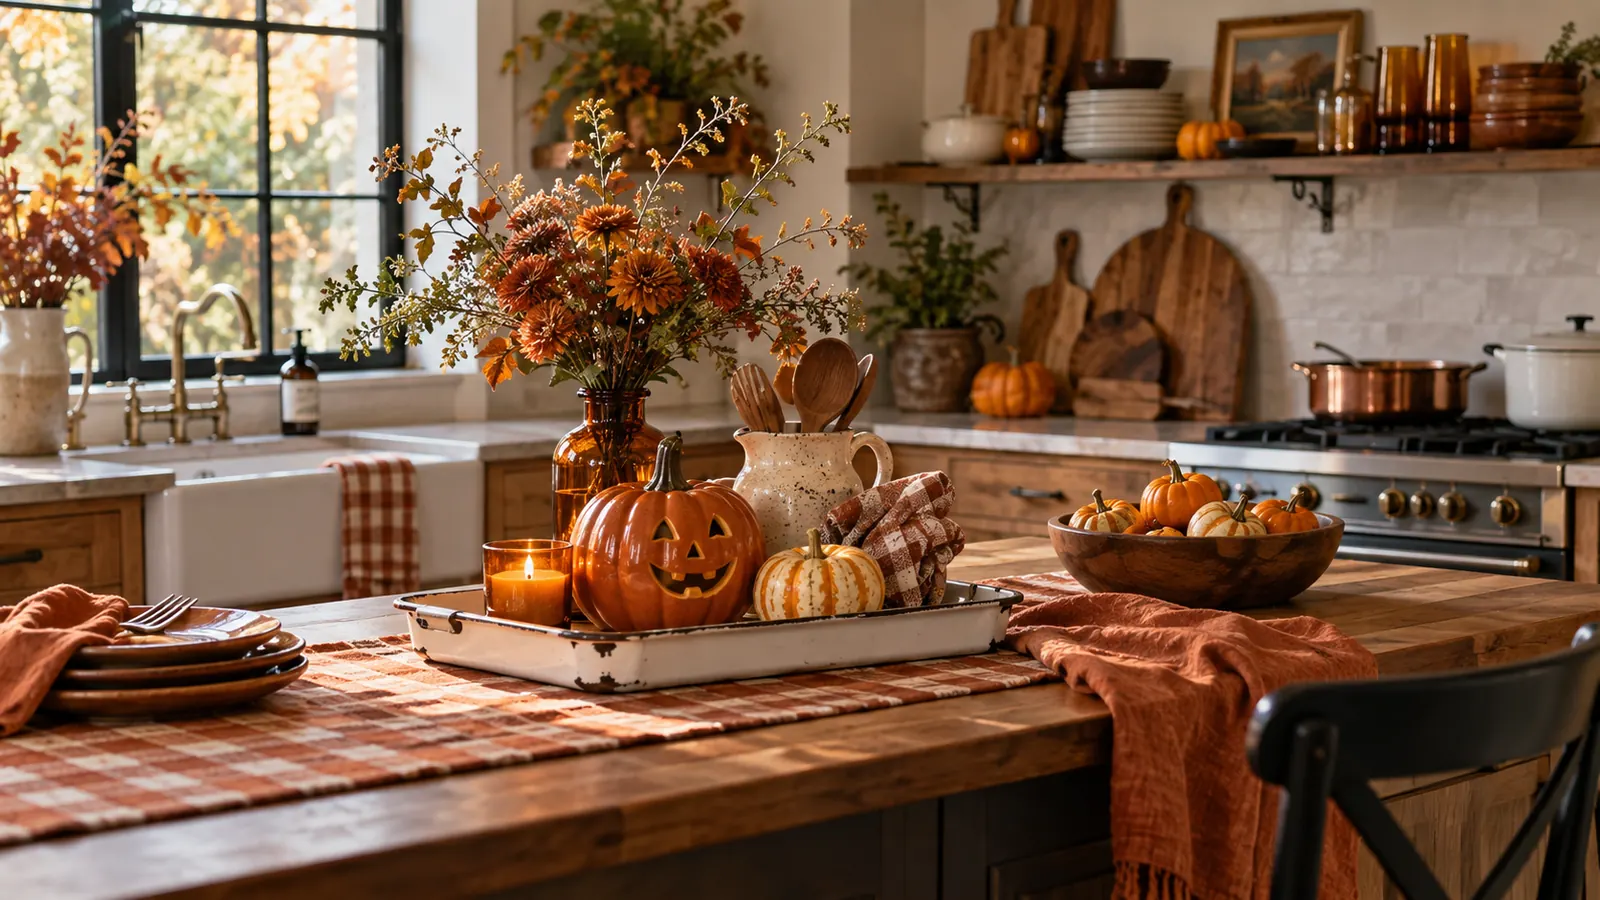
In the kitchen, use burnt-orange linens, amber glass and retro-shaped pumpkins to create a nostalgic seasonal corner. The idea works because it starts with a defined area rather than scattering small Halloween objects throughout the room. It can be simplified for a small space or expanded when the architecture gives the display more room.
Gather tea towels, amber bottles, enamel tray, pumpkins and a checked curtain or napkin. Begin with the largest anchor, check the composition from the normal entrance to the room, and add smaller pieces only where they strengthen the shape. Decorate one open shelf or counter corner and leave working preparation space untouched.
For a polished result, repeat two or three materials and leave some surrounding space undecorated. Photograph the setup in daylight and after dark: if important details disappear at night, add one diffused battery light rather than more objects.
How to create the look
- Clear and clean the chosen area in the kitchen.
- Place the largest element first, then build the main silhouette with tea towels, amber bottles, enamel tray, pumpkins and a checked curtain or napkin.
- Repeat one color or material at least three times to connect the arrangement.
- Check doors, walkways, heat sources, pets and children's reach before finishing.
Best for: Warm vintage interiors and budget styling
34. Woodland Halloween corner
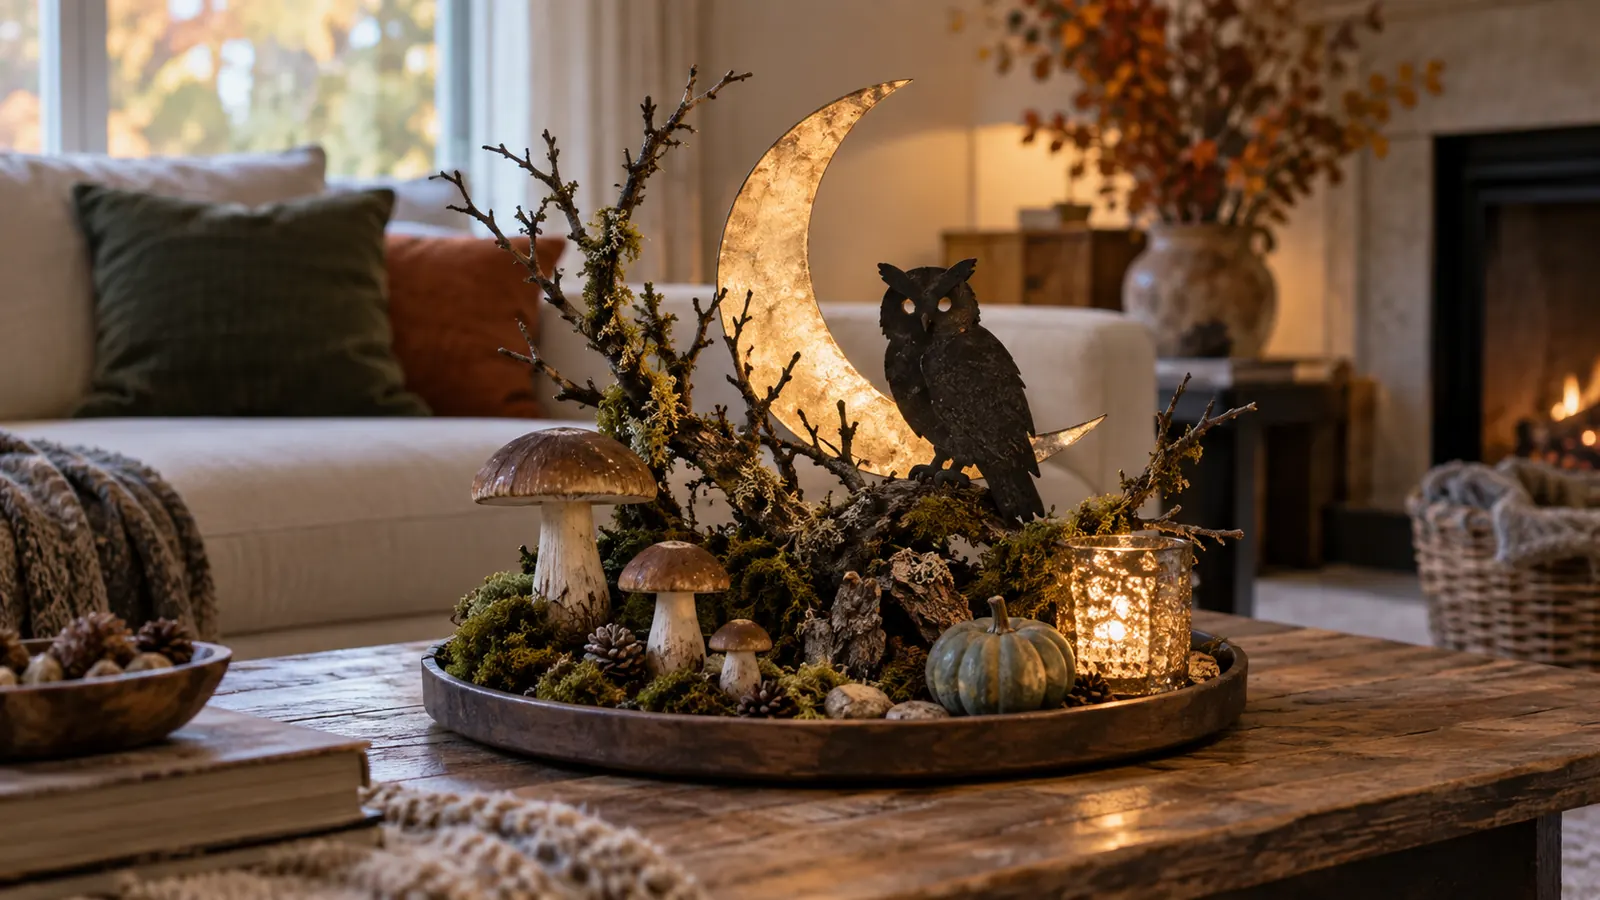
In the living room, combine mushrooms, mossy branches, an owl silhouette and a crescent moon into a forest vignette. The idea works because it starts with a defined area rather than scattering small Halloween objects throughout the room. It can be simplified for a small space or expanded when the architecture gives the display more room.
Gather faux mushrooms, preserved-looking craft moss, branches, paper owl and wooden moon. Begin with the largest anchor, check the composition from the normal entrance to the room, and add smaller pieces only where they strengthen the shape. Use a tray or shallow crate to define the display and prevent small pieces from spreading.
For a polished result, repeat two or three materials and leave some surrounding space undecorated. Photograph the setup in daylight and after dark: if important details disappear at night, add one diffused battery light rather than more objects.
How to create the look
- Clear and clean the chosen area in the living room.
- Place the largest element first, then build the main silhouette with faux mushrooms, preserved-looking craft moss, branches, paper owl and wooden moon.
- Repeat one color or material at least three times to connect the arrangement.
- Check doors, walkways, heat sources, pets and children's reach before finishing.
Best for: Nature-inspired homes that avoid conventional orange and black
35. Coastal Halloween mantel
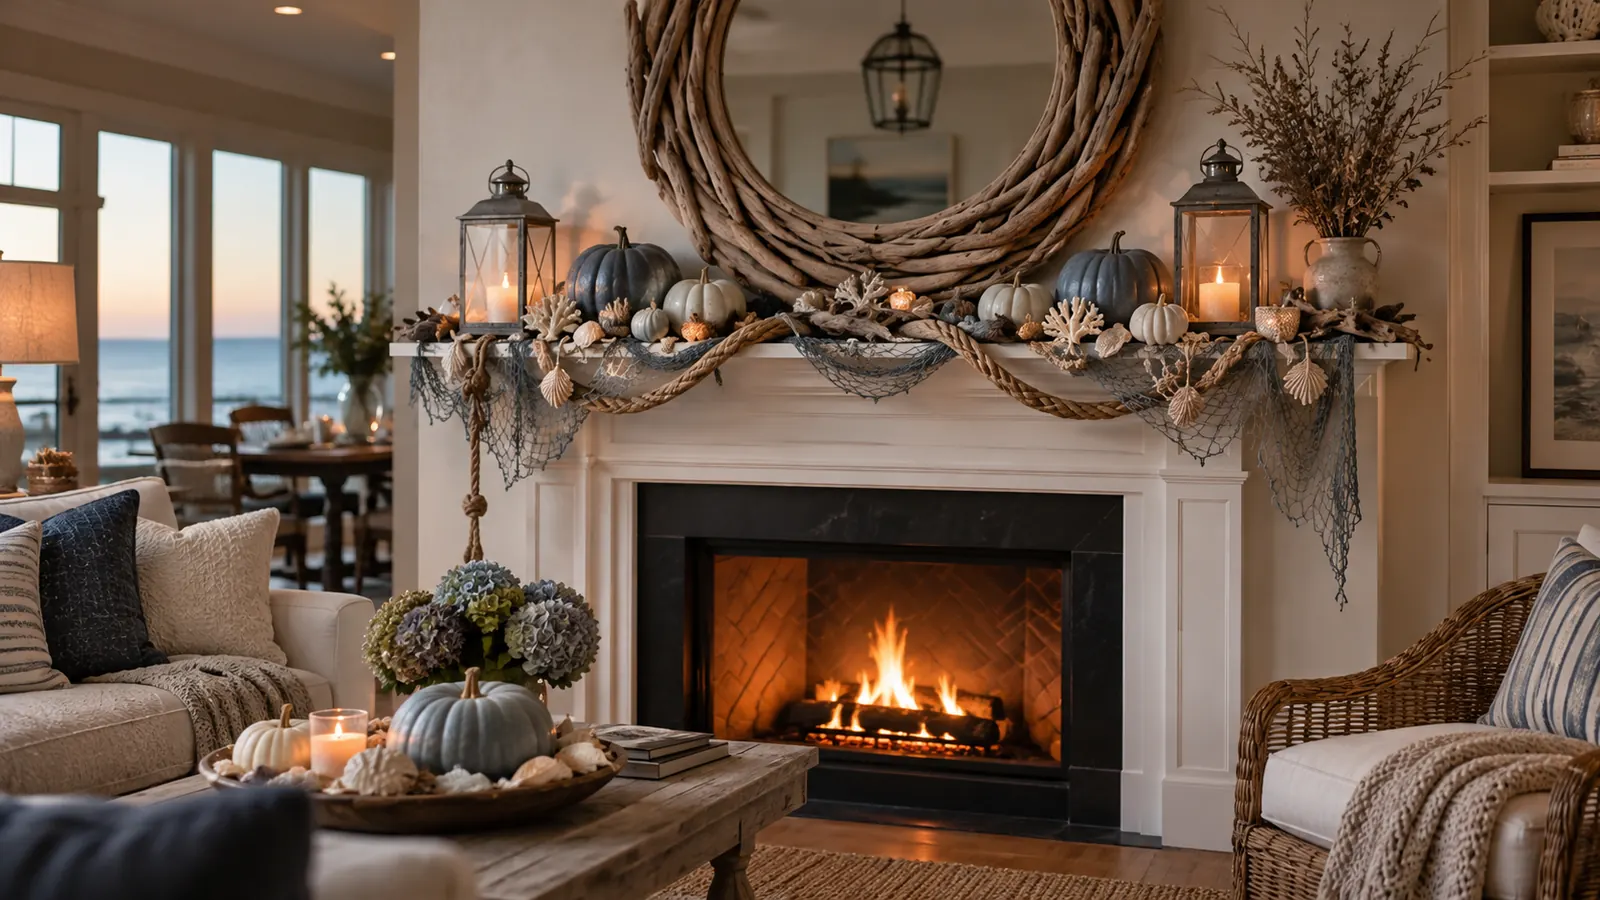
In the coastal living room, translate Halloween into weathered driftwood, smoky blue pumpkins and ghostly white shells. The idea works because it starts with a defined area rather than scattering small Halloween objects throughout the room. It can be simplified for a small space or expanded when the architecture gives the display more room.
Gather responsibly acquired shells, driftwood, blue-gray pumpkins, rope and frosted lanterns. Begin with the largest anchor, check the composition from the normal entrance to the room, and add smaller pieces only where they strengthen the shape. Choose one black accent to create contrast without abandoning the coastal palette.
For a polished result, repeat two or three materials and leave some surrounding space undecorated. Photograph the setup in daylight and after dark: if important details disappear at night, add one diffused battery light rather than more objects.
How to create the look
- Clear and clean the chosen area in the coastal living room.
- Place the largest element first, then build the main silhouette with responsibly acquired shells, driftwood, blue-gray pumpkins, rope and frosted lanterns.
- Repeat one color or material at least three times to connect the arrangement.
- Check doors, walkways, heat sources, pets and children's reach before finishing.
Best for: Beach houses and blue-and-white interiors
36. Kids' Halloween craft display
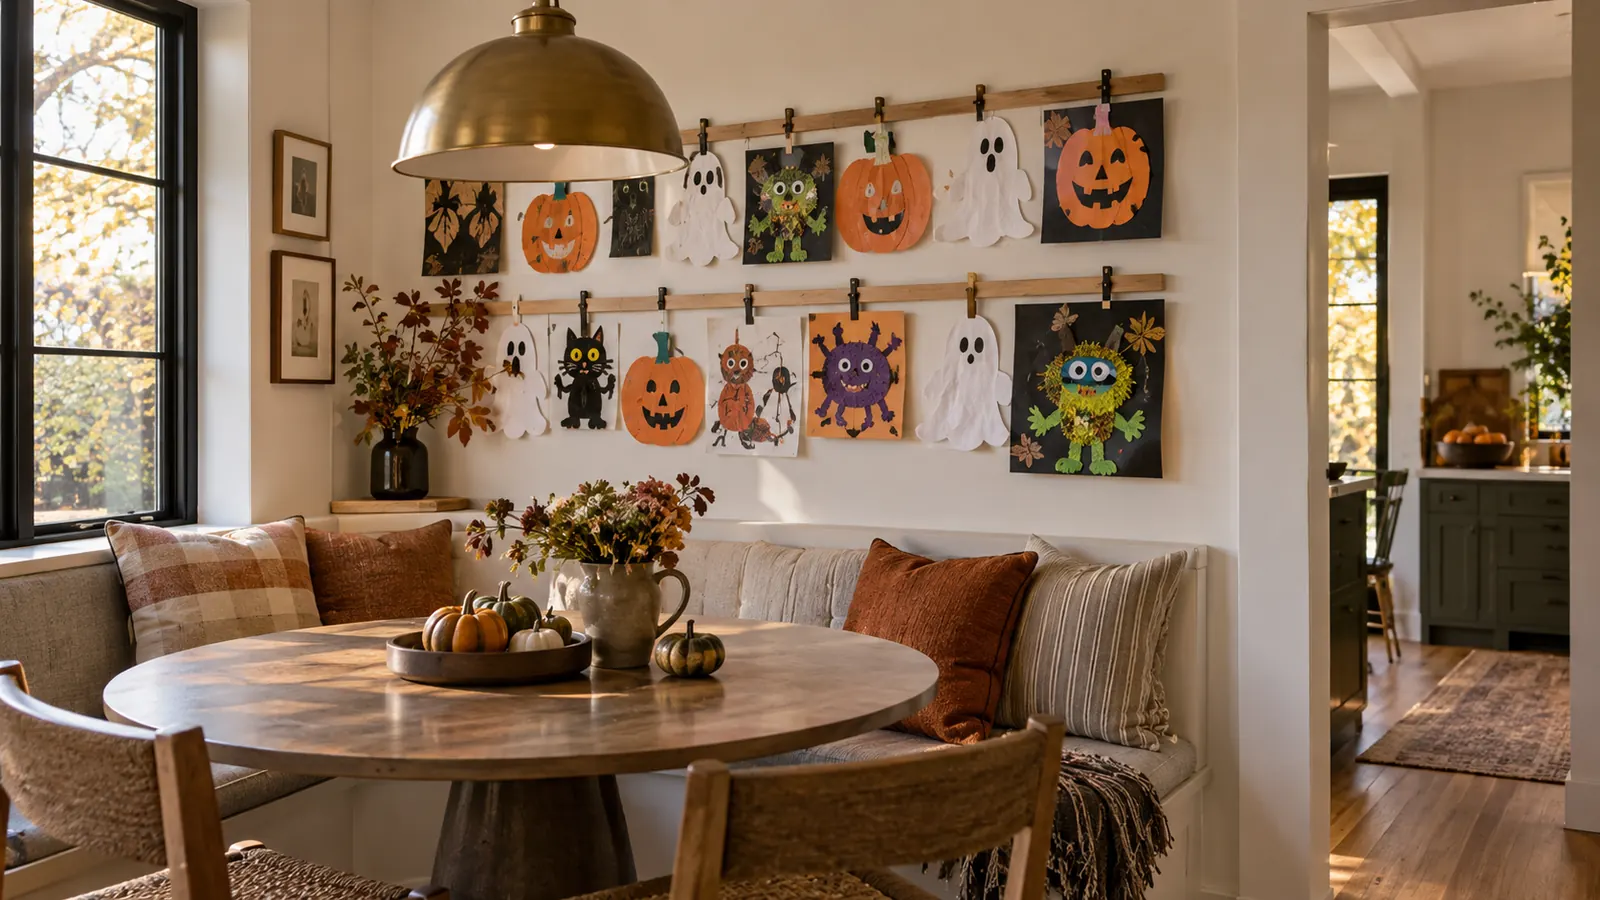
In the breakfast nook, turn children's paper pumpkins, ghosts and monsters into a tidy rotating gallery. The idea works because it starts with a defined area rather than scattering small Halloween objects throughout the room. It can be simplified for a small space or expanded when the architecture gives the display more room.
Gather wooden clip rails, paper crafts, labeled storage envelopes kept out of view and a washable runner. Begin with the largest anchor, check the composition from the normal entrance to the room, and add smaller pieces only where they strengthen the shape. Use matching clips and equal spacing so many different artworks still look intentional.
For a polished result, repeat two or three materials and leave some surrounding space undecorated. Photograph the setup in daylight and after dark: if important details disappear at night, add one diffused battery light rather than more objects.
How to create the look
- Clear and clean the chosen area in the breakfast nook.
- Place the largest element first, then build the main silhouette with wooden clip rails, paper crafts, labeled storage envelopes kept out of view and a washable runner.
- Repeat one color or material at least three times to connect the arrangement.
- Check doors, walkways, heat sources, pets and children's reach before finishing.
Best for: Families who want children to participate in decorating
37. Small-apartment Halloween shelf
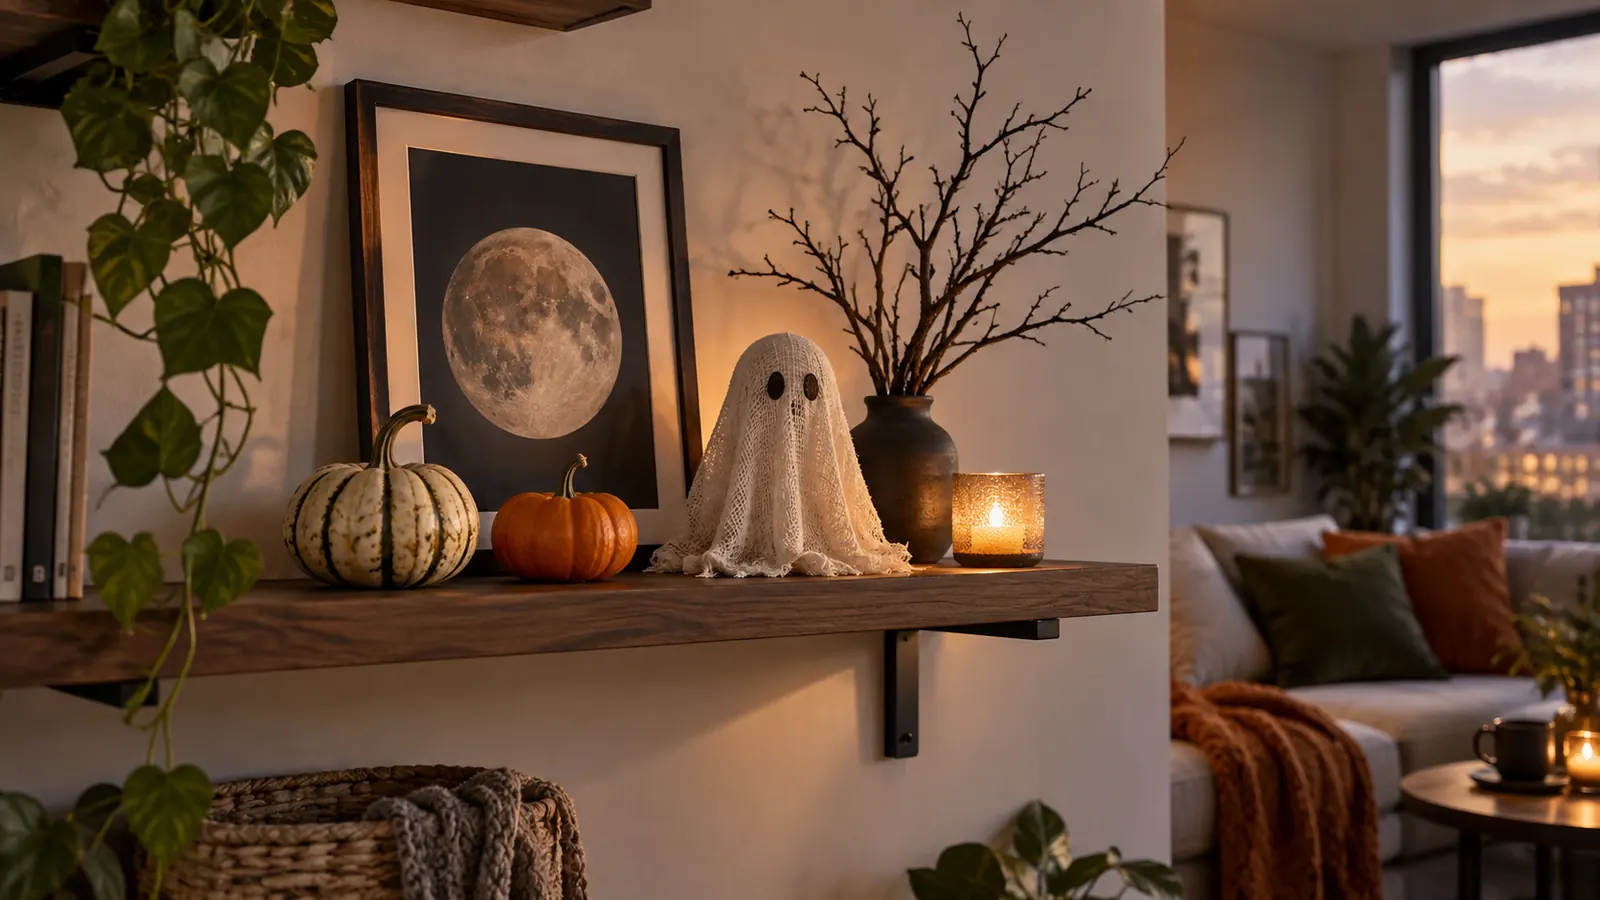
In the studio apartment, concentrate the entire seasonal story on one shelf with a moon print, mini pumpkins and one ghost. The idea works because it starts with a defined area rather than scattering small Halloween objects throughout the room. It can be simplified for a small space or expanded when the architecture gives the display more room.
Gather one frame, two or three pumpkins, a handmade ghost, small branch and battery votive. Begin with the largest anchor, check the composition from the normal entrance to the room, and add smaller pieces only where they strengthen the shape. Repeat the room's existing colors and remove an equal number of everyday objects before decorating.
For a polished result, repeat two or three materials and leave some surrounding space undecorated. Photograph the setup in daylight and after dark: if important details disappear at night, add one diffused battery light rather than more objects.
How to create the look
- Clear and clean the chosen area in the studio apartment.
- Place the largest element first, then build the main silhouette with one frame, two or three pumpkins, a handmade ghost, small branch and battery votive.
- Repeat one color or material at least three times to connect the arrangement.
- Check doors, walkways, heat sources, pets and children's reach before finishing.
Best for: Studios, dorm-style rooms and very limited storage
38. Renter-friendly door frame
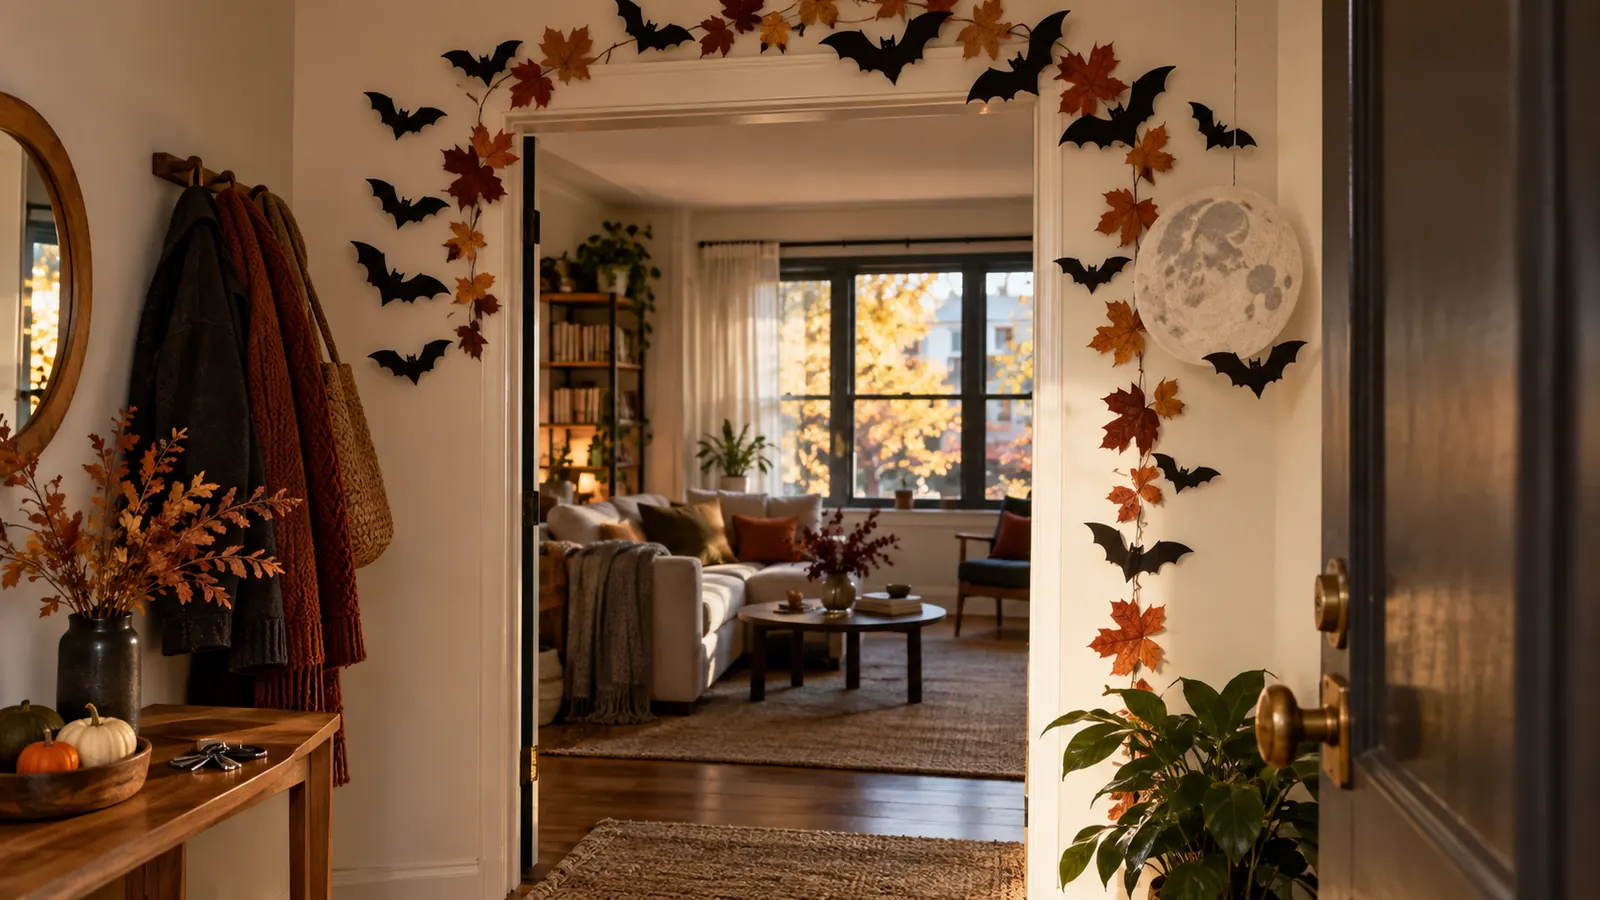
In the apartment entry, outline the inside of the doorway with removable bats, paper leaves and a small hanging moon. The idea works because it starts with a defined area rather than scattering small Halloween objects throughout the room. It can be simplified for a small space or expanded when the architecture gives the display more room.
Gather cardstock shapes, residue-free tabs, lightweight felt moon and removable cord. Begin with the largest anchor, check the composition from the normal entrance to the room, and add smaller pieces only where they strengthen the shape. Follow building rules, decorate the interior-facing side and test adhesive on an inconspicuous spot.
For a polished result, repeat two or three materials and leave some surrounding space undecorated. Photograph the setup in daylight and after dark: if important details disappear at night, add one diffused battery light rather than more objects.
How to create the look
- Clear and clean the chosen area in the apartment entry.
- Place the largest element first, then build the main silhouette with cardstock shapes, residue-free tabs, lightweight felt moon and removable cord.
- Repeat one color or material at least three times to connect the arrangement.
- Check doors, walkways, heat sources, pets and children's reach before finishing.
Best for: Renters who cannot attach an outdoor wreath
39. Last-minute candle cluster
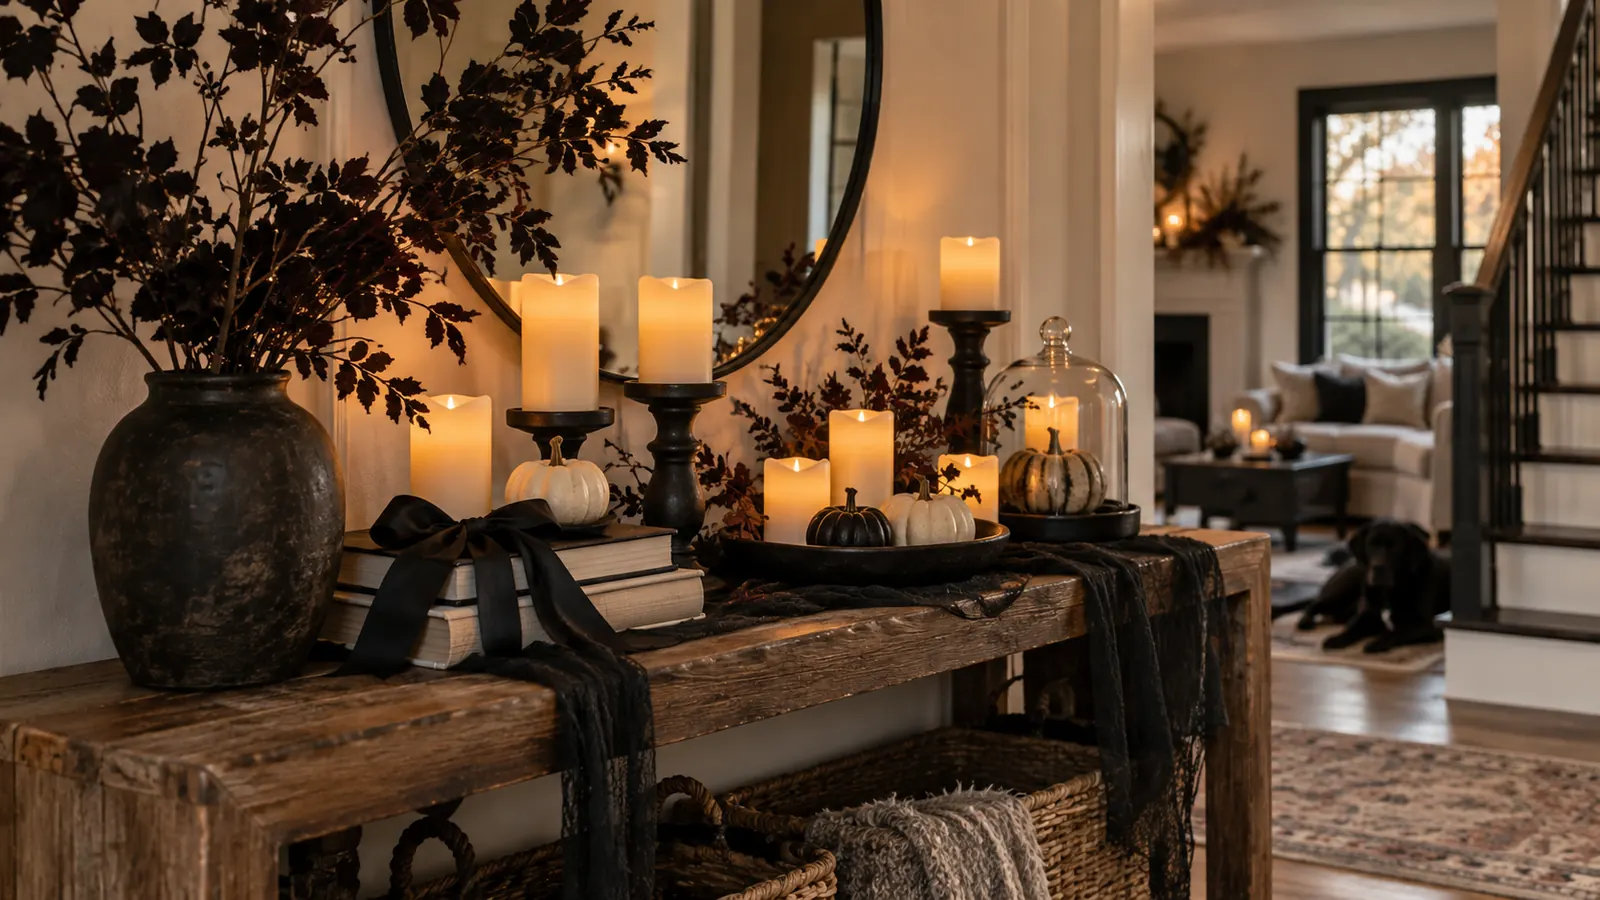
In the console or coffee table, group flameless pillars on books and trays with black ribbon and a few tiny pumpkins. The idea works because it starts with a defined area rather than scattering small Halloween objects throughout the room. It can be simplified for a small space or expanded when the architecture gives the display more room.
Gather LED candles, sturdy books, trays, ribbon, pumpkins and dark foliage. Begin with the largest anchor, check the composition from the normal entrance to the room, and add smaller pieces only where they strengthen the shape. Use at least three candle heights and contain the whole arrangement on one tray.
For a polished result, repeat two or three materials and leave some surrounding space undecorated. Photograph the setup in daylight and after dark: if important details disappear at night, add one diffused battery light rather than more objects.
How to create the look
- Clear and clean the chosen area in the console or coffee table.
- Place the largest element first, then build the main silhouette with LED candles, sturdy books, trays, ribbon, pumpkins and dark foliage.
- Repeat one color or material at least three times to connect the arrangement.
- Check doors, walkways, heat sources, pets and children's reach before finishing.
Best for: A fast transformation using reusable basics
40. Moonlit outdoor party canopy
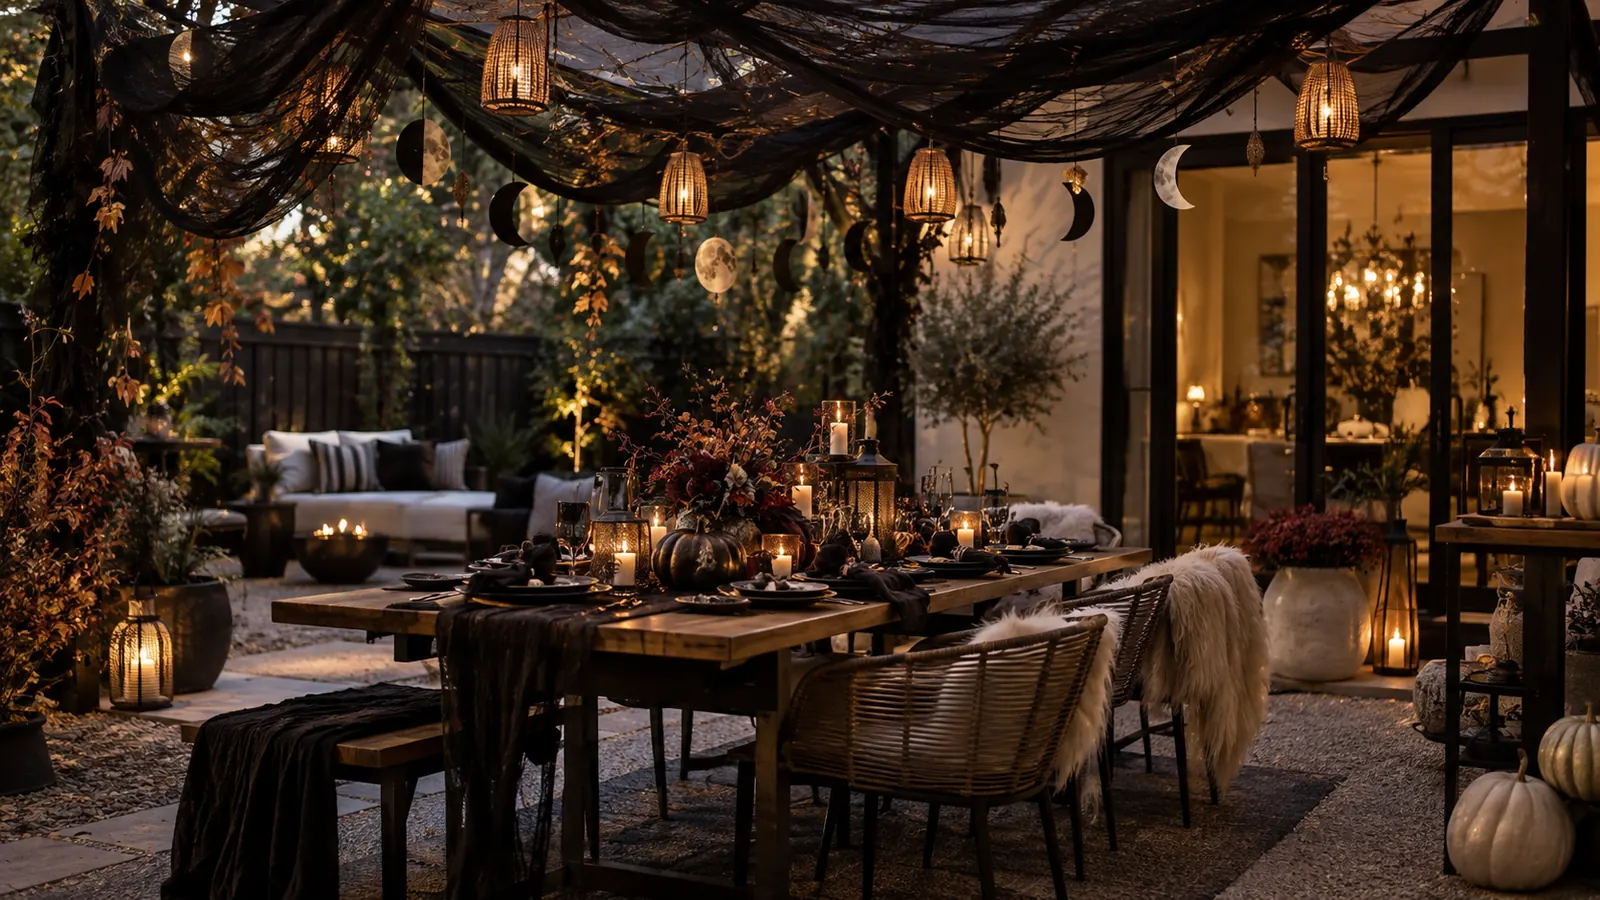
In the patio, create an intimate canopy of black gauze swags, paper moons and warm hanging lanterns. The idea works because it starts with a defined area rather than scattering small Halloween objects throughout the room. It can be simplified for a small space or expanded when the architecture gives the display more room.
Gather outdoor-rated fabric, weatherproof battery lanterns, paper or thin wood moons and secure clips. Begin with the largest anchor, check the composition from the normal entrance to the room, and add smaller pieces only where they strengthen the shape. Keep fabric far from heaters, cooking areas and walkways, and remove it in wind or rain.
For a polished result, repeat two or three materials and leave some surrounding space undecorated. Photograph the setup in daylight and after dark: if important details disappear at night, add one diffused battery light rather than more objects.
How to create the look
- Clear and clean the chosen area in the patio.
- Place the largest element first, then build the main silhouette with outdoor-rated fabric, weatherproof battery lanterns, paper or thin wood moons and secure clips.
- Repeat one color or material at least three times to connect the arrangement.
- Check doors, walkways, heat sources, pets and children's reach before finishing.
Best for: A Halloween dinner or small backyard gathering
Frequently asked questions
How can I make Halloween decor look elegant instead of cluttered?
Choose one focal point per room, limit the palette to three or four colors and repeat a small set of materials. Leave visible space around the display and remove some everyday objects before adding seasonal pieces.
What are the easiest DIY Halloween decorations?
Paper bats, window silhouettes, fabric ghosts, a flameless candle cluster and a small pumpkin shelf are inexpensive and forgiving. They need few tools, pack flat or use objects that can return to everyday decor.
How do I decorate for Halloween in a small apartment?
Concentrate the theme on one vertical surface, shelf, door frame or window. Avoid filling the floor, choose collapsible paper and fabric pieces, and repeat colors already present in the room so the seasonal layer feels integrated.
How early should I decorate for Halloween?
Many people begin with pumpkins, branches and autumn textiles in late September, then add bats, ghosts and darker accents during October. A layered approach lets the display evolve without rebuilding the room.
How can outdoor Halloween decorations be safer?
Keep the full walking surface clear, avoid blocking addresses and lights, anchor every lightweight piece and use weather-rated battery lighting. Remove hanging fabric and large props during strong wind or rain.
Anna reviewed the article for clarity, image relevance, realistic expectations and alignment with the Lively Edit editorial policy. Safety and health claims are checked against appropriate authoritative sources; the updated date changes only after a meaningful review.
Read our editorial process →The images in this story were created with AI as original editorial visuals and reviewed to ensure that each image is relevant to the accompanying guidance.